Single Item
The Short Answer (SA) is a constructed response item type in which the student write a short answer with allowed number of words to question.
How to Write Short Answer?
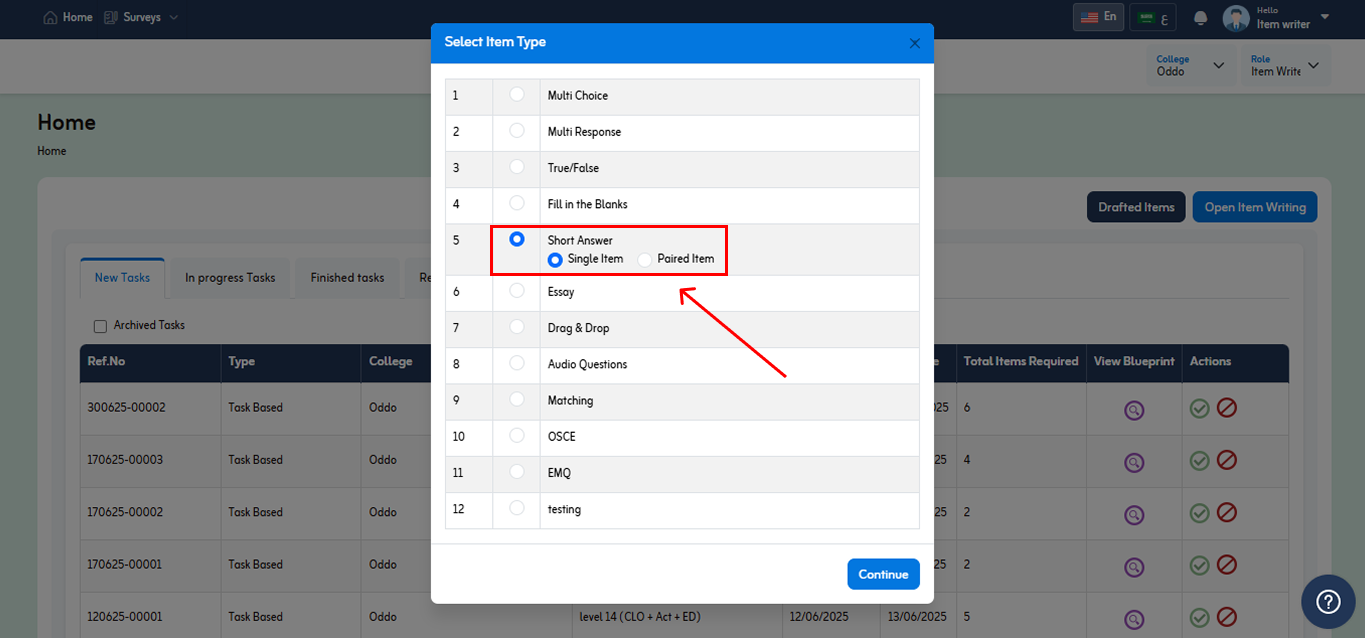
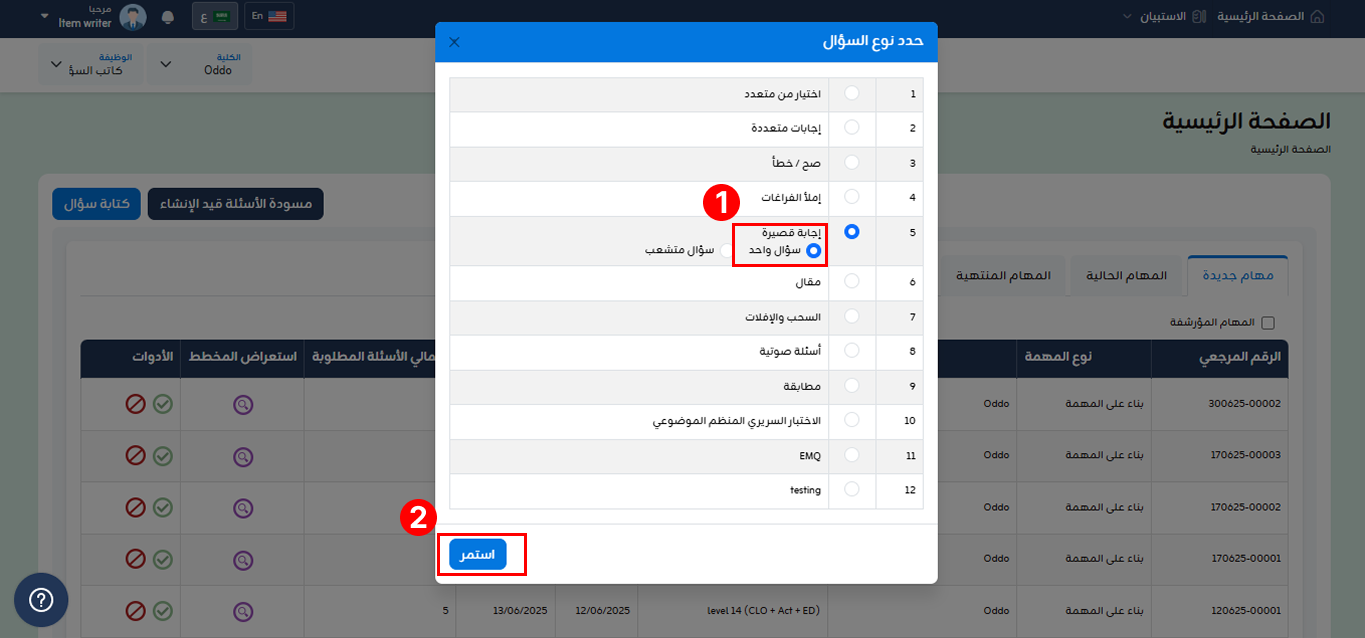
- Click Short Answer radio button to create short answer item.
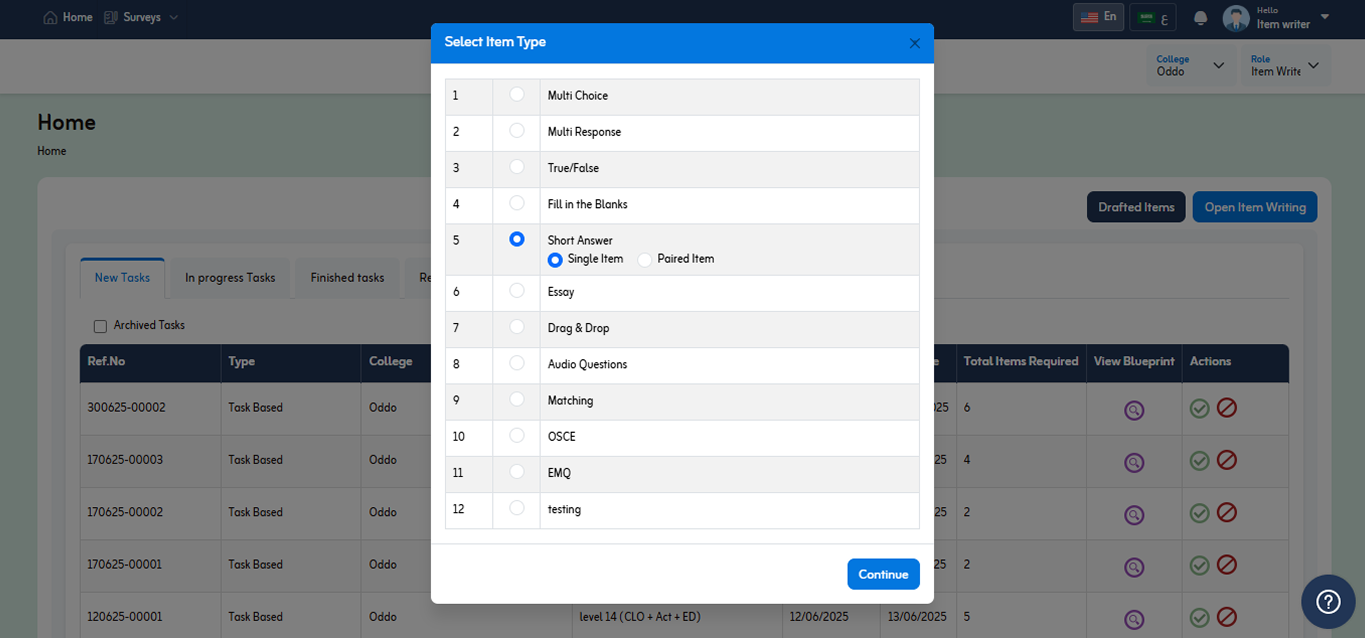
- Select short answer option and click “Continue” button.
- You will be redirected Manage Item Page.
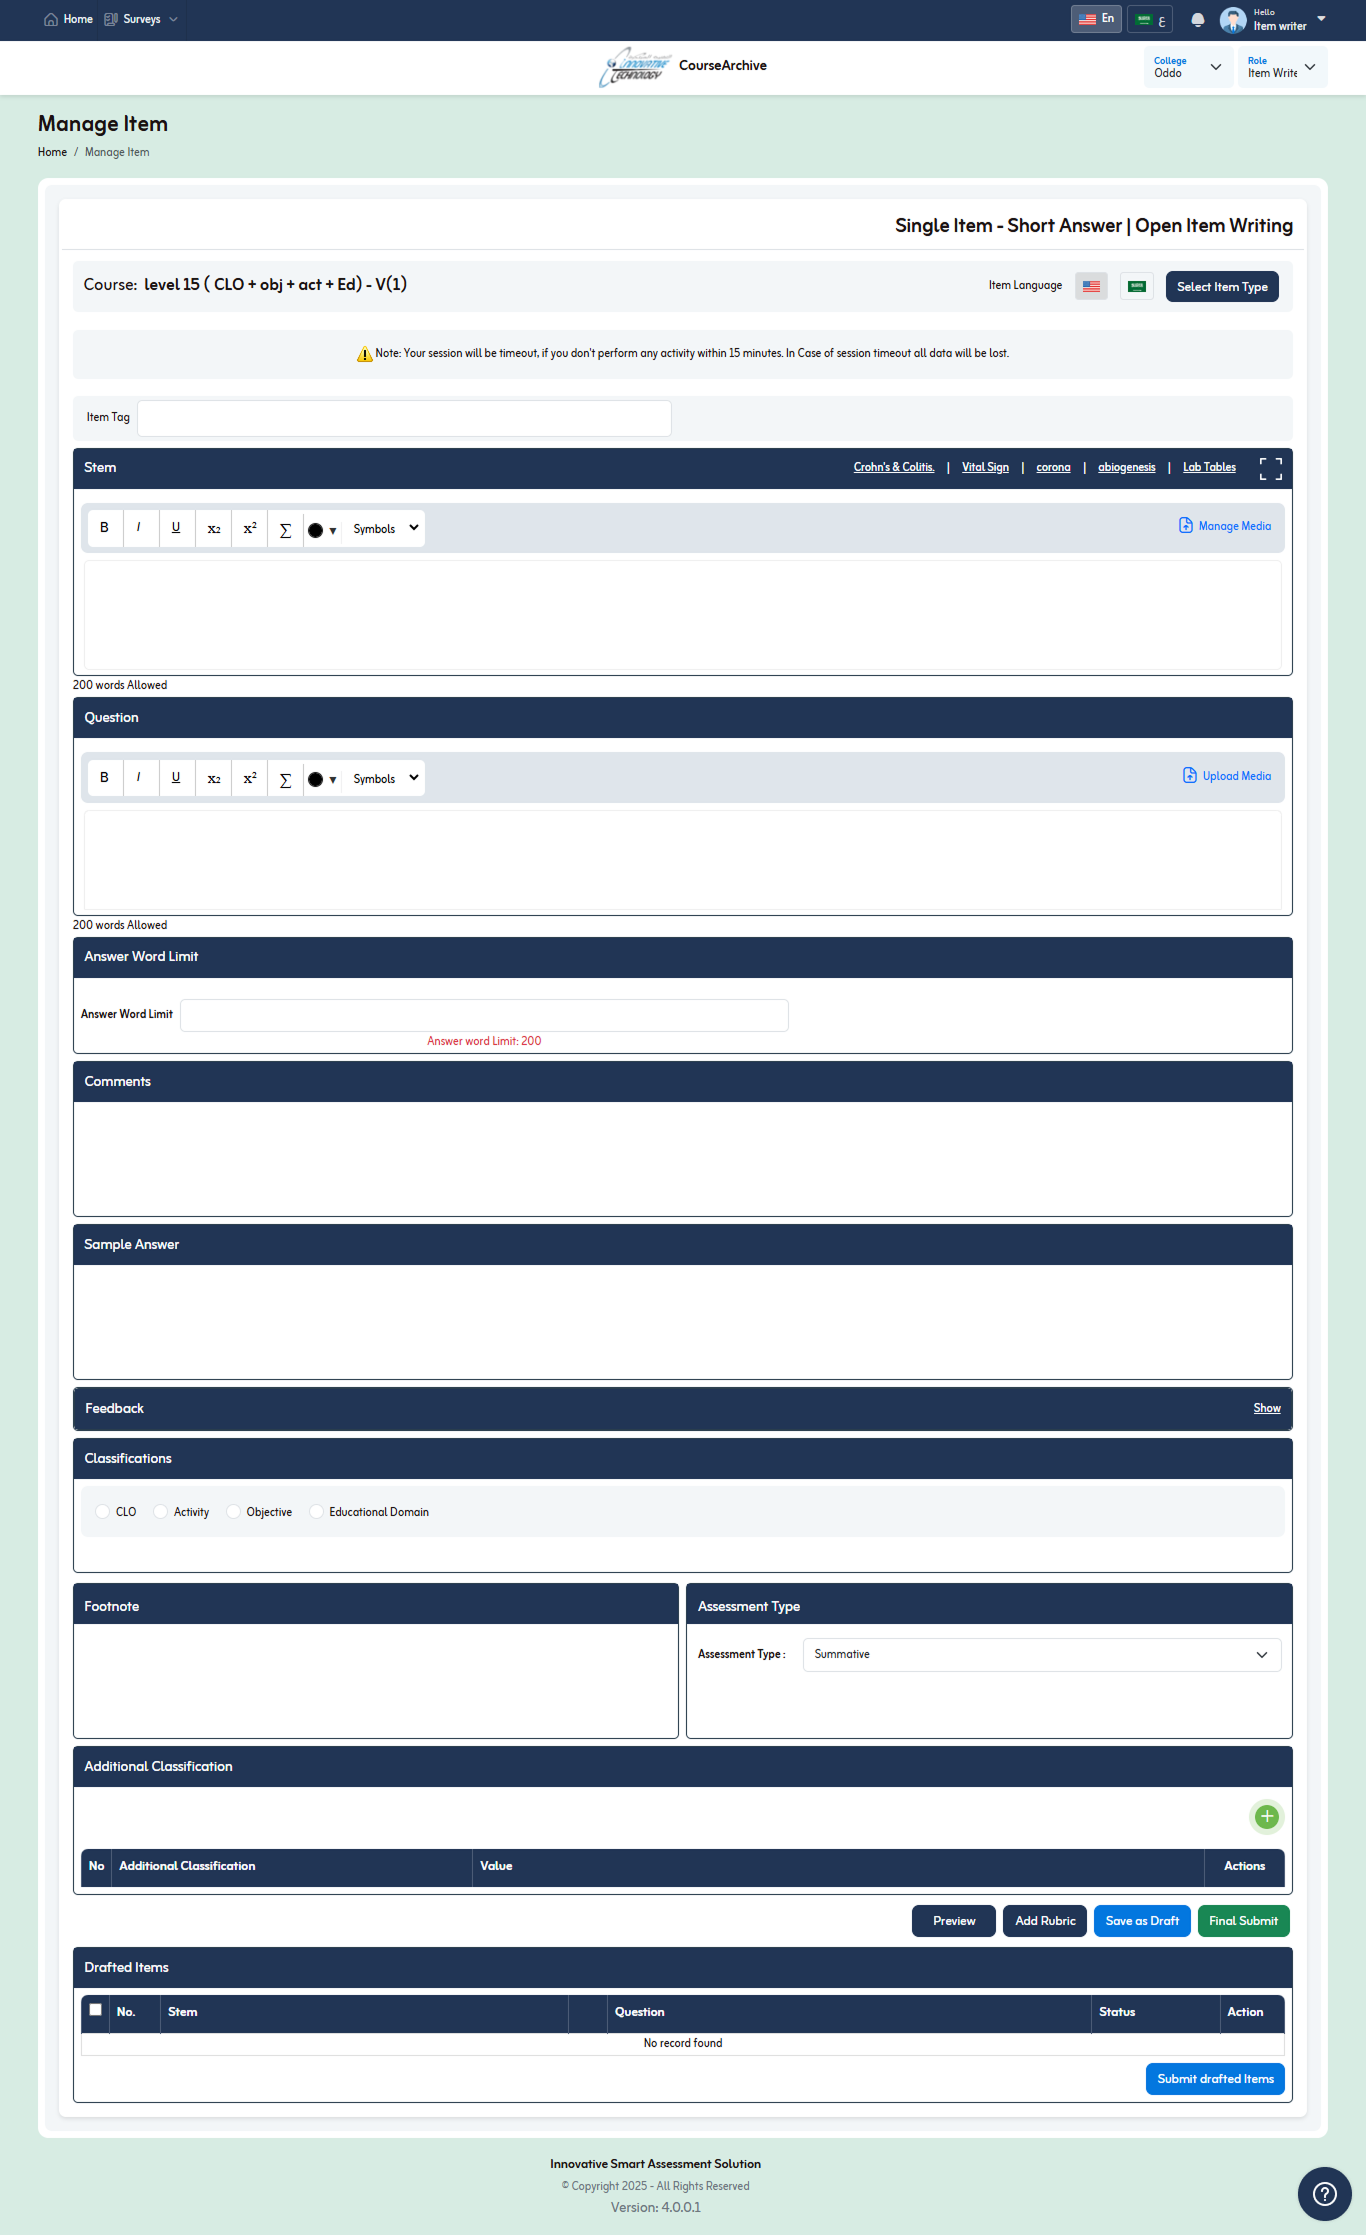
- An Short Answer assessment item consist of following components;
- Stem
- Question
- Answer Word limit
- Comments
- Classifications
- Footnote
- Assessment Type
- Additional Classifications
- A stem consist of following;
- Stem Text
- Description of Item
- Media
- Based on course Assessment Settings
- Tables
- Based on Allowed tables for college
- Stem Text
- You can upload media as per Course “Multimedia” settings define while designing course. You can upload media for following;
- Stem
- Questions
- Media upload size limit should be as per defined in course “Multimedia” settings as well.
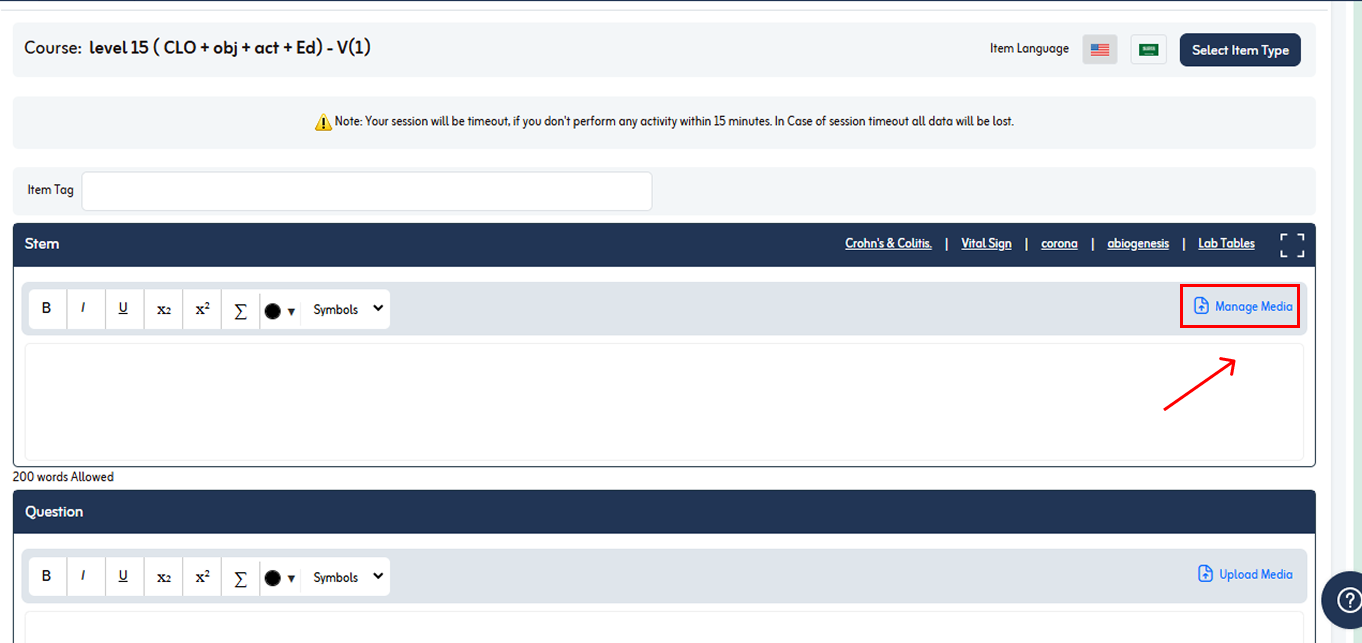
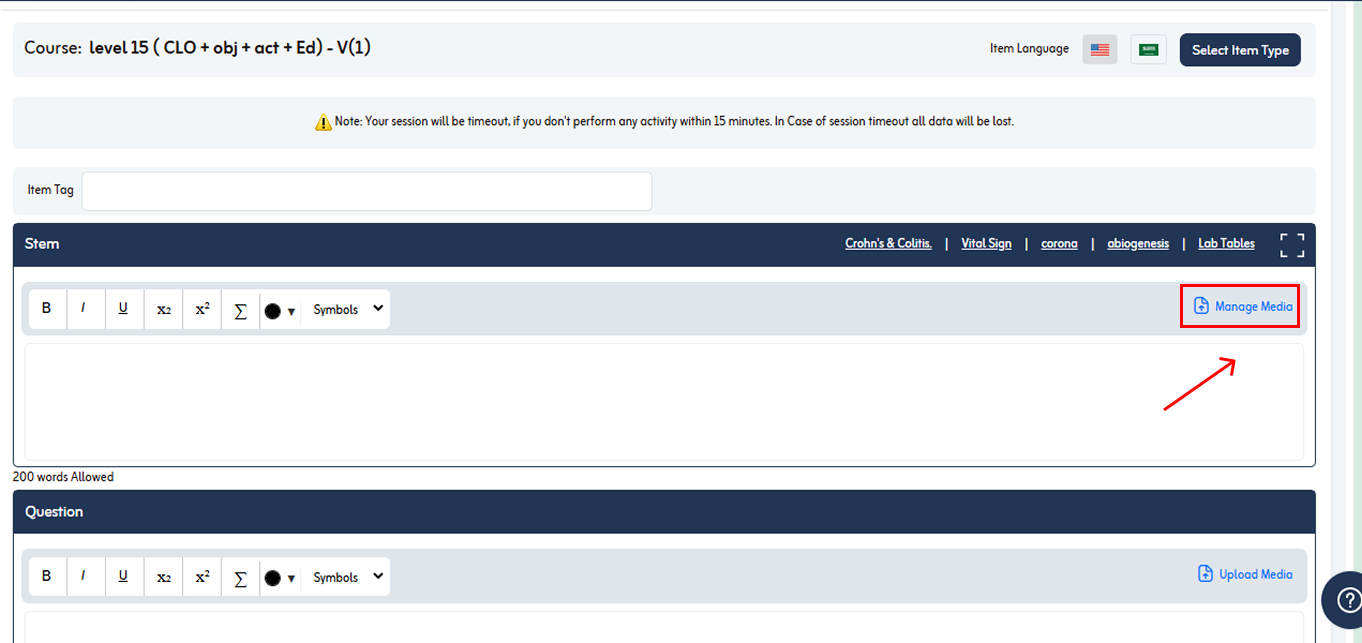
- To add media, click “Upload Media” button in stem.
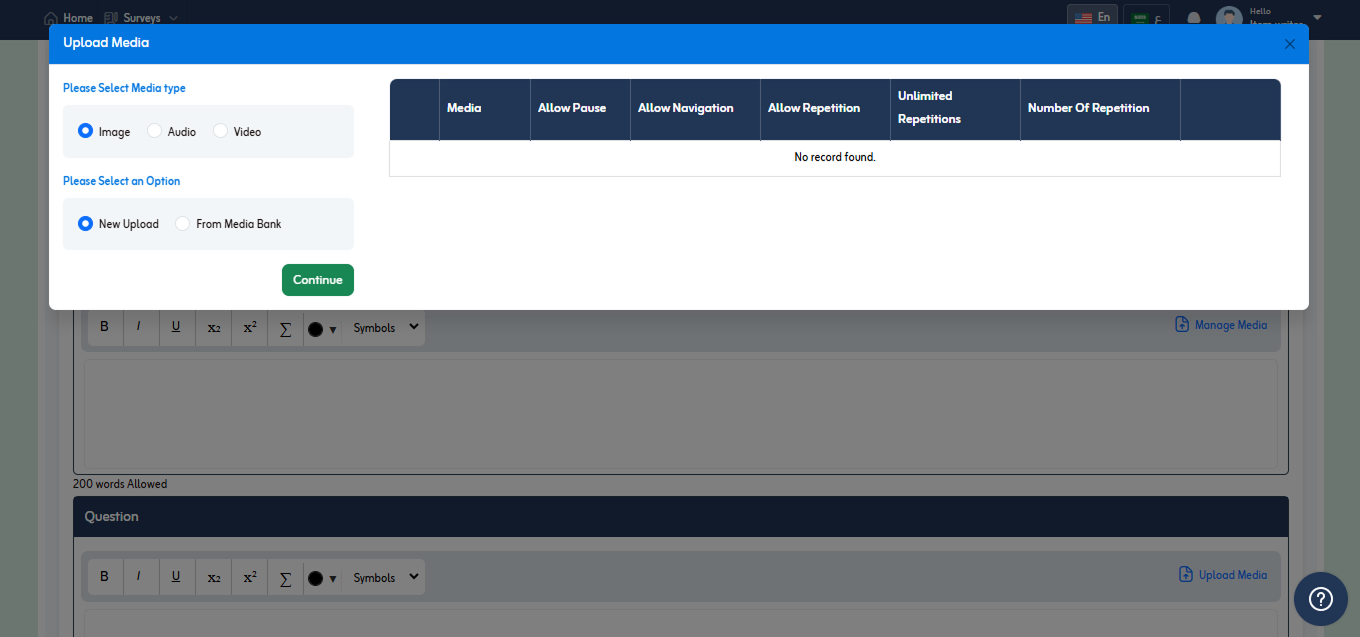
- Upload Media popup will appear.
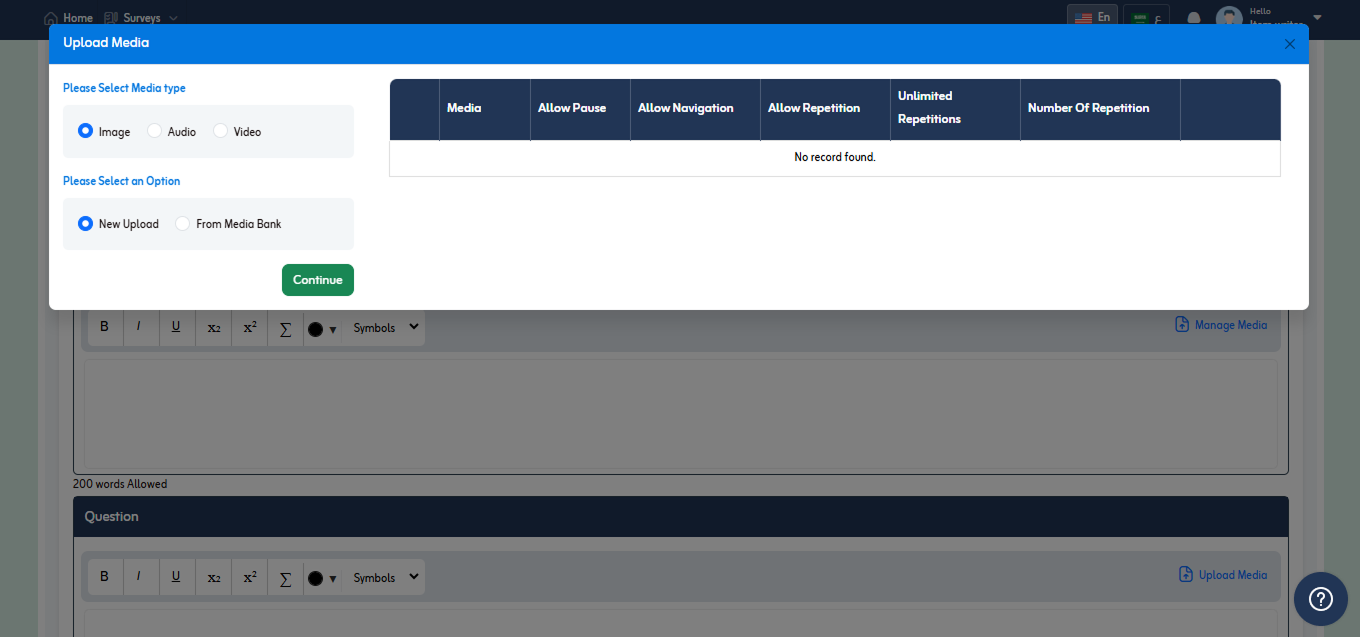
- Select media type from following;
- Image
- Audio
- Video
- Select an option from following;
- New Upload
- From media Bank
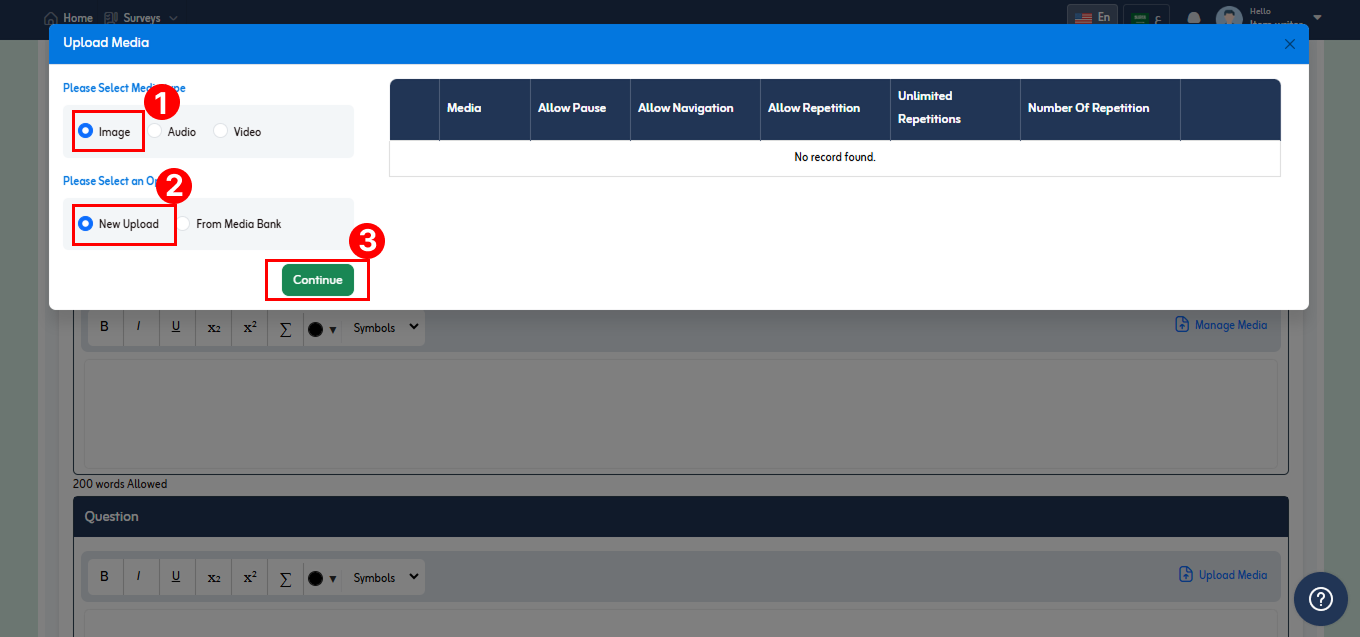
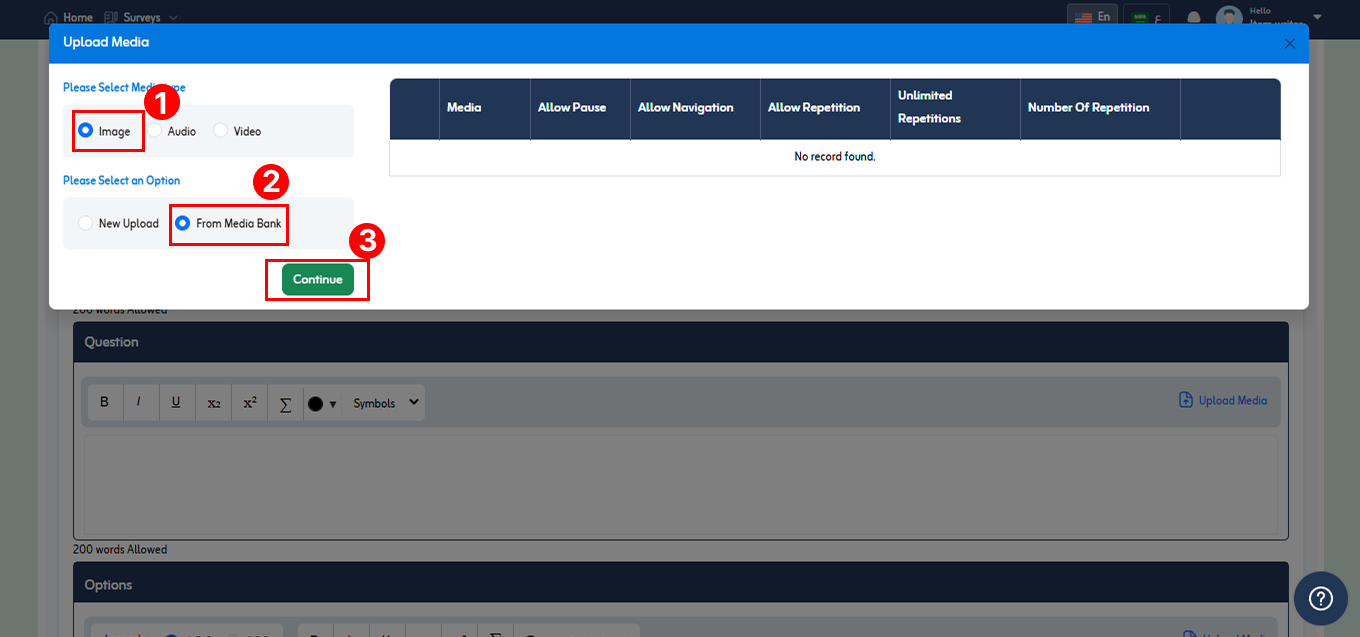
- Let’s suppose select Image from media type and New Upload from an option and click Continue as shown in below fig.
- Upload media popup will appear.
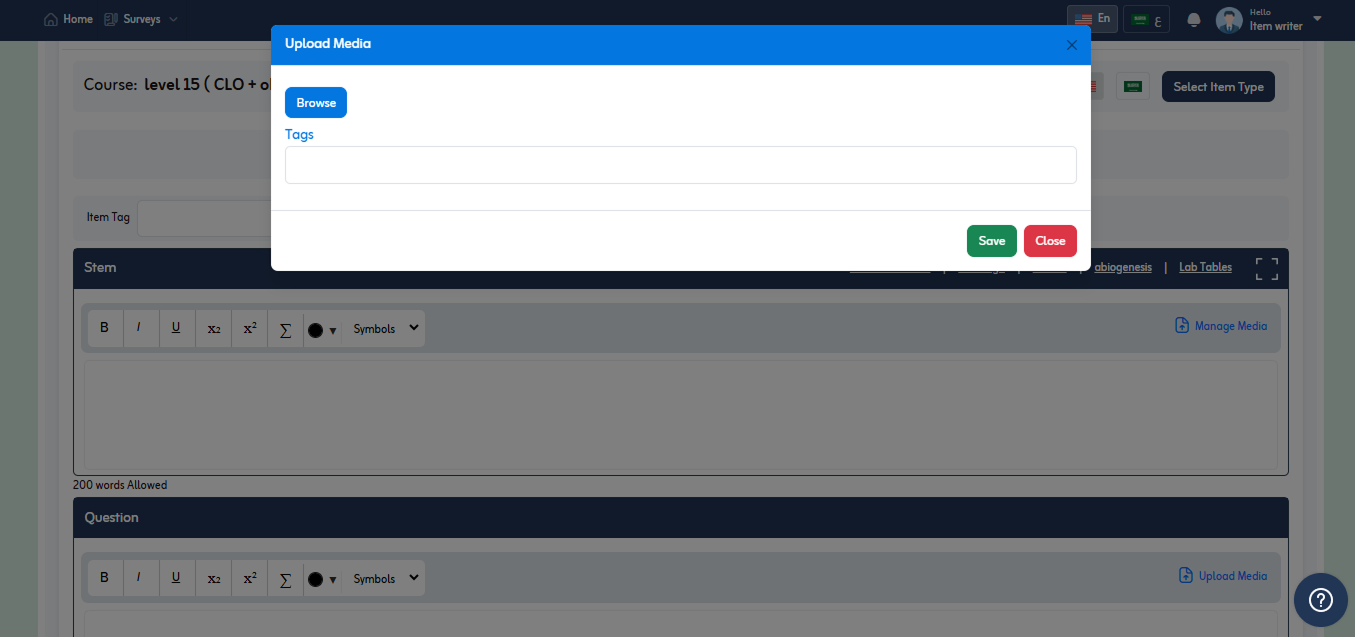
- Click Browse button to upload media from system.
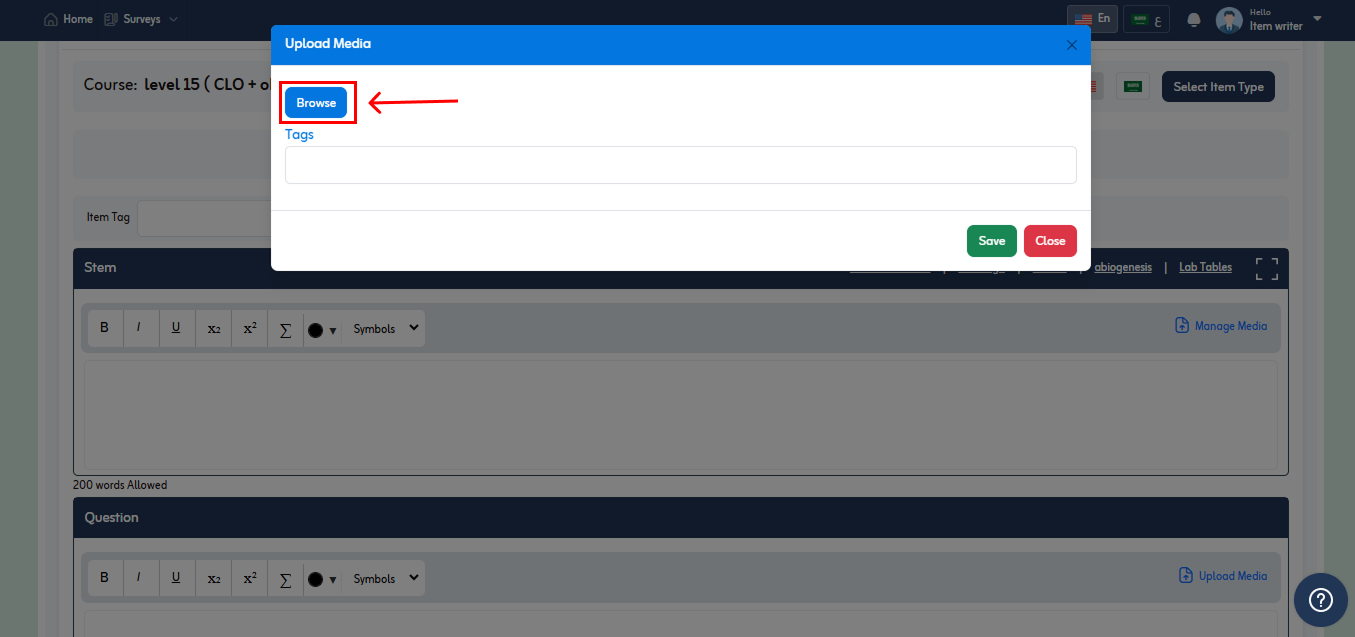
- After selecting media from system a popup will appear where you can crop image according to your requirement.
- After cropping image, click on Save button.
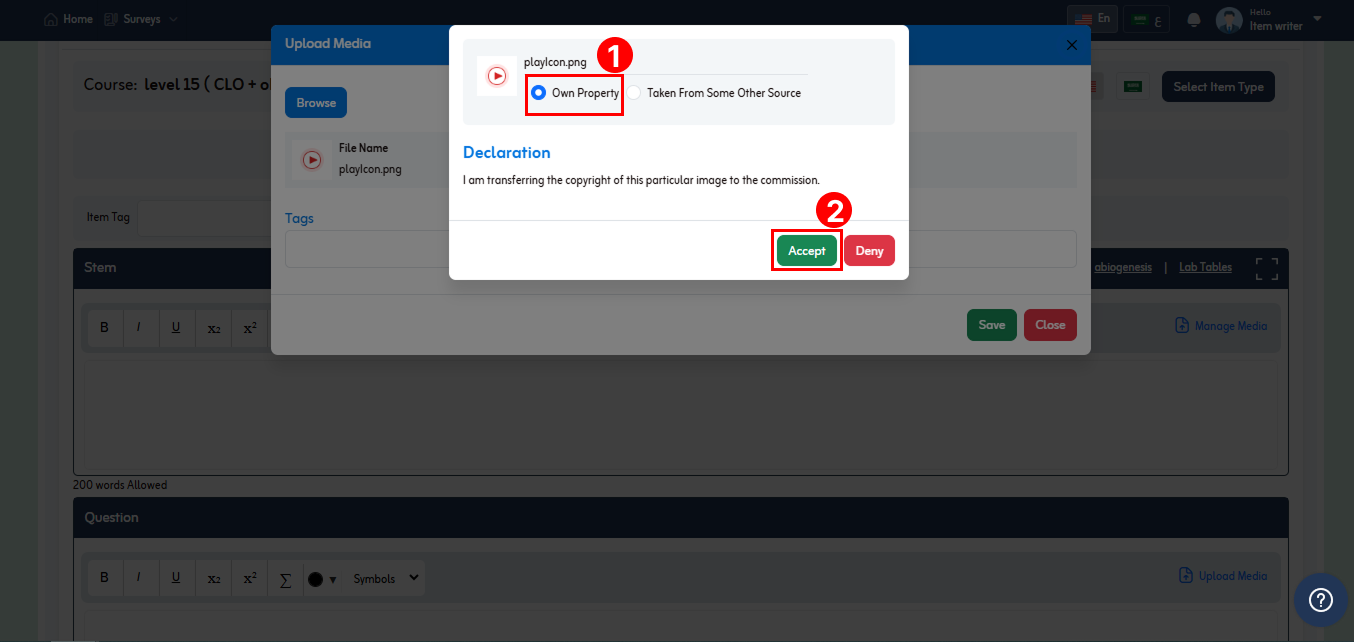
- Now you have to specify the media source from following;
- Own Property
- Select own property option to transfer the copyright of this particular image to the commission.
- Taken from some other source
- You need to provide the following information of the image source from where you have taken.
- Reference
- URL
- You need to provide the following information of the image source from where you have taken.
- Own Property
- Let’s suppose select own property and select “Accept” button.
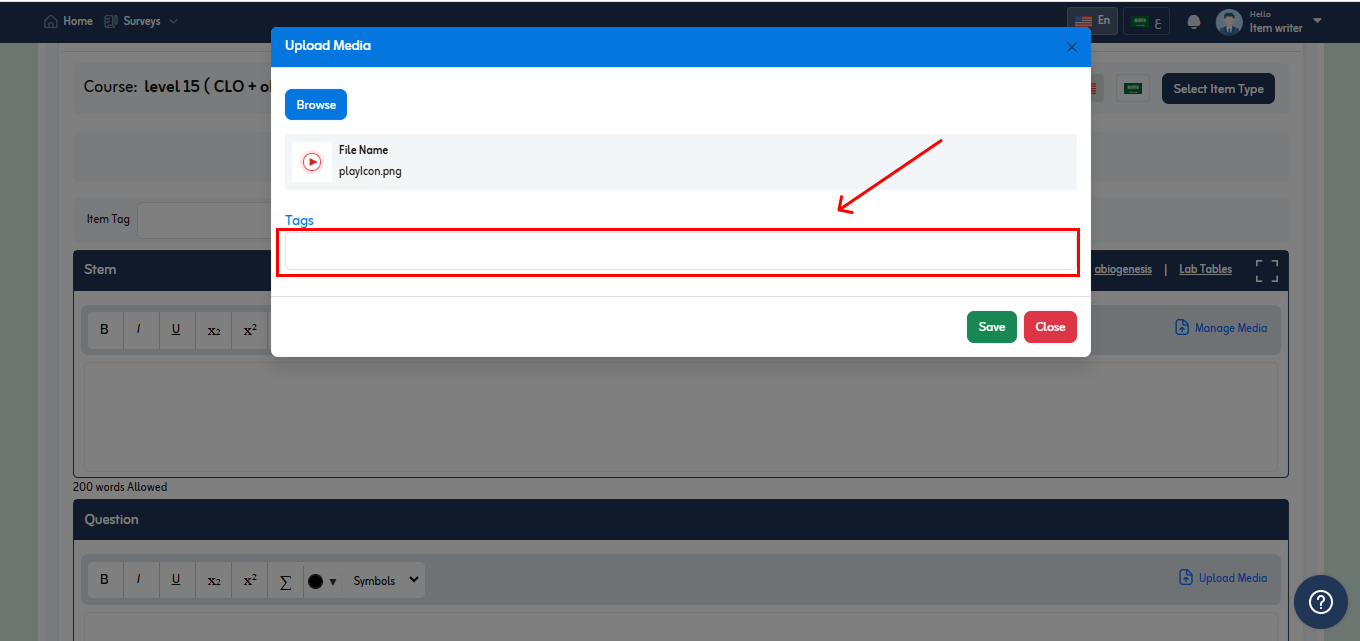
- Enter tag in the given field for image you uploaded.
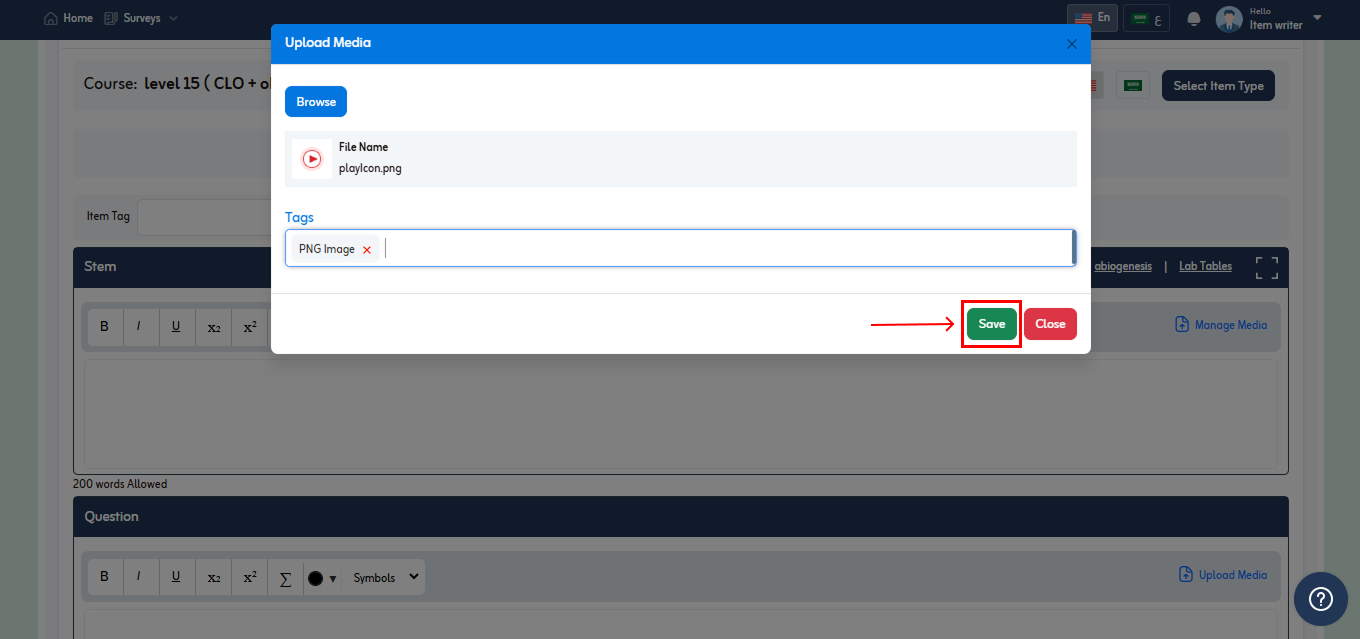
- After adding tag, click Save button.
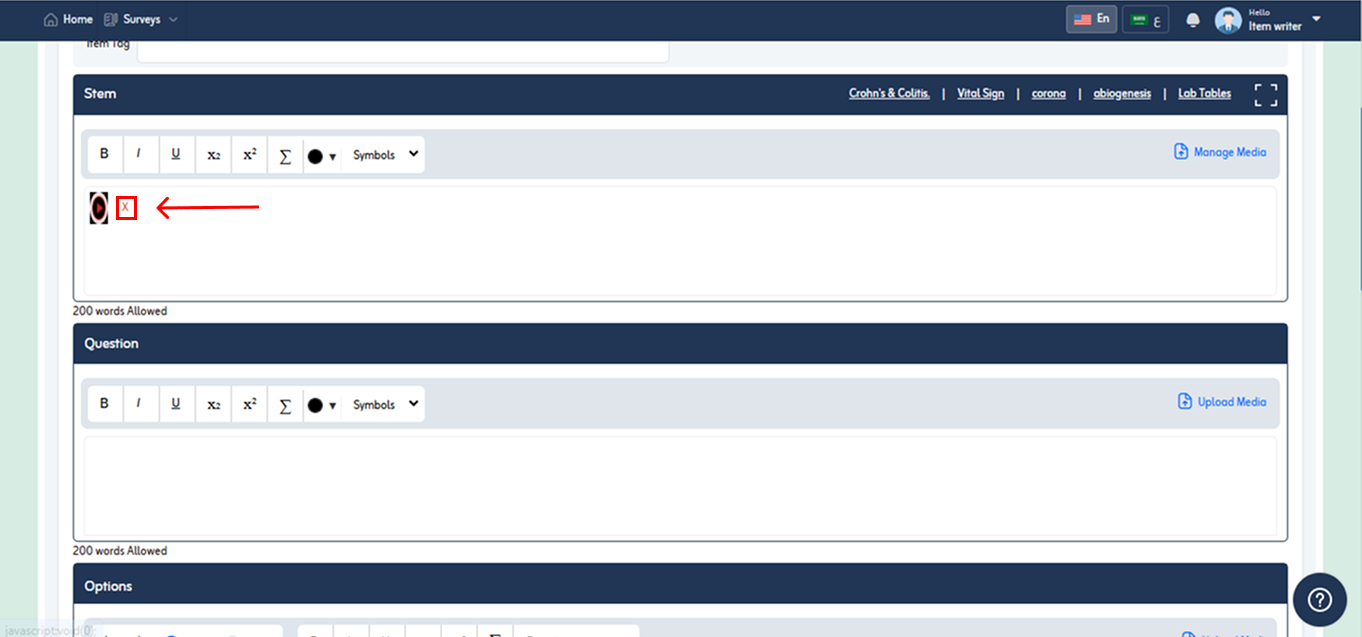
- You can also delete inserted image by clicking on “x” icon that appear in front of the image as shown in below image.
- To use media from bank click Upload Media Button.
- Upload Media popup will appear.
- Select media type and select “From Media Bank” option and click “Continue”.
- Upload Media popup will appear.
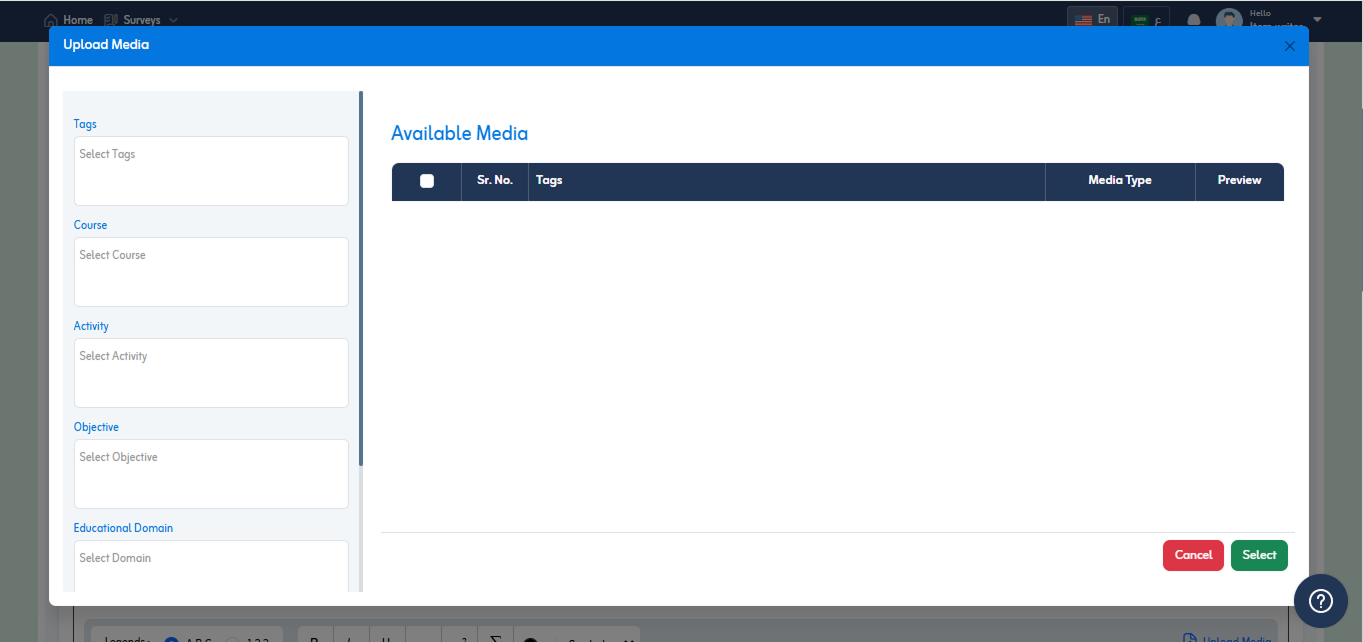
- Here you can to view list of available media.
- You can search media with respect to following filters
- Tags
- Educational Domain
- Course
- Activity
- Objective
- Source
- Used
- Not used
- Let’s suppose select source “Not Used” and click search icon.
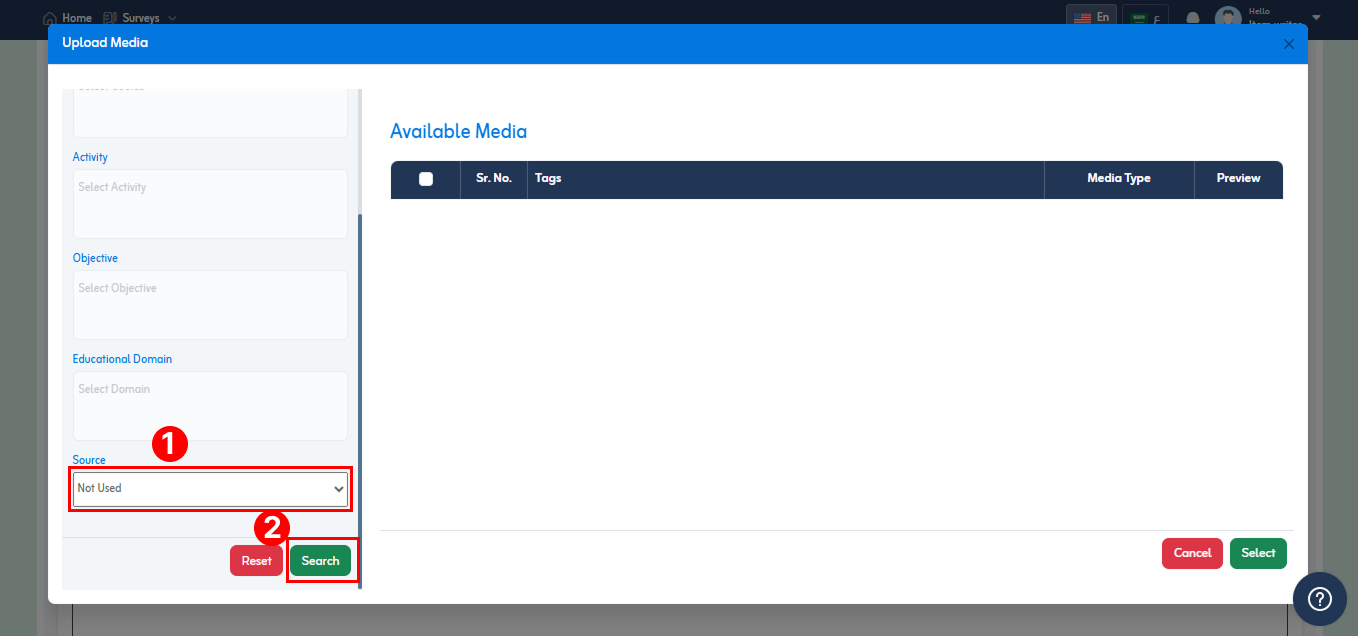
- Search results will be displayed of selected media type (Image) under available media section as shown in below fig.
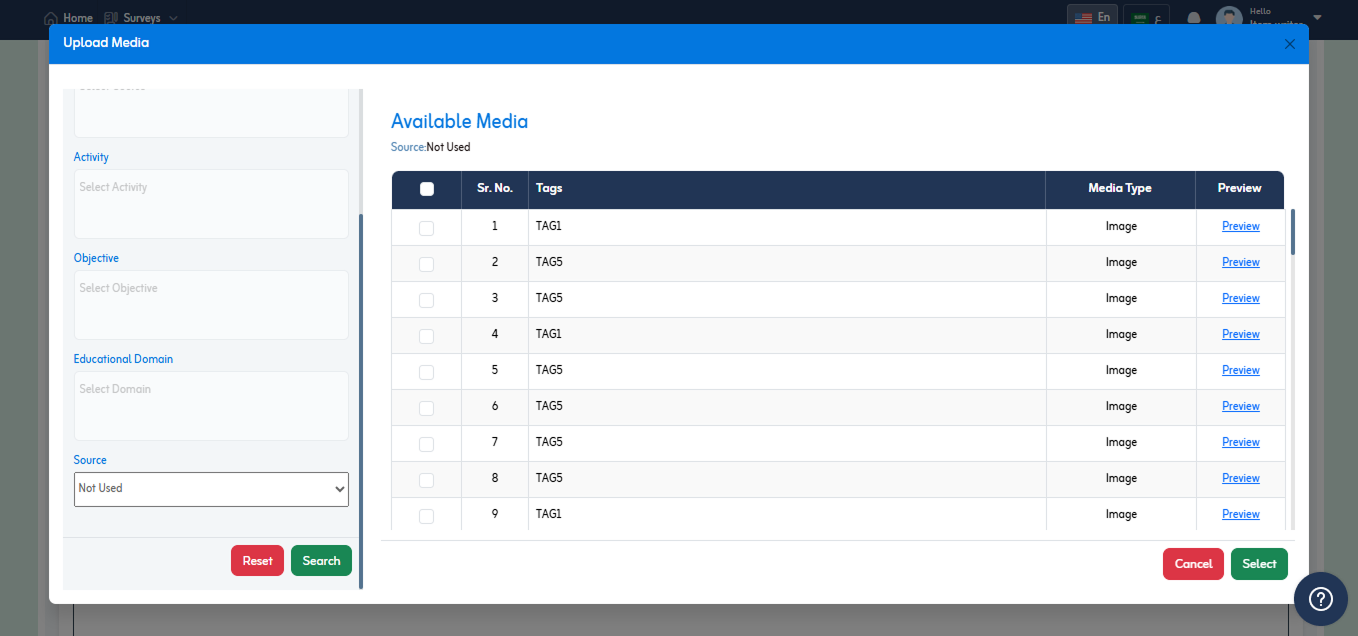
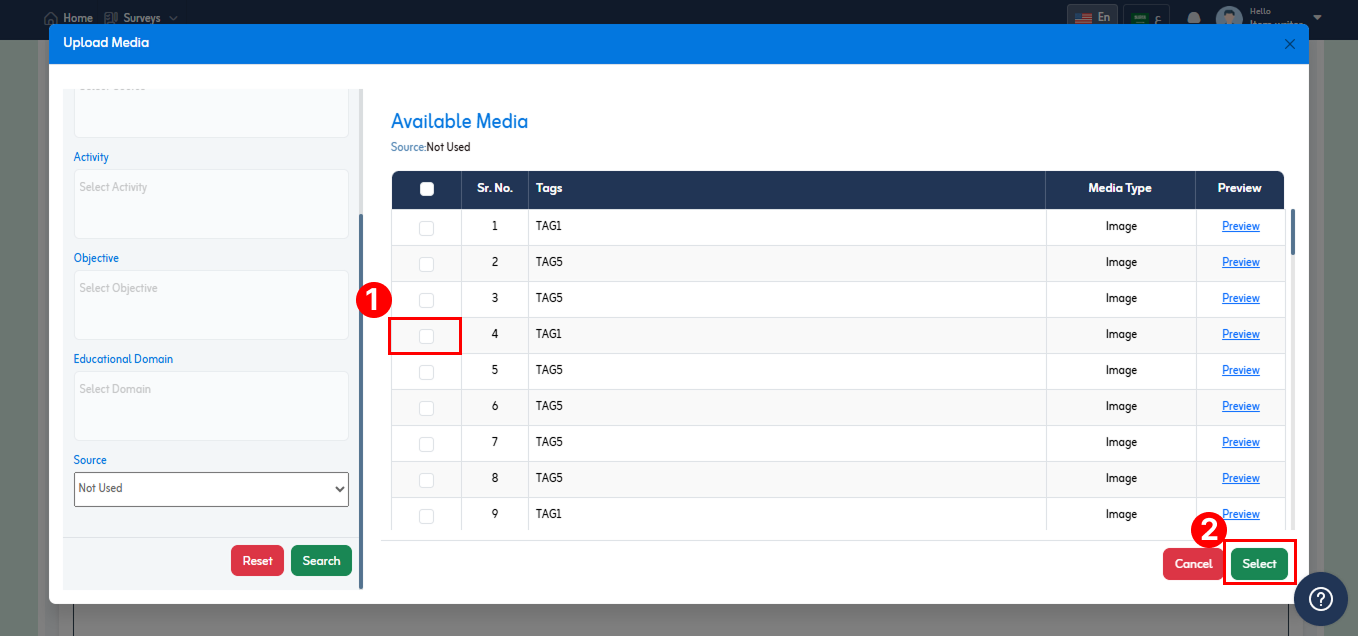
- Select required media and click “Select” button below to add image.
- To add equation, click inside the field. And click
 icon.
icon.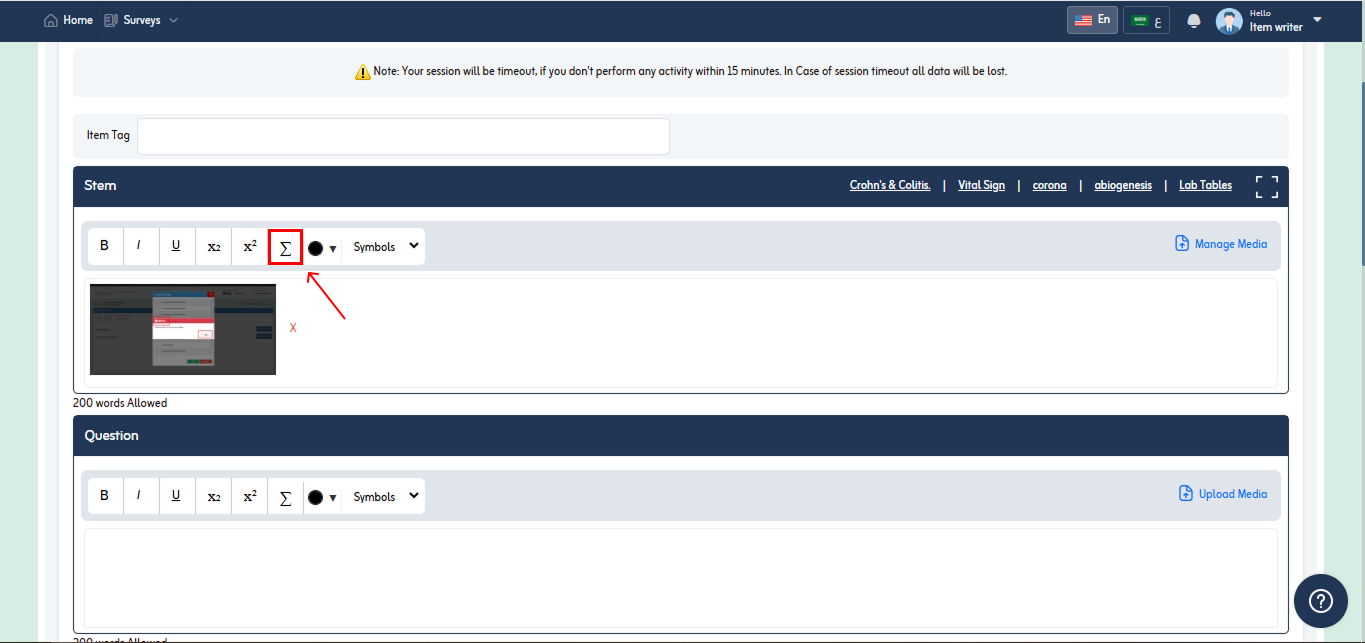
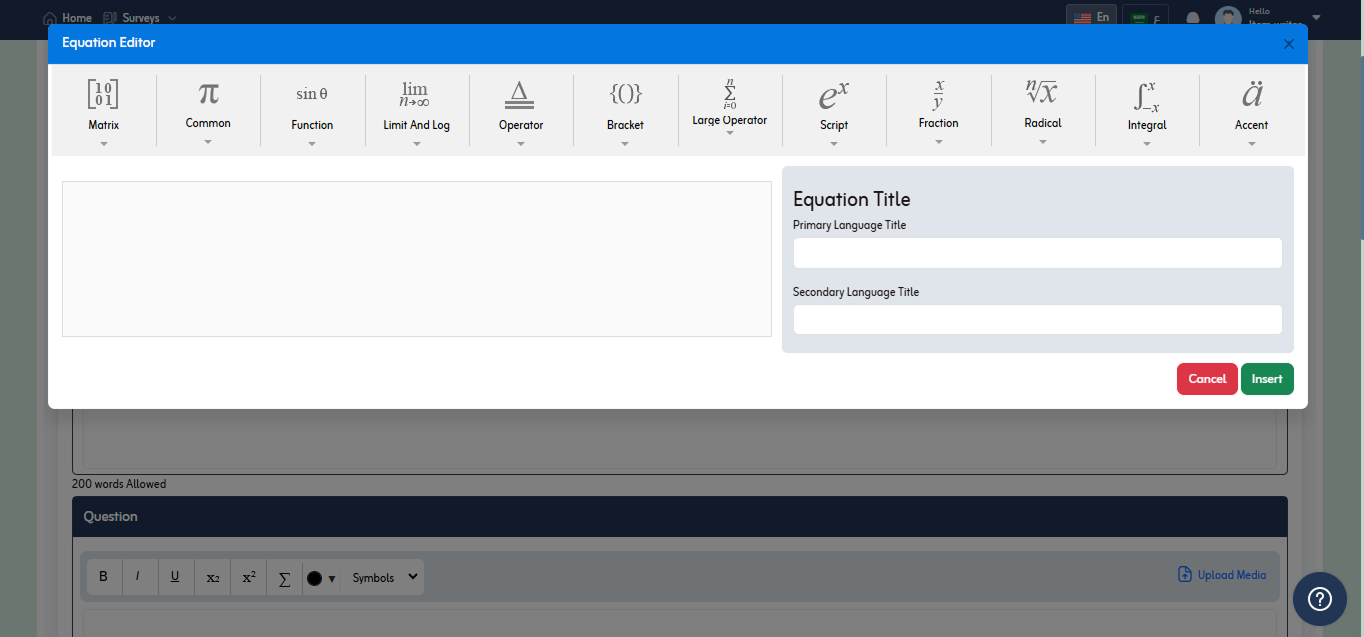
- Equation editor Popup will appear.
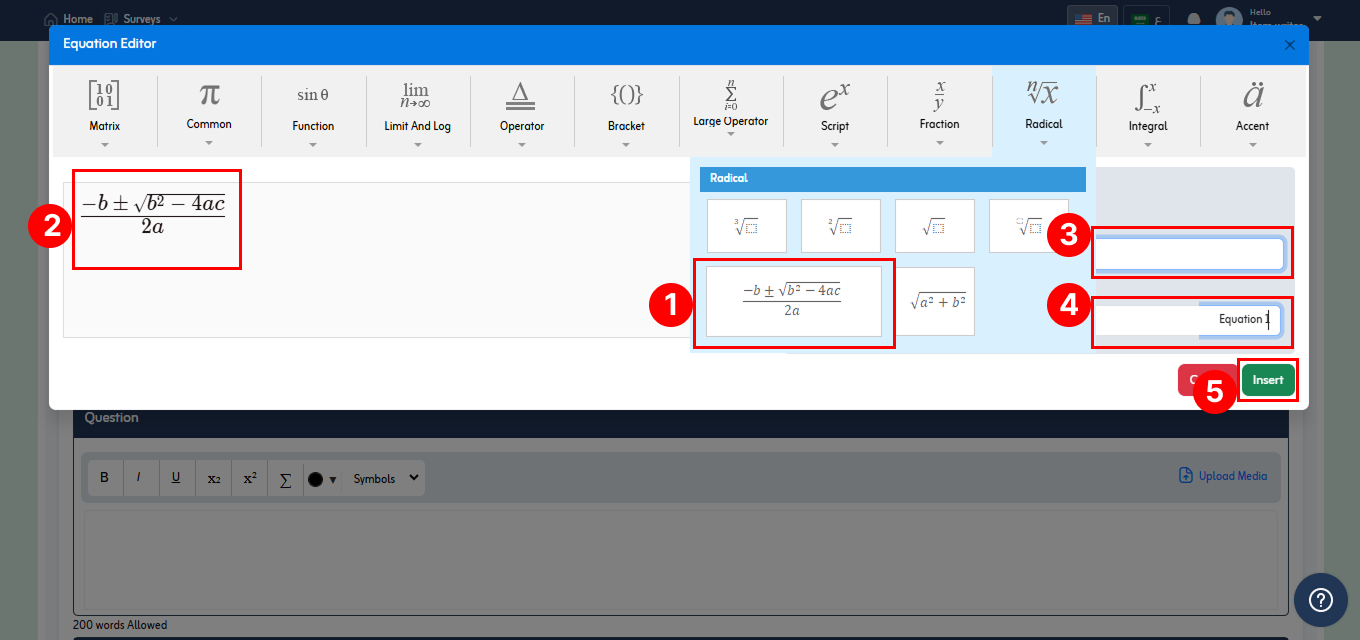
- Click required equation from list. The selected equation will be displayed below. Then provide equation title in both primary and secondary language. To insert click “Insert” button.
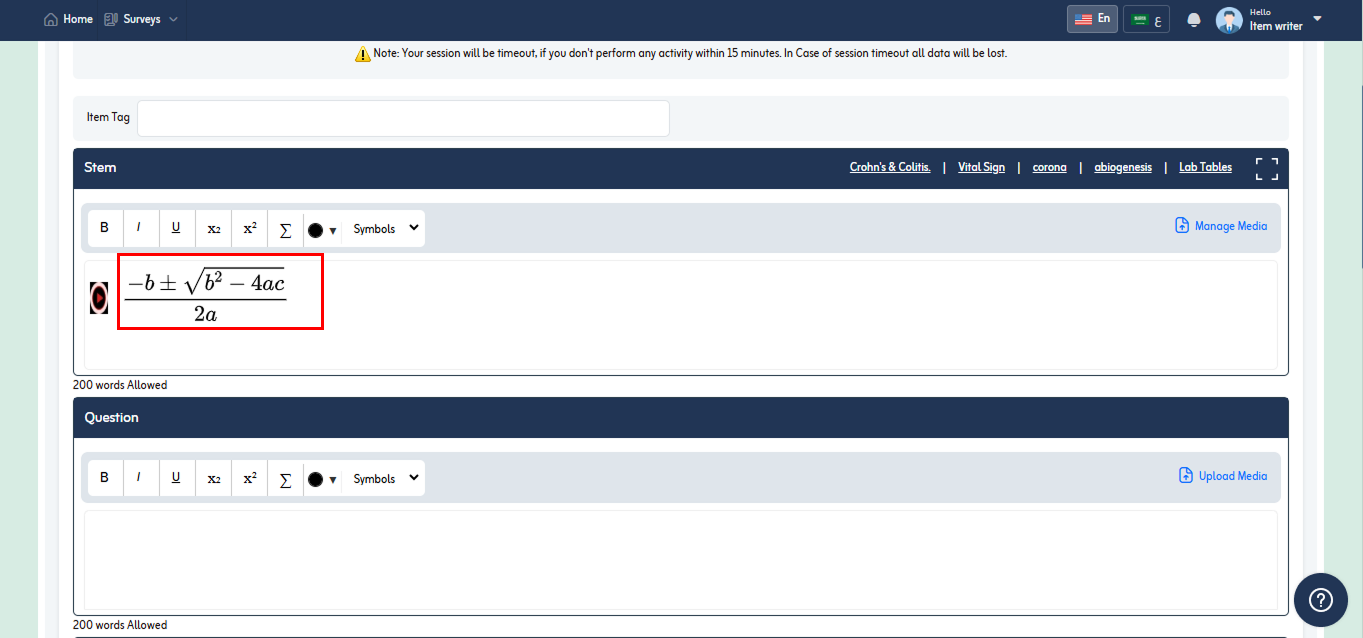
- The entered equation will be displayed in the place where you added as shown in below fig.
- You can also add tables in stem. To add table in stem click desired table name from above.
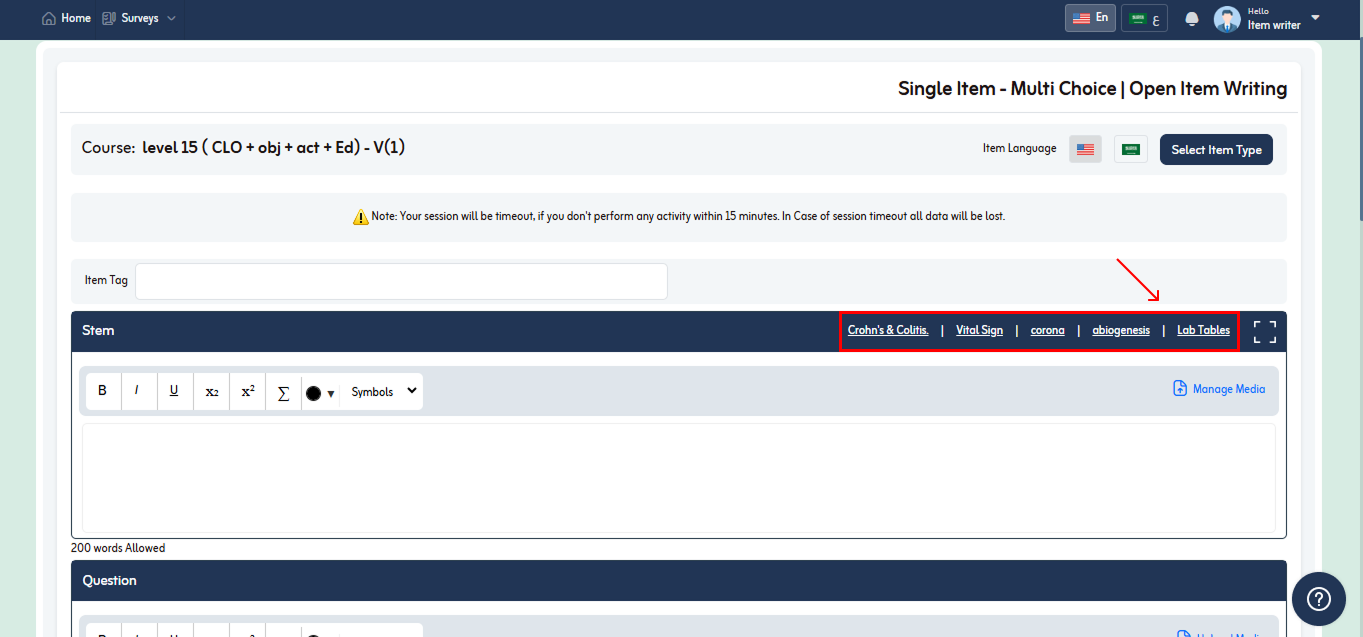
- Let’s suppose select vital sign from list.
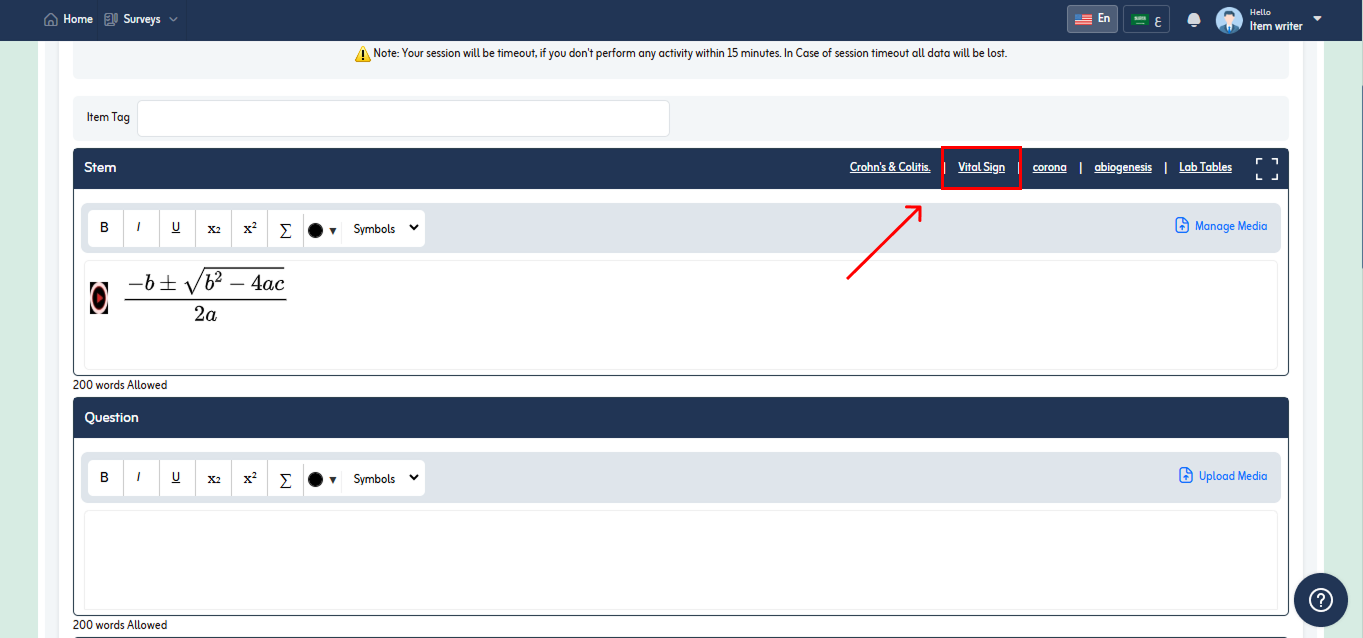
- Popup will appear with the name of table.
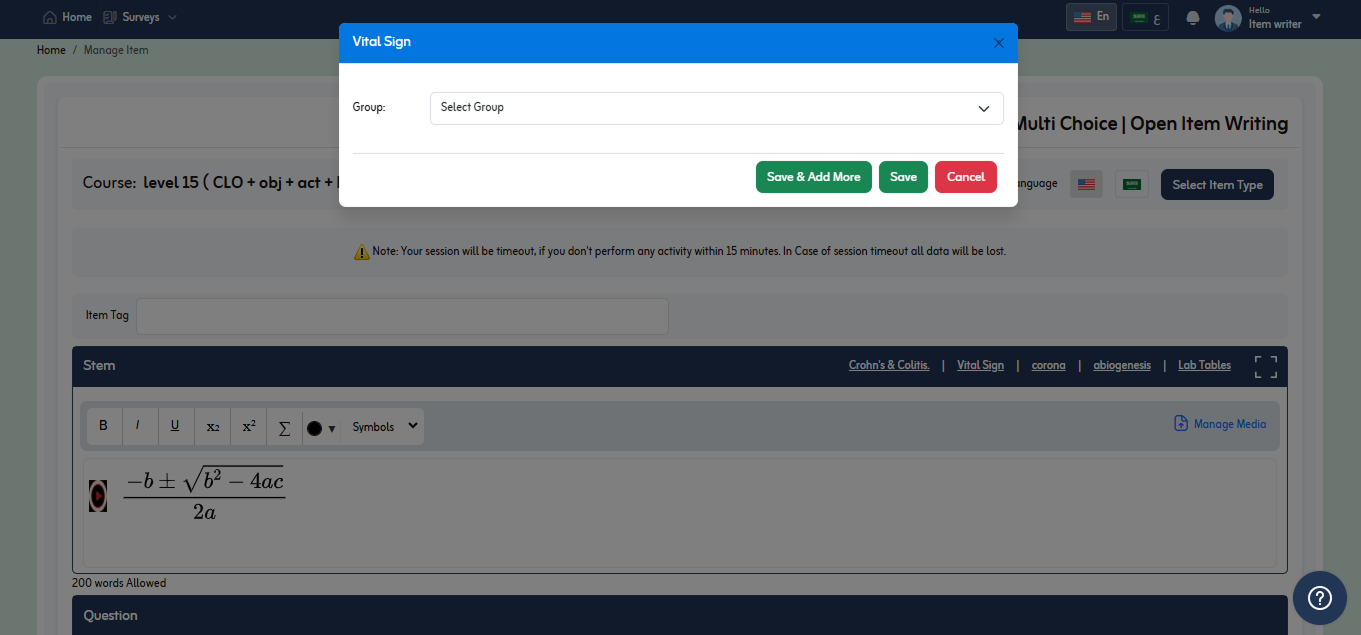
- Select group by clicking dropdown icon.
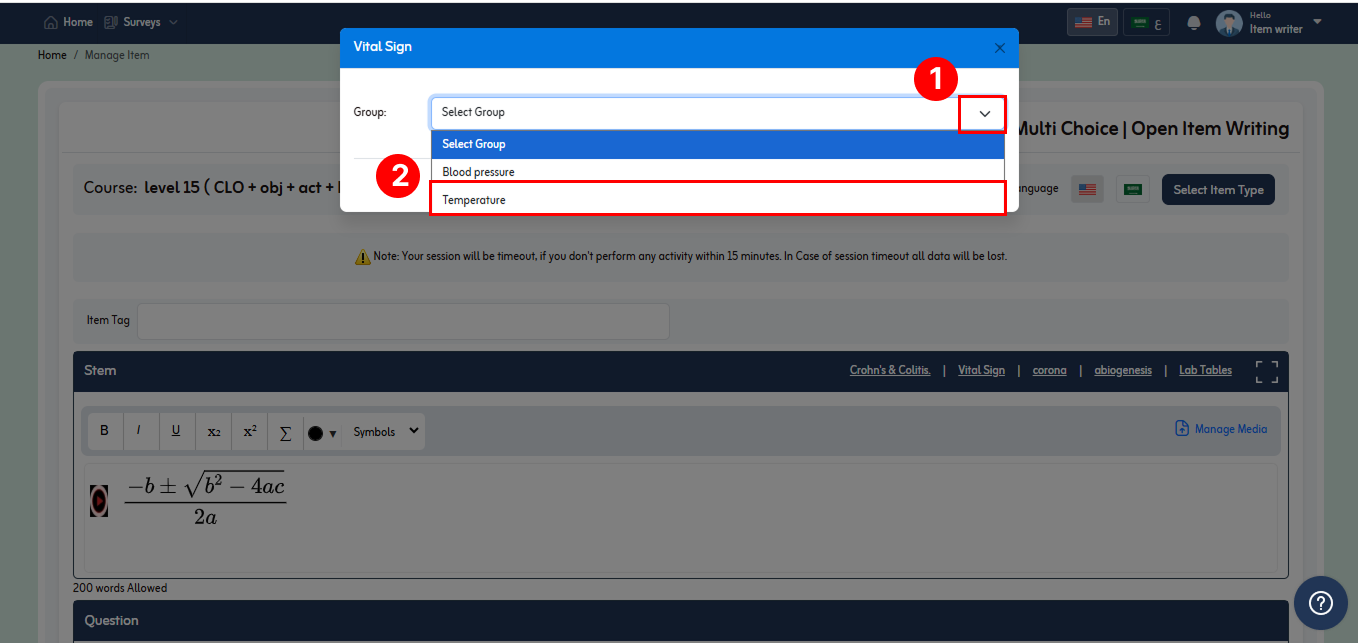
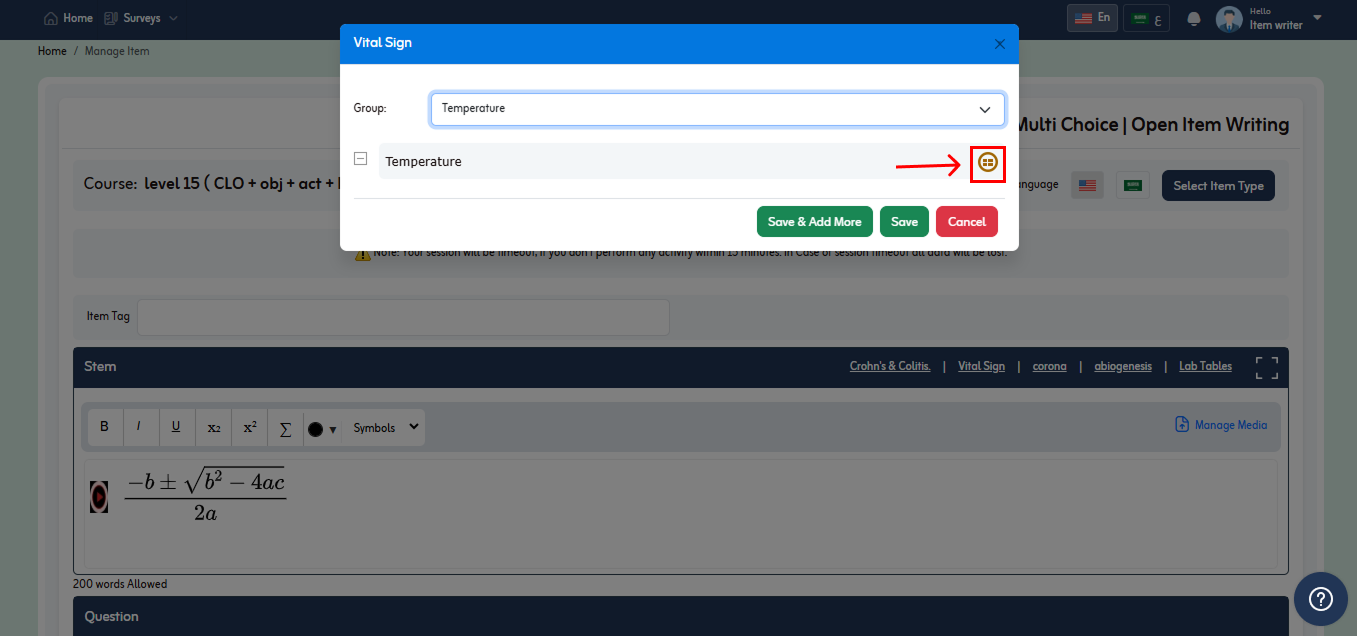
- Selected group will display below. Click detail icon as shown in below fig.
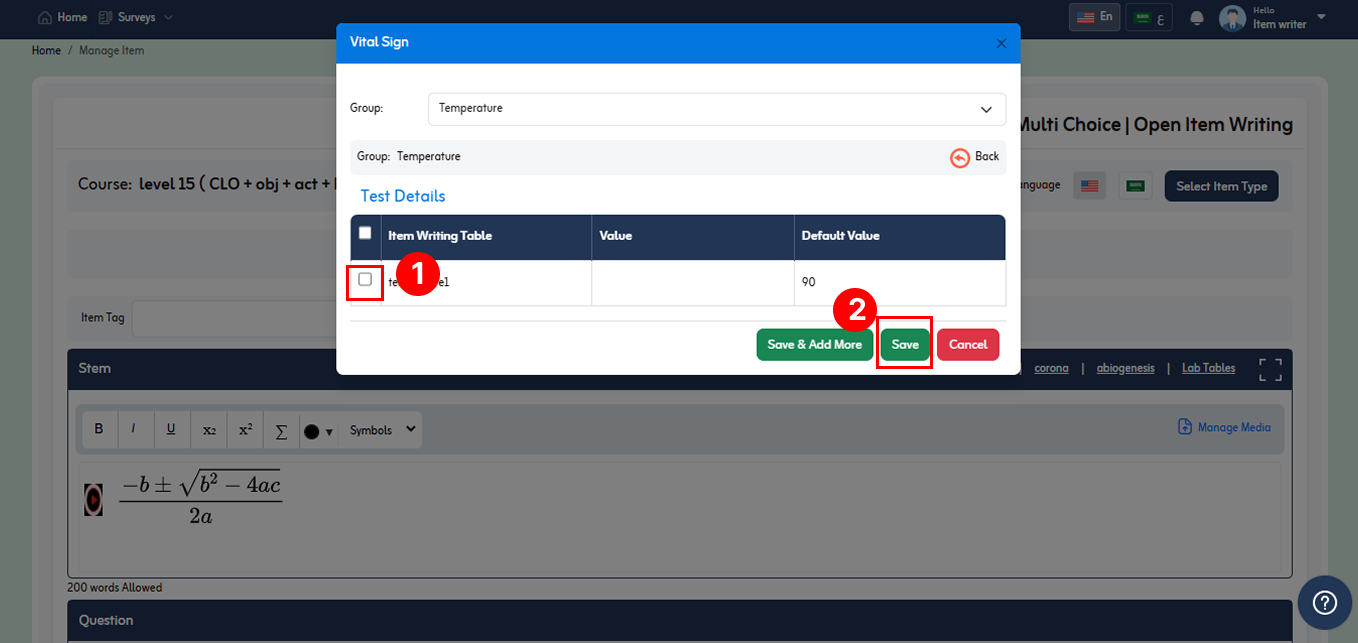
- Test details will display below. Select required test from list and click save button. But if you want to add more groups/test click “Save and Add More” button.
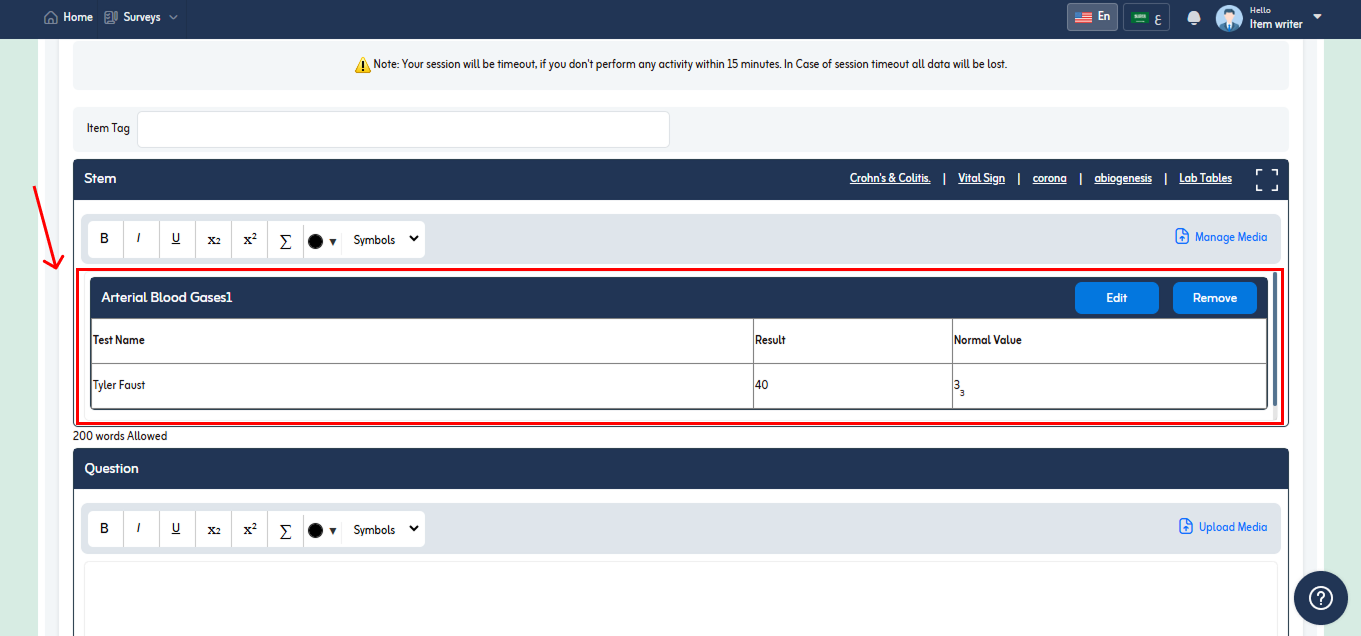
- Added table will be displayed in stem as shown in the below fig.
- Add question in the given field. You can also add media and equation as mention above for stem.
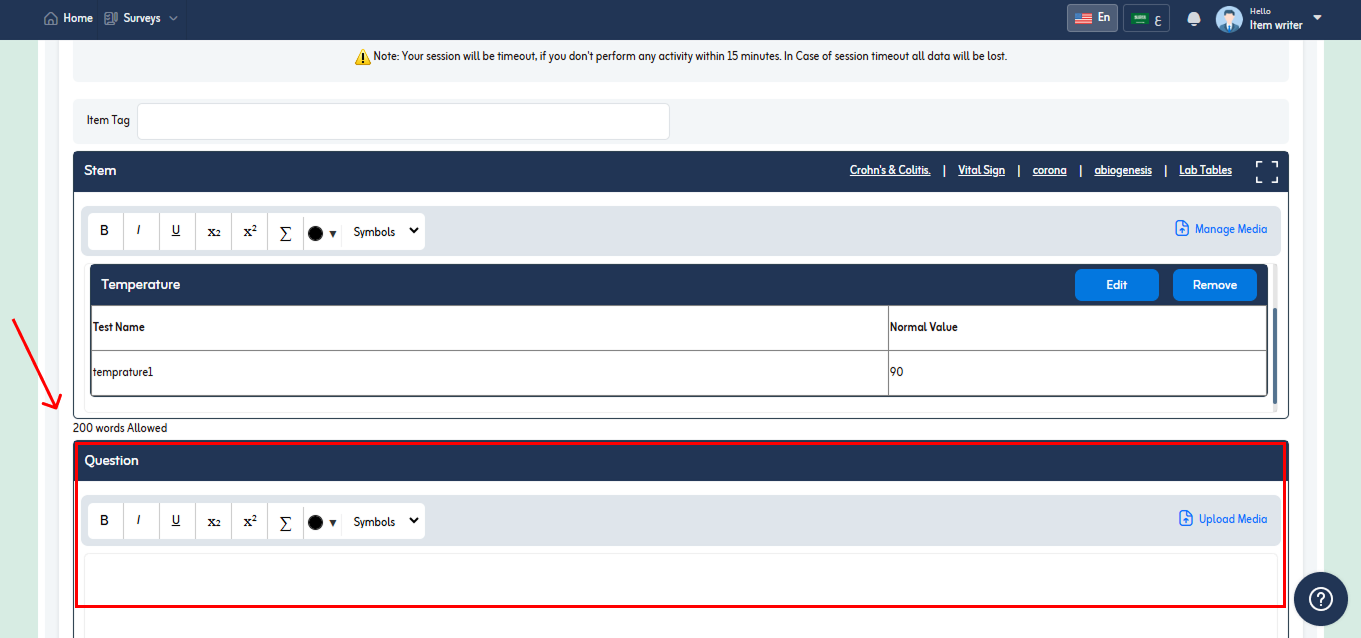
- Below you view no of words that are allowed in Question of item.
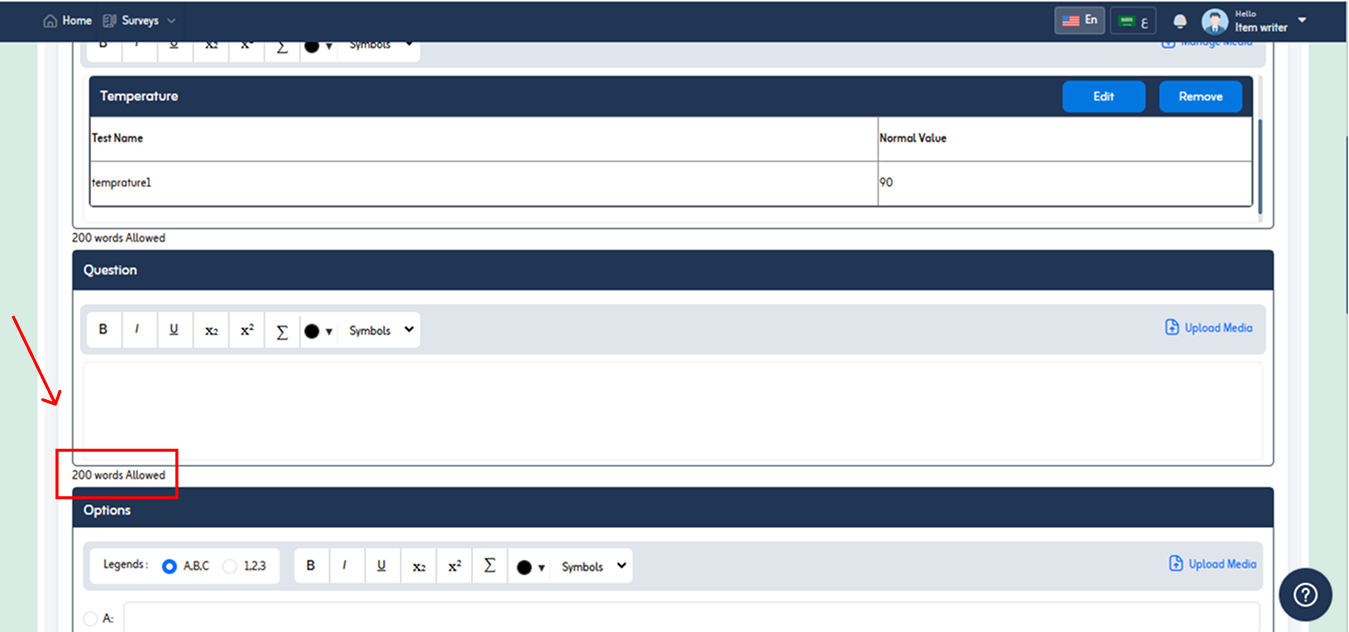
- 44. Write statement of short answer in the given filed. And enter “Answer Word Limit”.
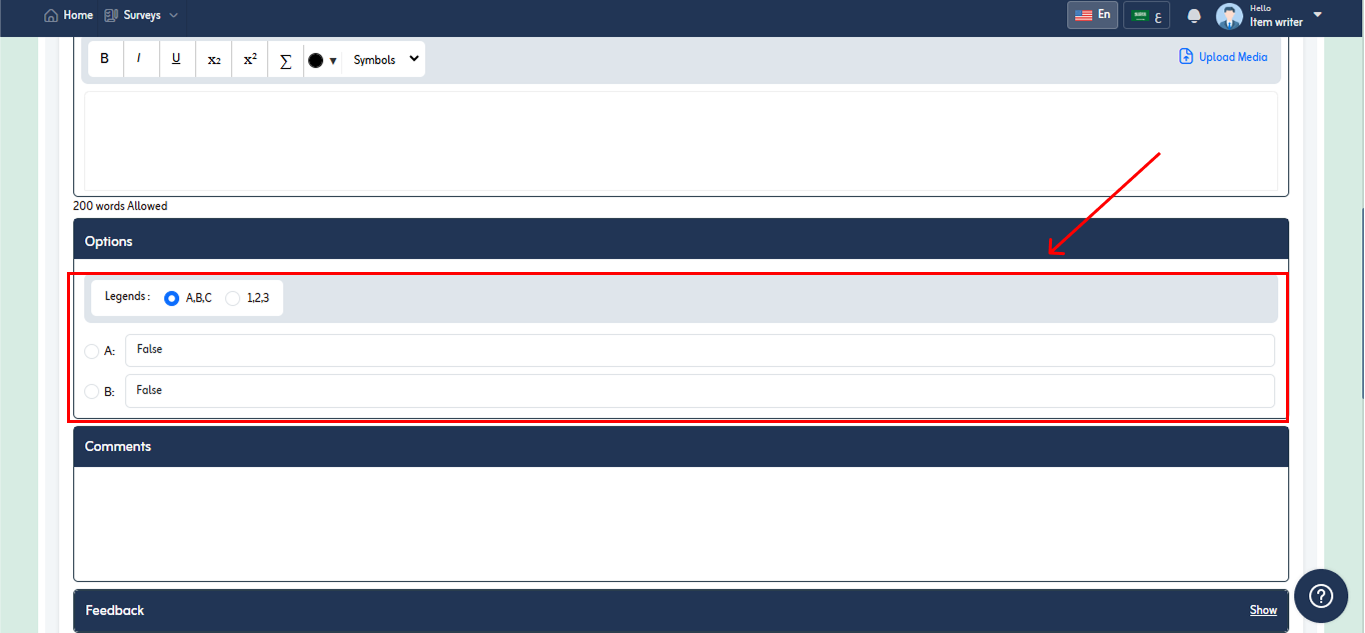
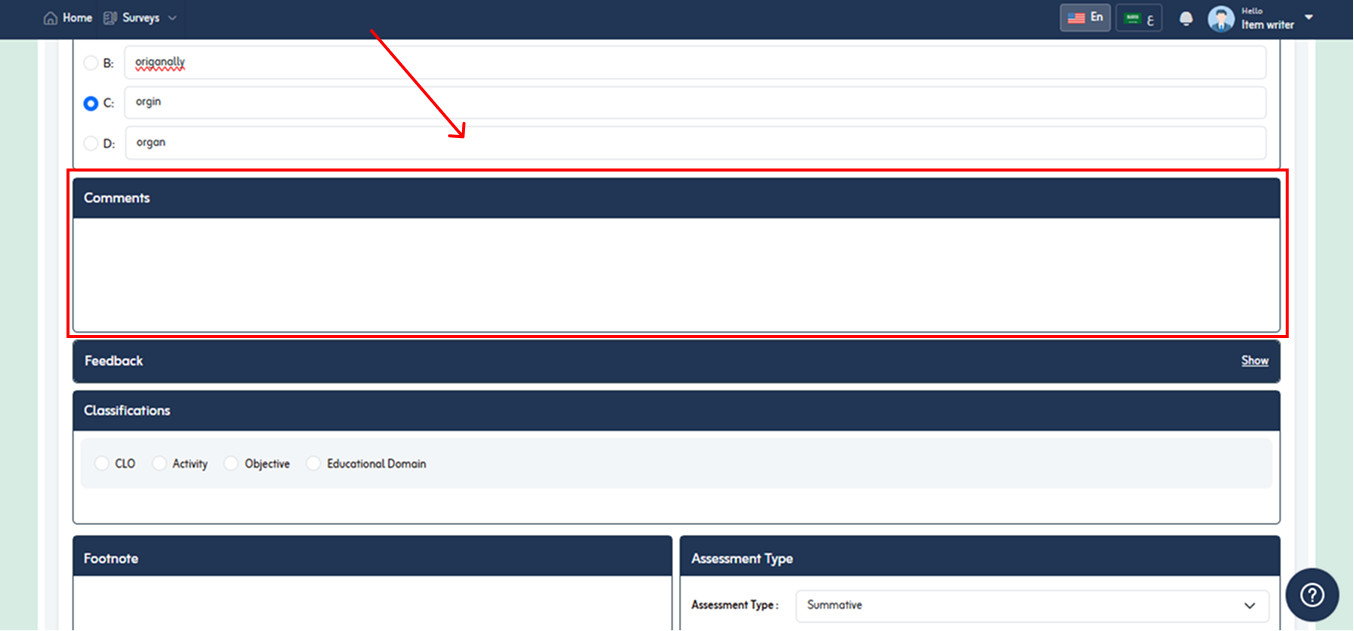
- You can also write comment for an item in the comment section. It is optional field. You can leave it empty.
- You can also add item classification. An assessment item can be linked with single or multiple activities, objectives and Educational Domains.
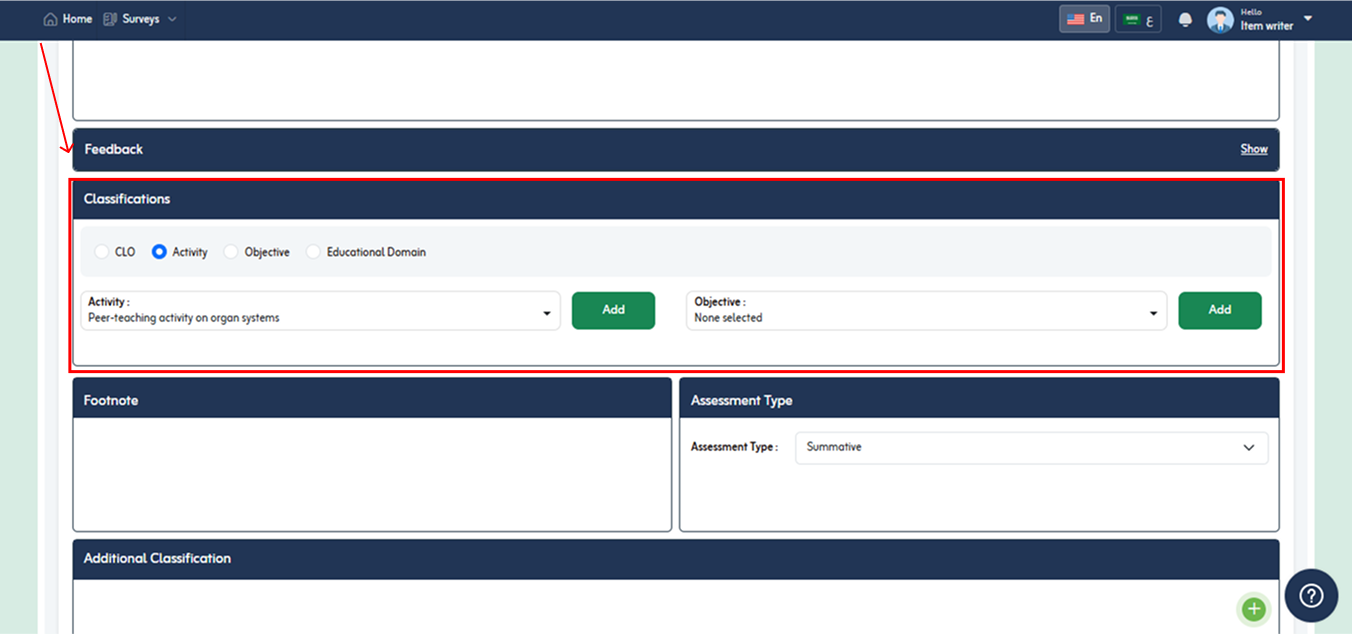
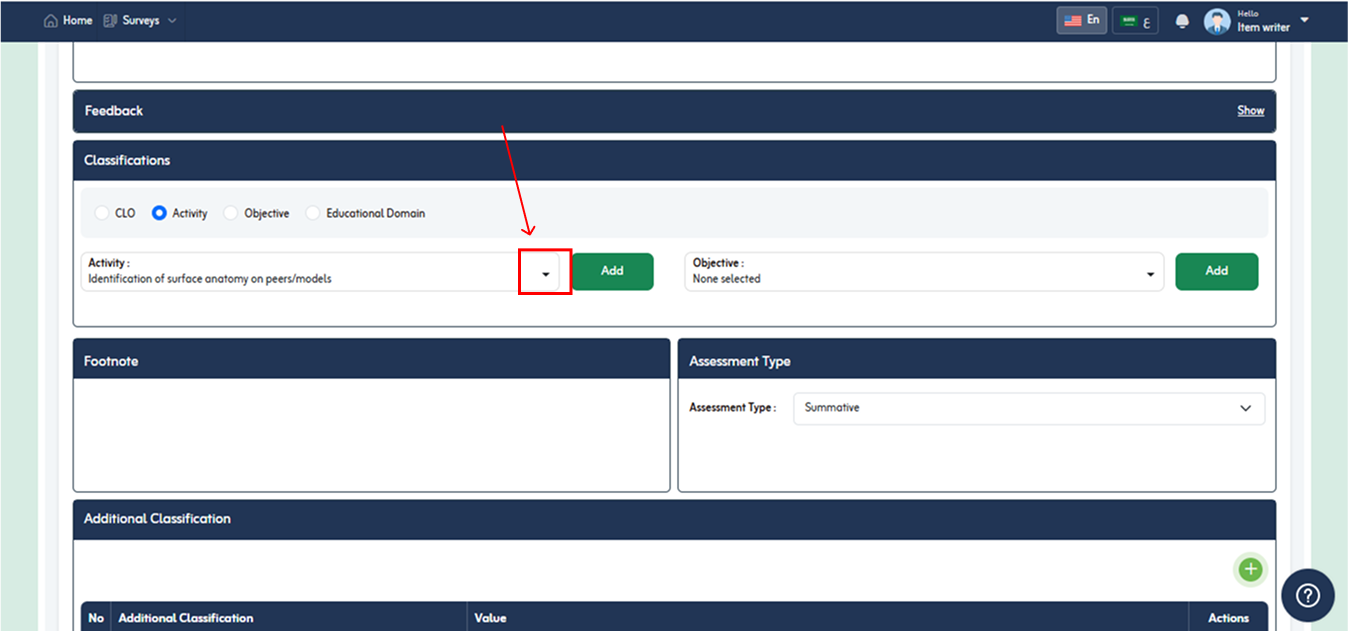
- Select Activity from dropdown that are available in course for this item.
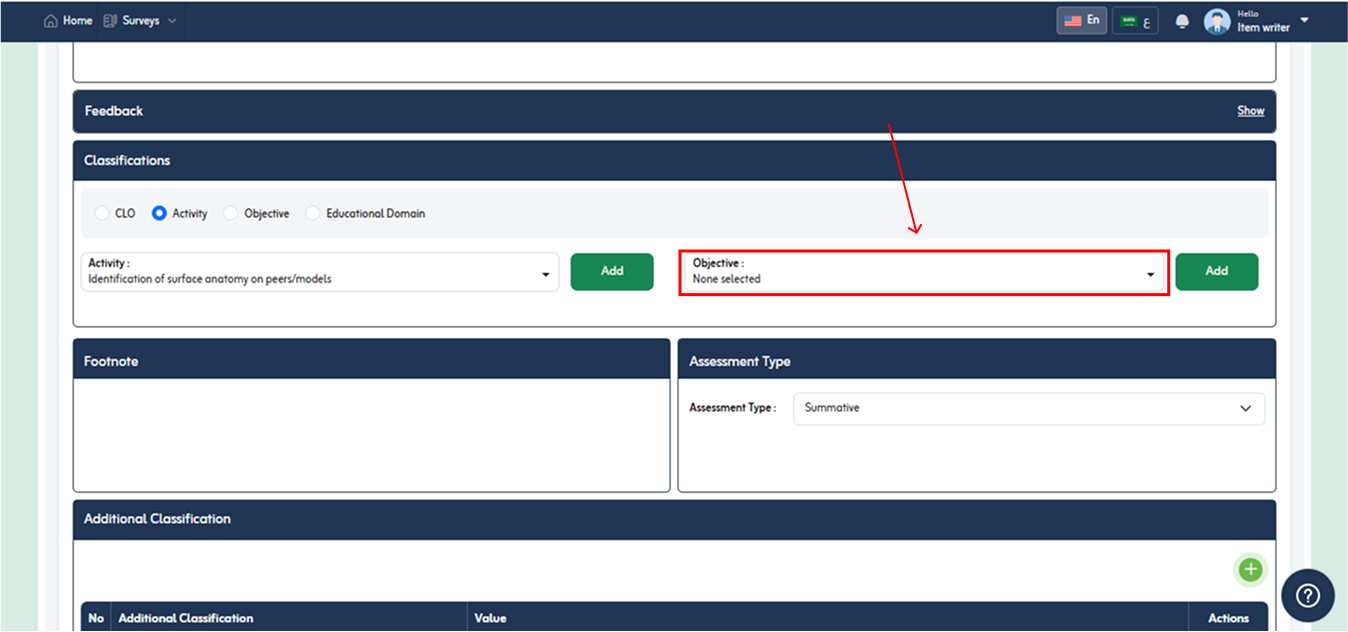
- Select objective from list that are linked with activity.
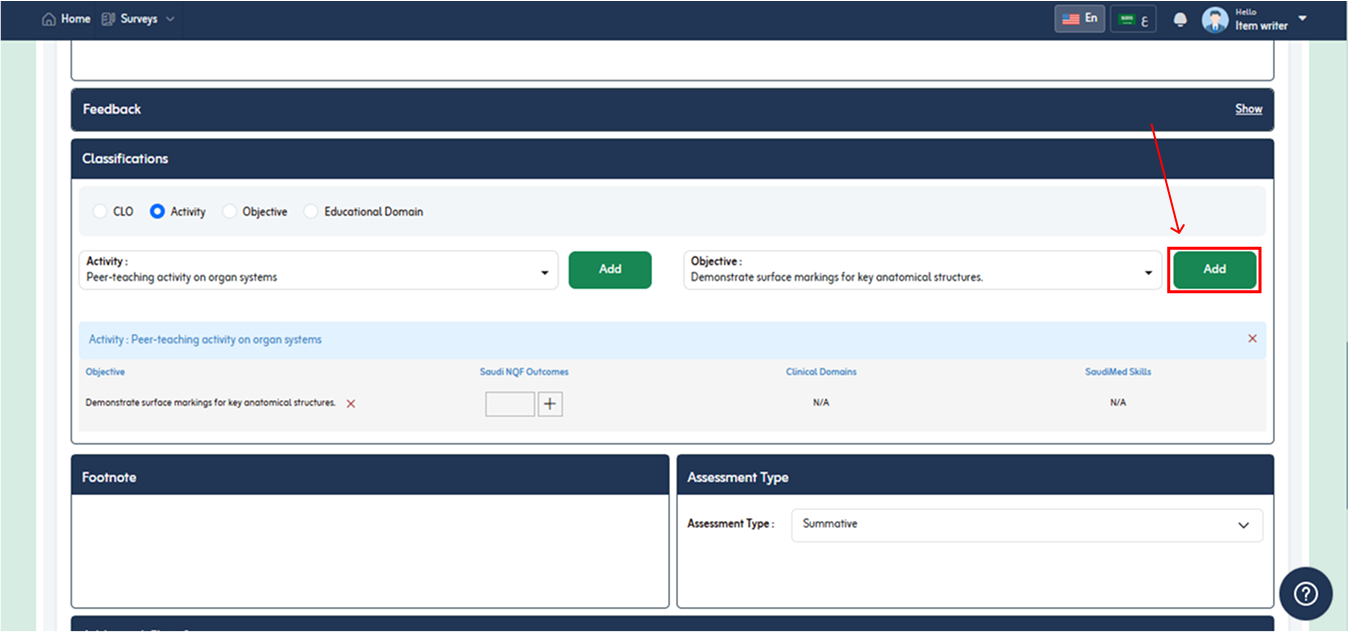
- After selecting objective from list, click Add button.
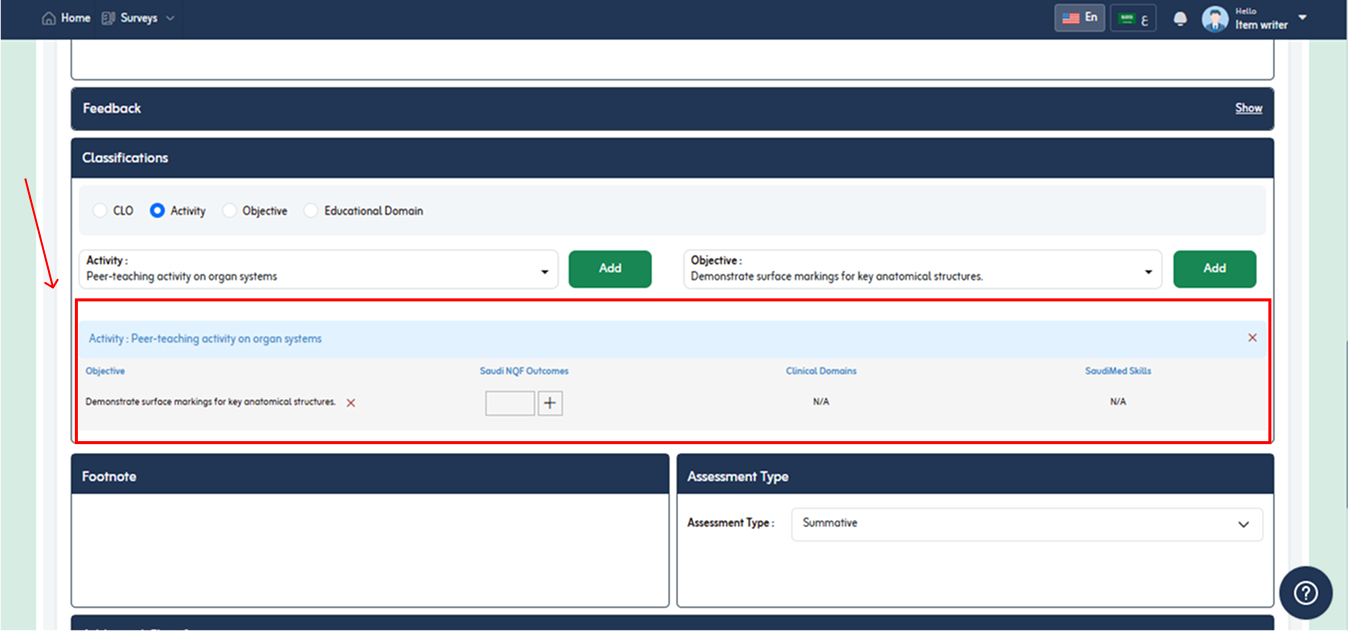
- On clicking add classification will display below.
- Link Educational Domains with item by clicking on + icon under the desired option. E.g. Information technology.
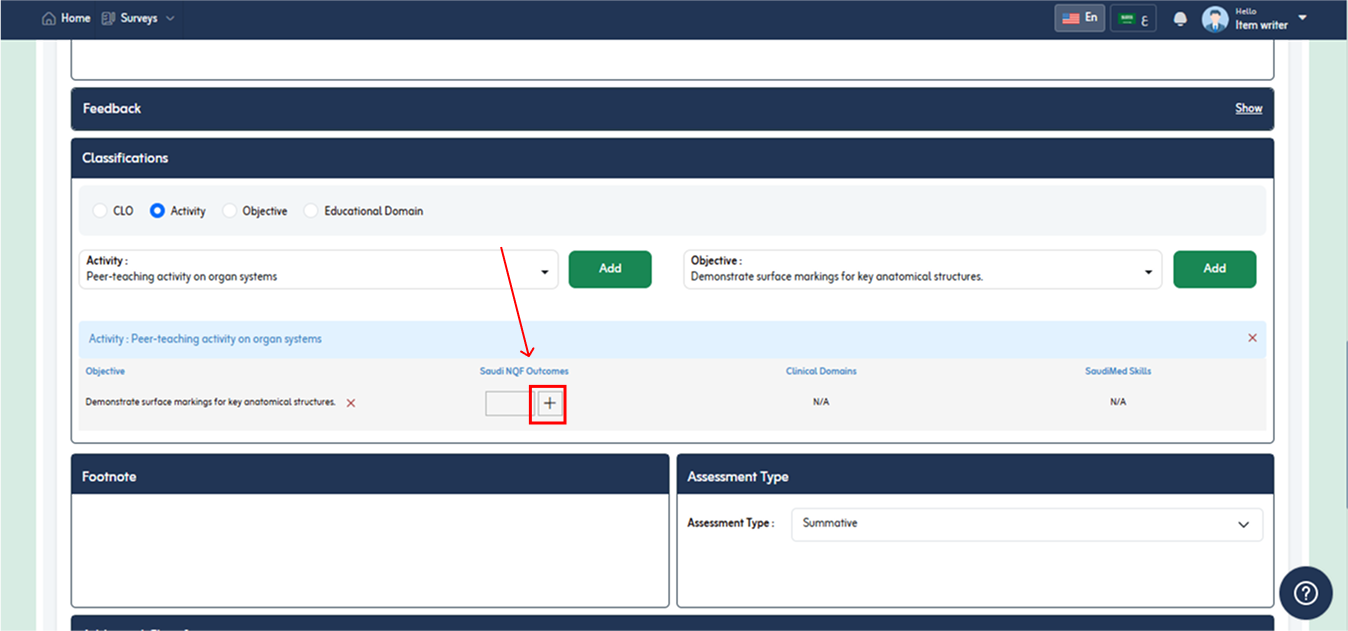
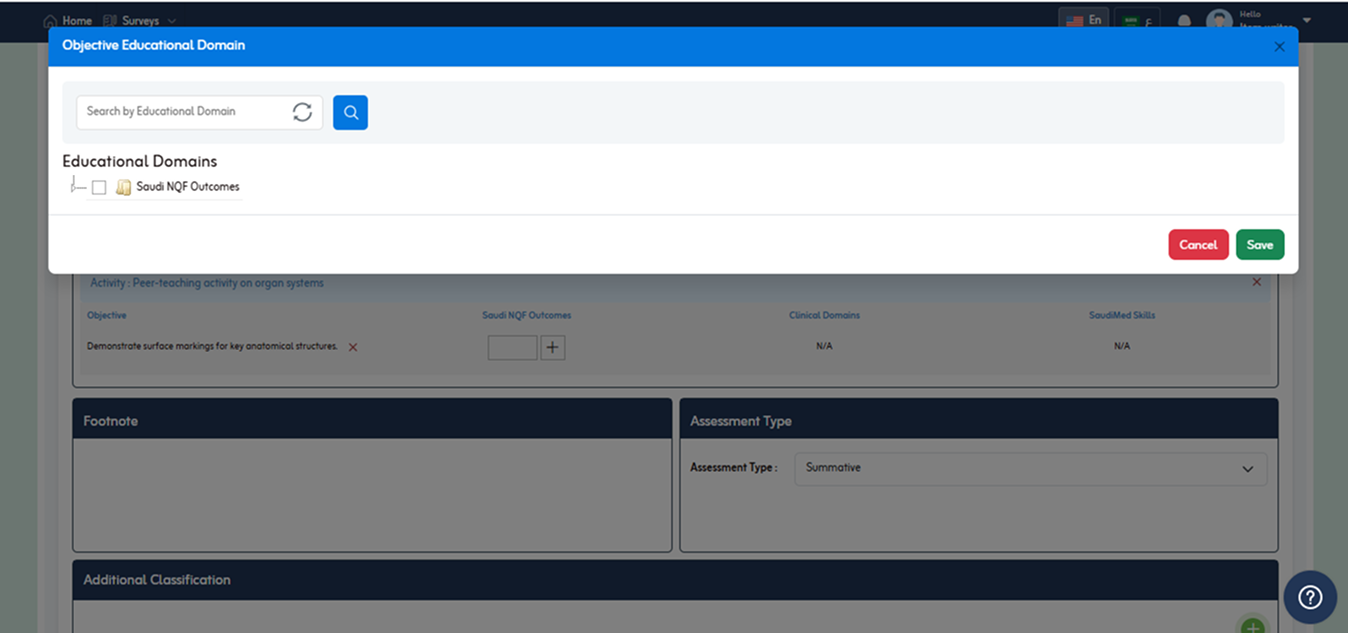
- Objective learning Domain popup will appear. Popup will show list with complete hierarchy and leaf nodes with check boxes so that you can select multiple learning Domains to attach with objective
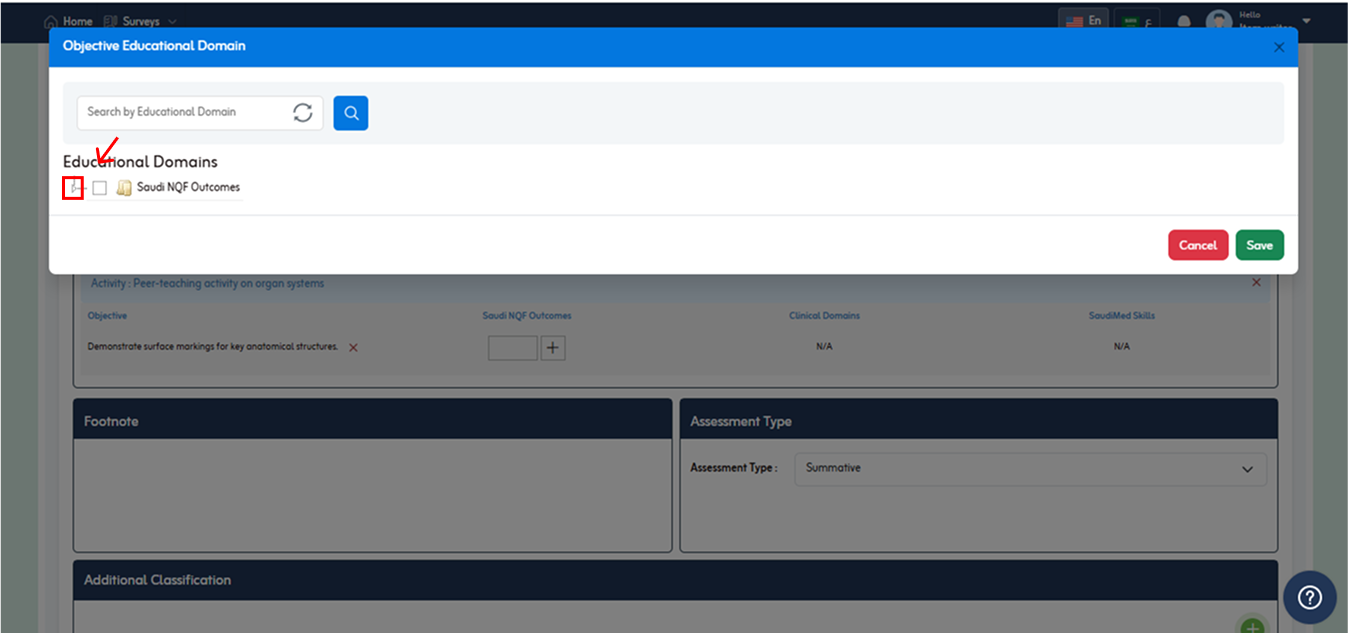
- Expand the learning domain by clicking on As shown in below fig.
- Select desire learning domain by checking box behind it and click save button.
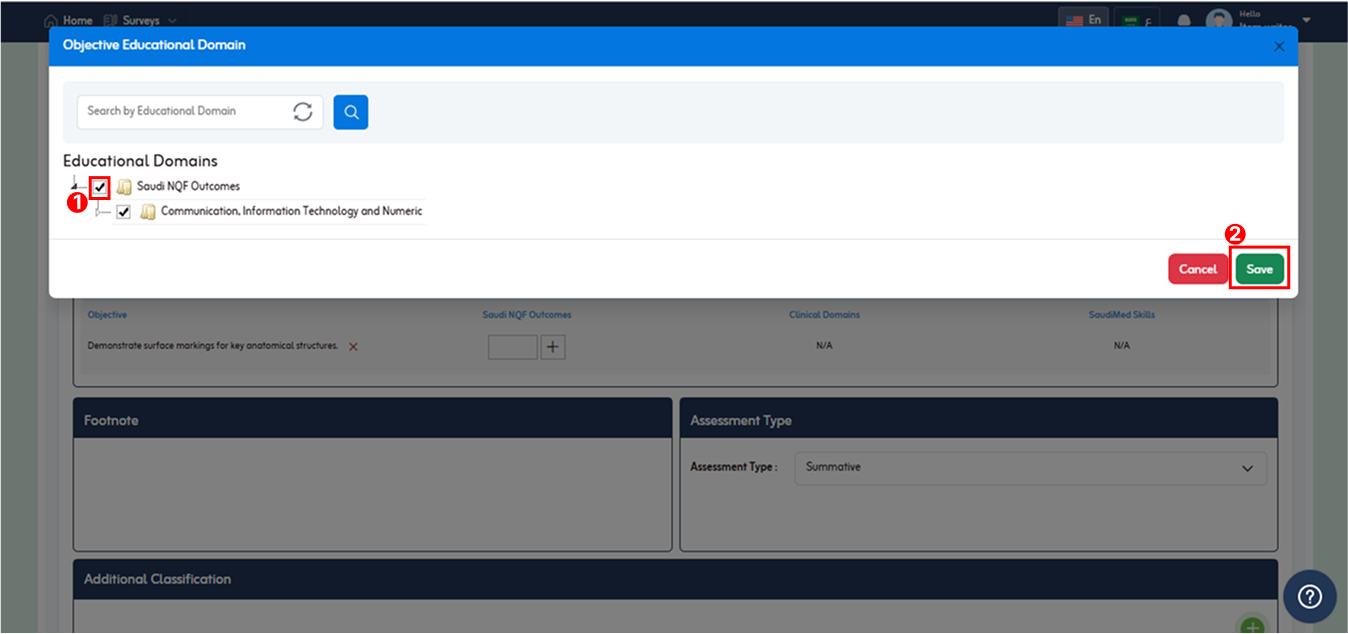
- The added learning domain will be shown in shown in classification section with color. As shown in below fig.
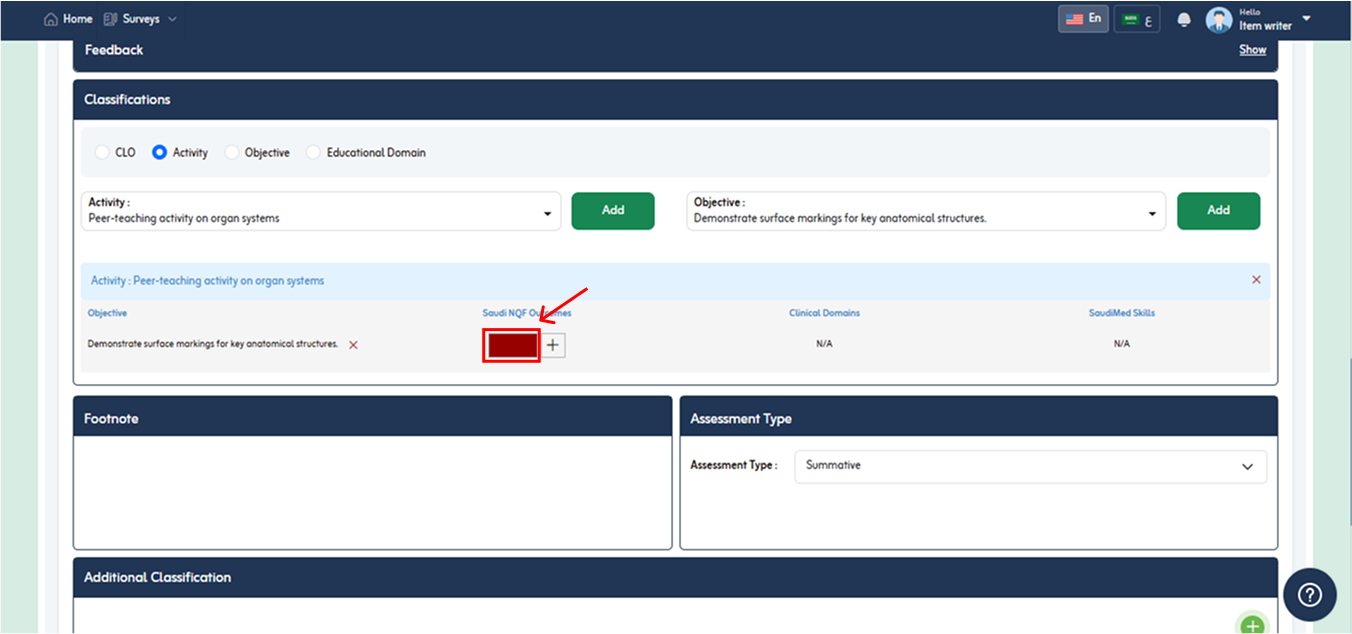
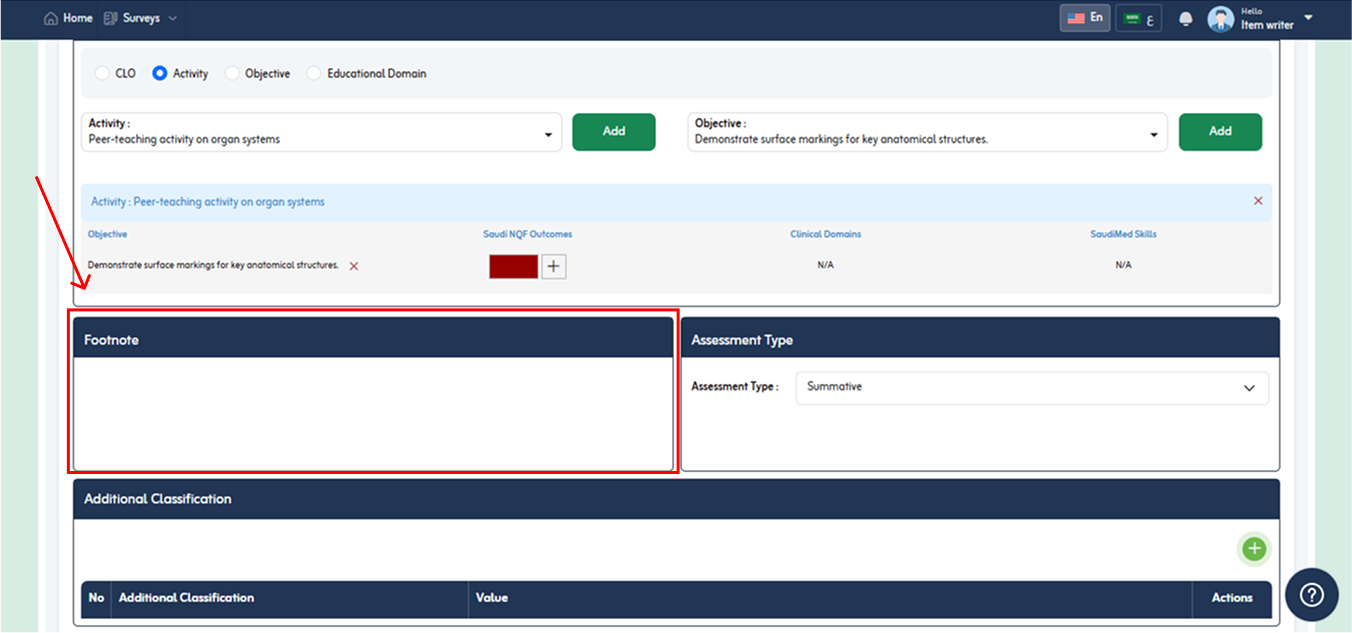
- Add Footnote in given field. It is text that is related to stem and it is optional.
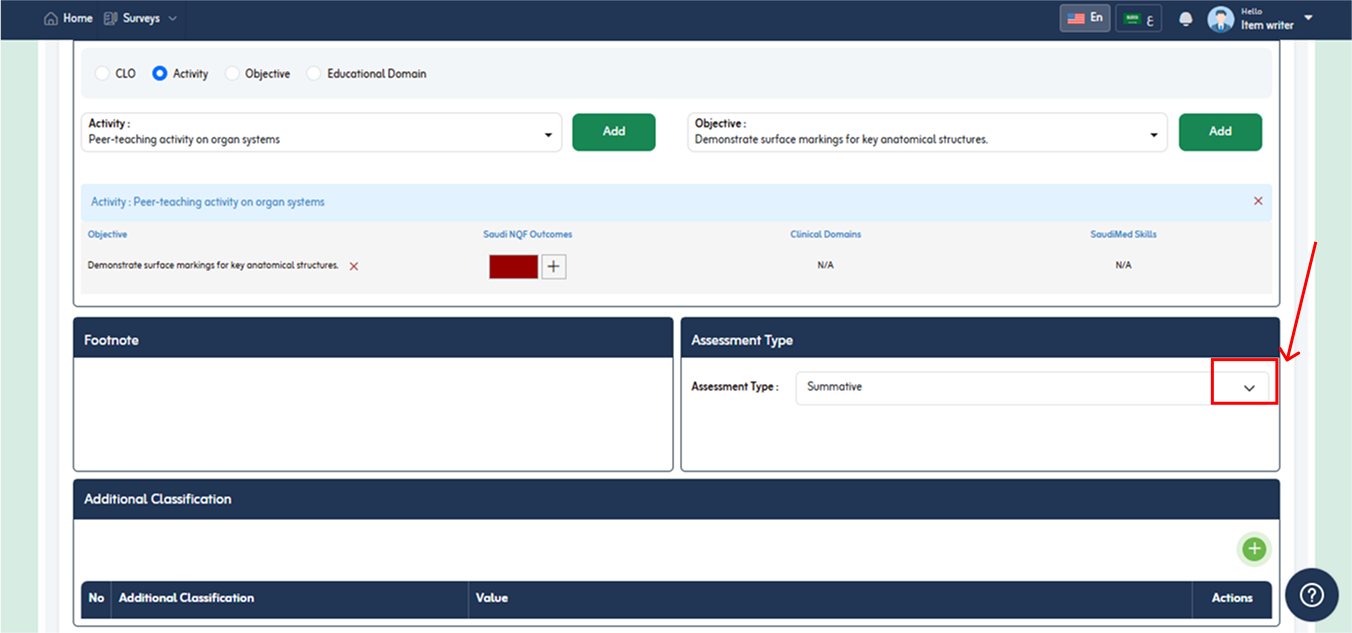
- Select assessment Type of the item from following;
- Formative
- Summative
- You can select from dropdown icon.
- To Add Additional classification click on “Add Additional Classification” button. It is customized classifications define while designing a course. It is optional while writing an item.
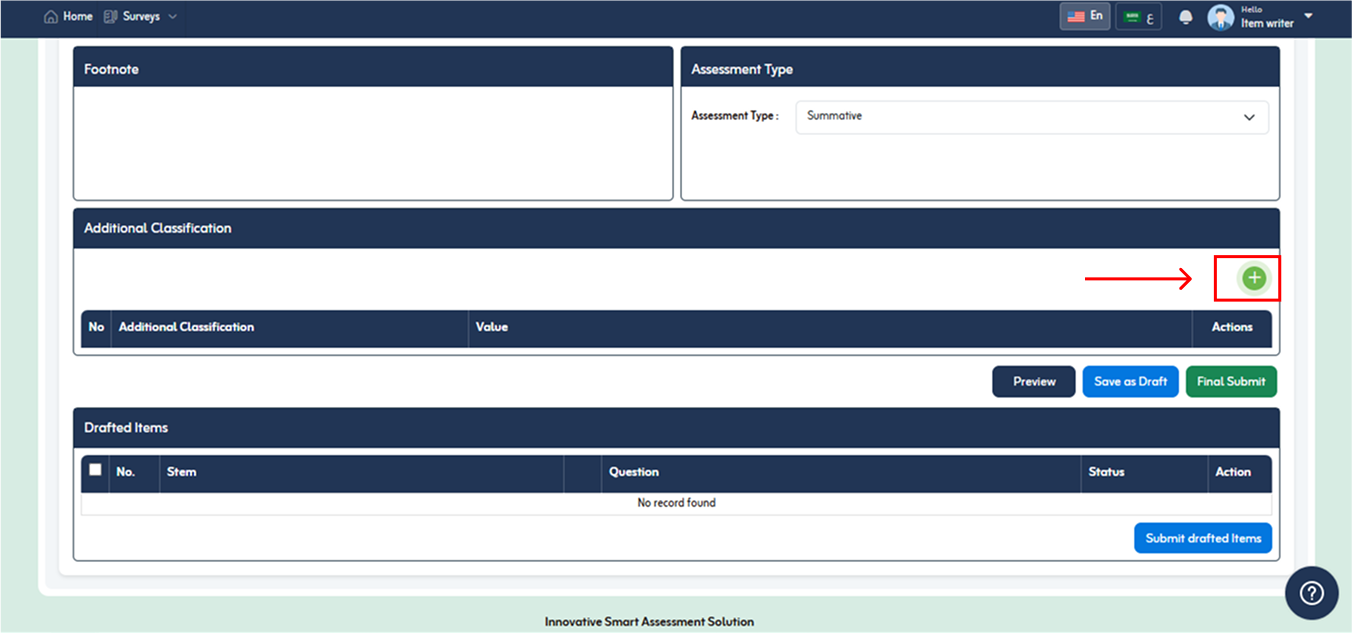
- Additional Classification popup will appear.
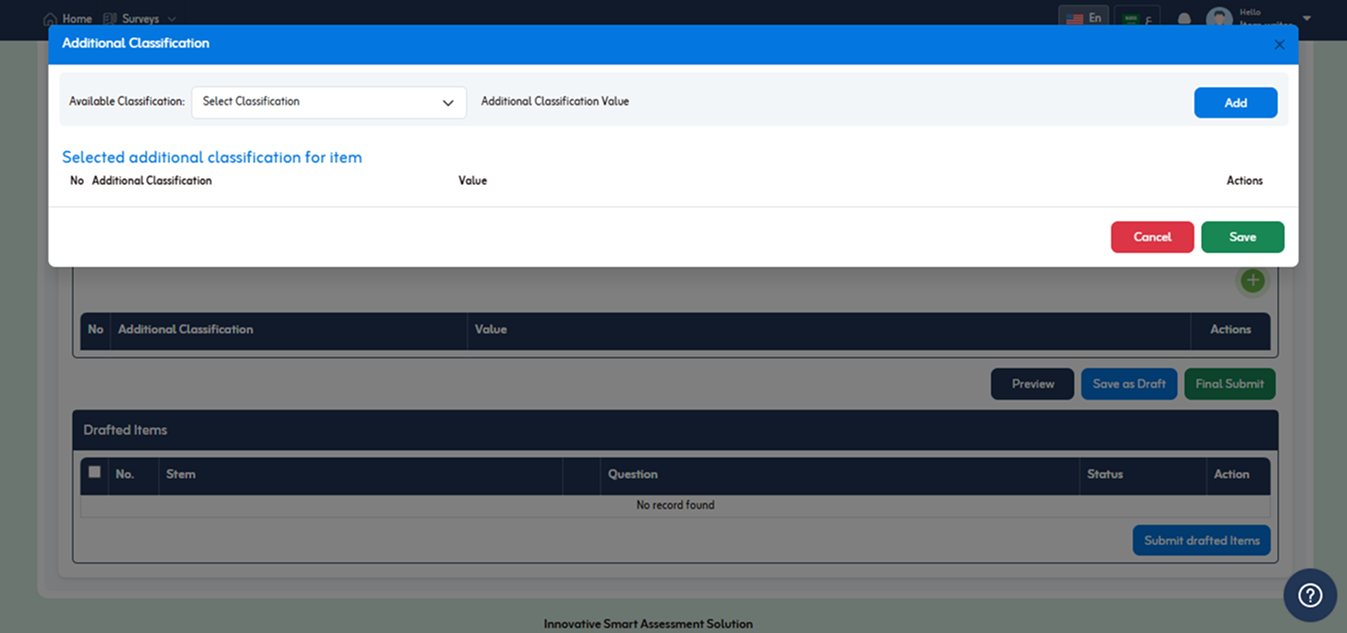
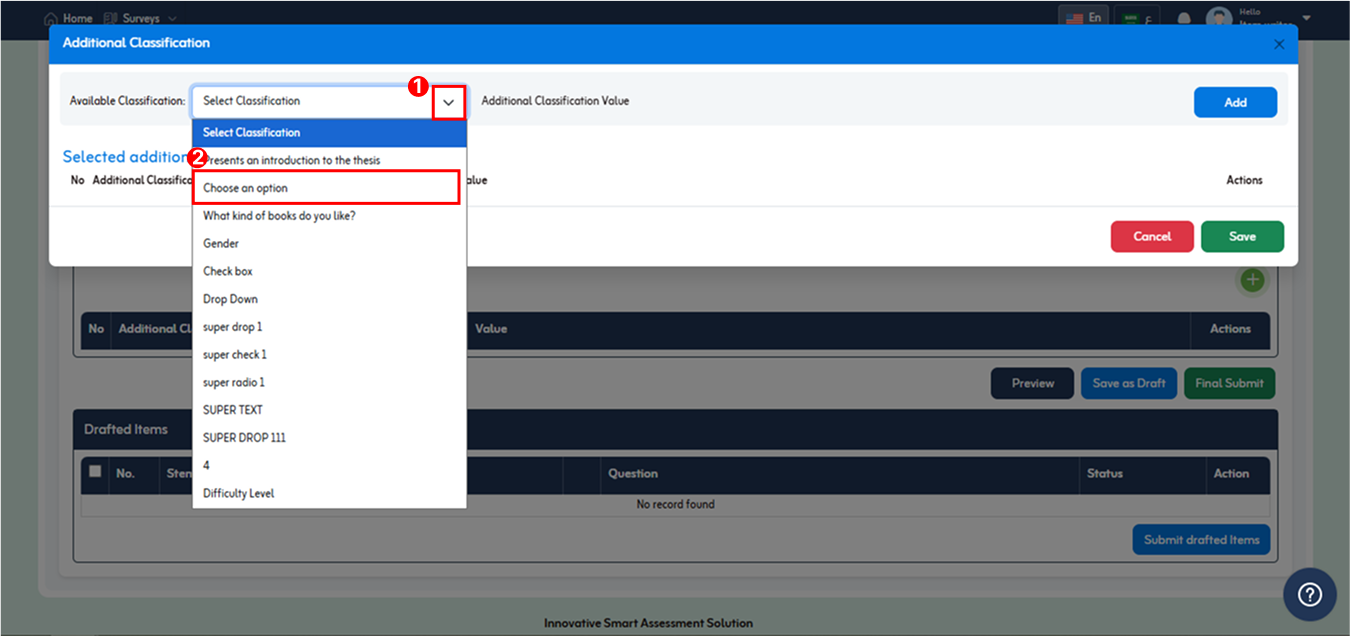
- Select Classification from dropdown list.
- Additional classification value field will appear.
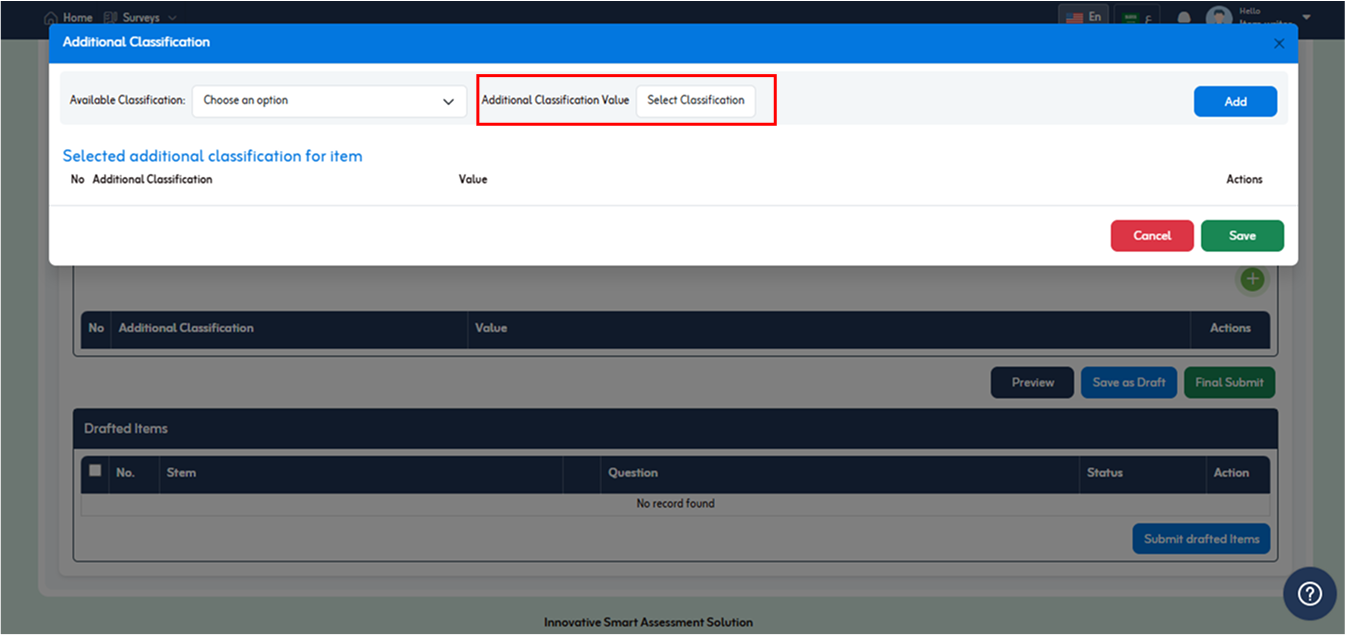
- Select classification value and click Add button.
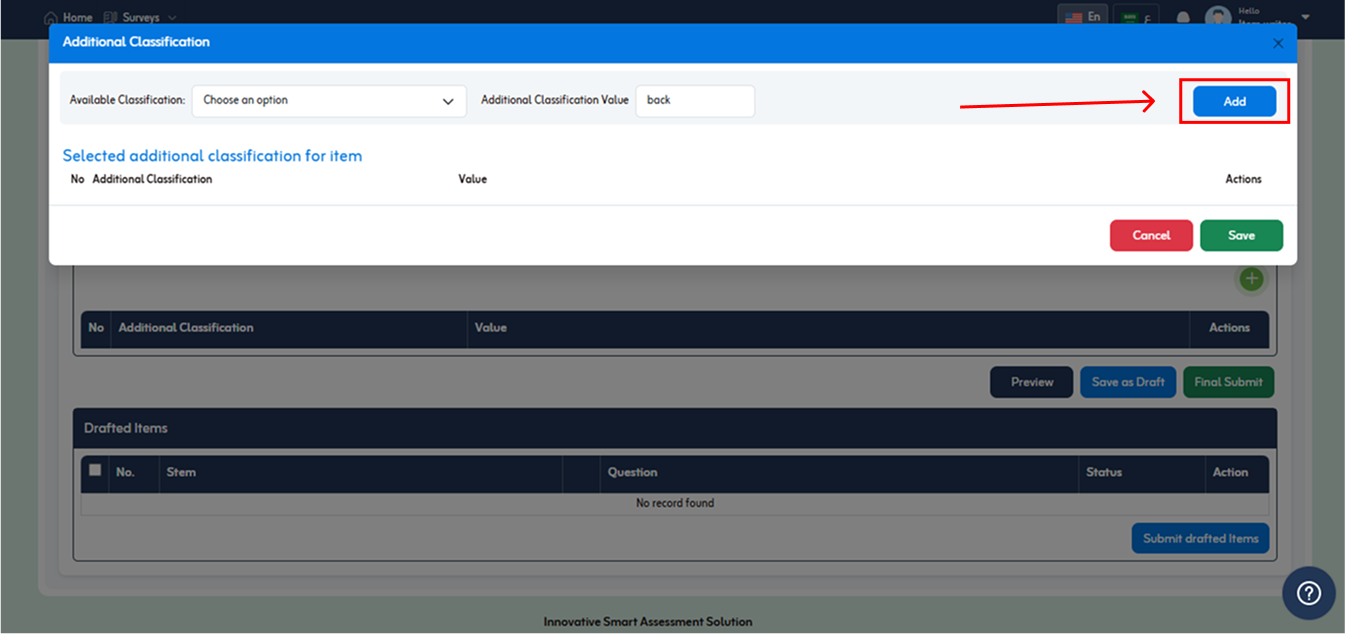
- Selected Additional classification for item will display below with edit and delete option under action column. You are allowed to add multiple additional classification with item.
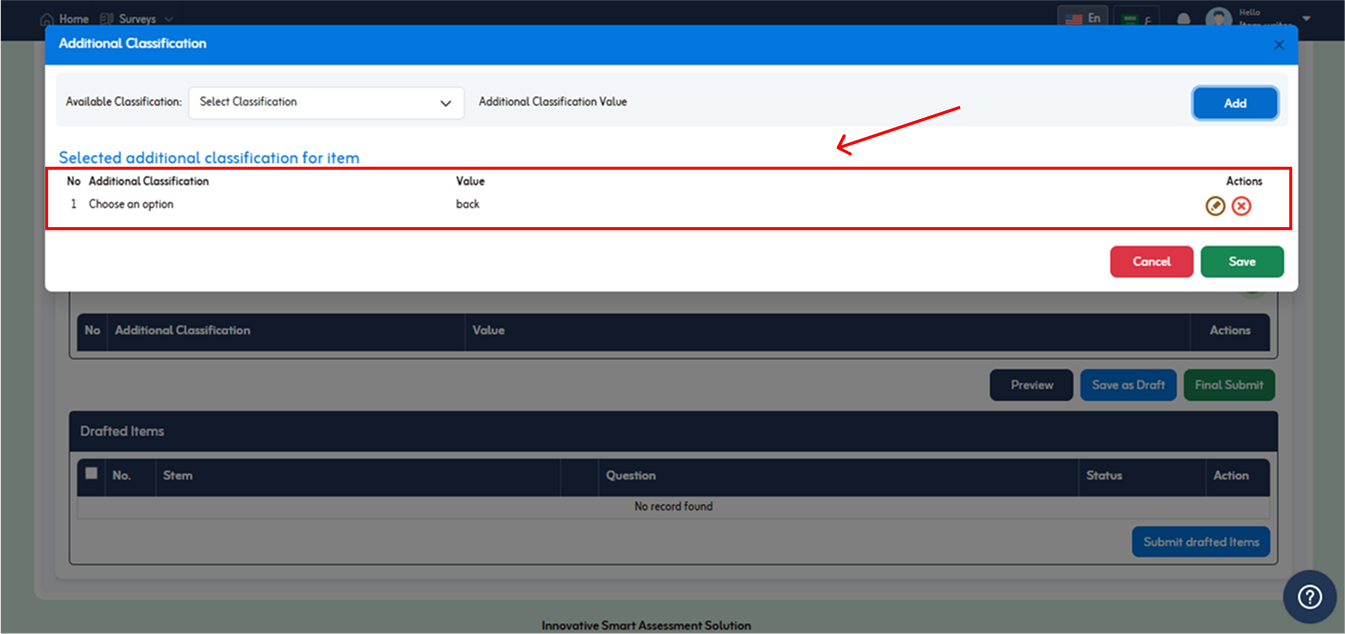
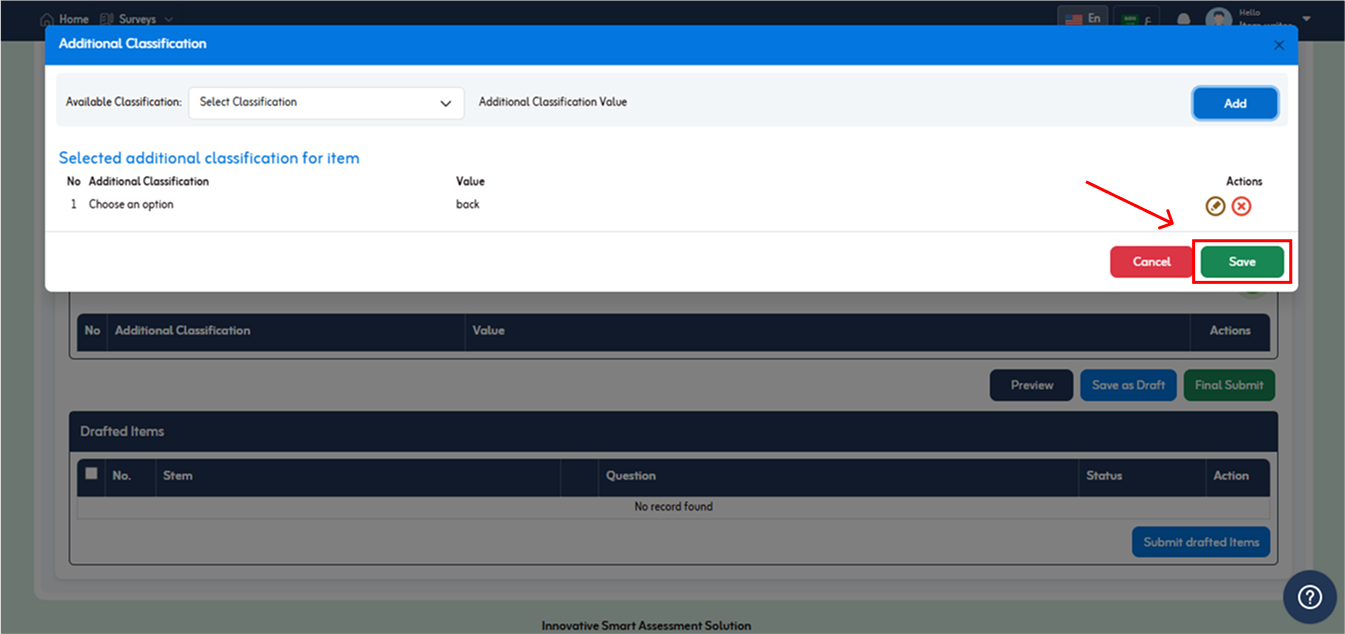
- After adding additional classification, click “Save” button. As shown in below fig.
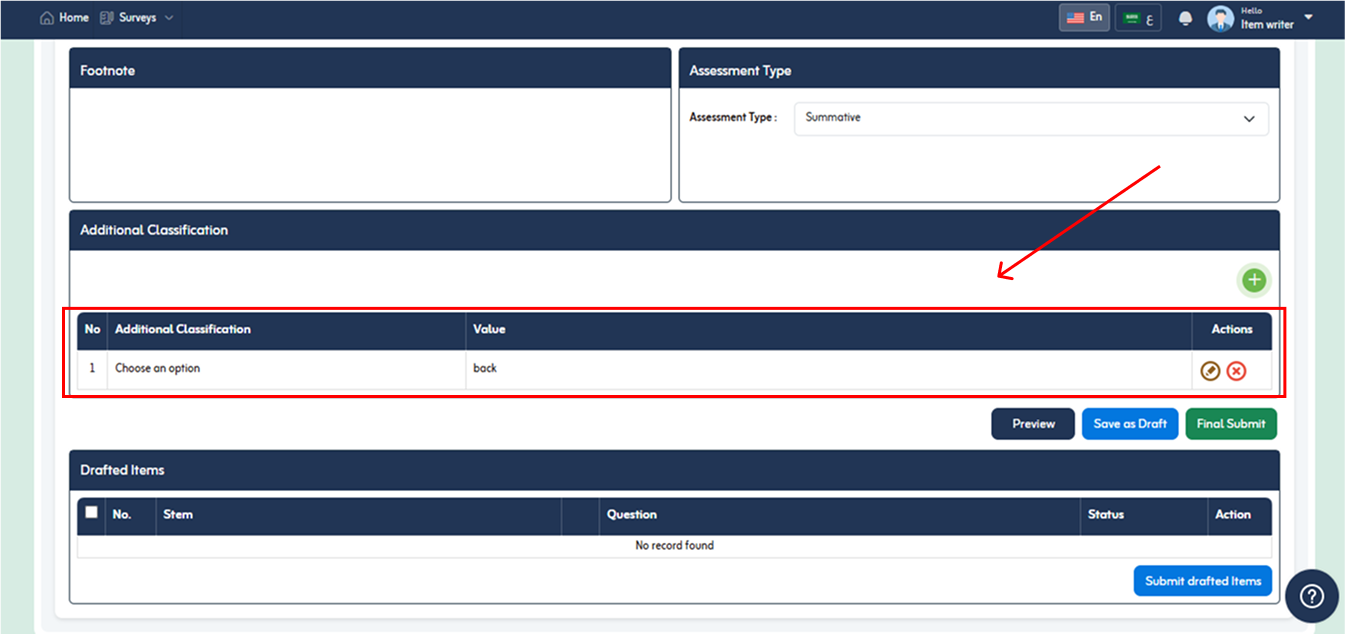
- Added classification will be shown in Additional Classification section.
- To view written item while conduction, click on “Preview” button below.
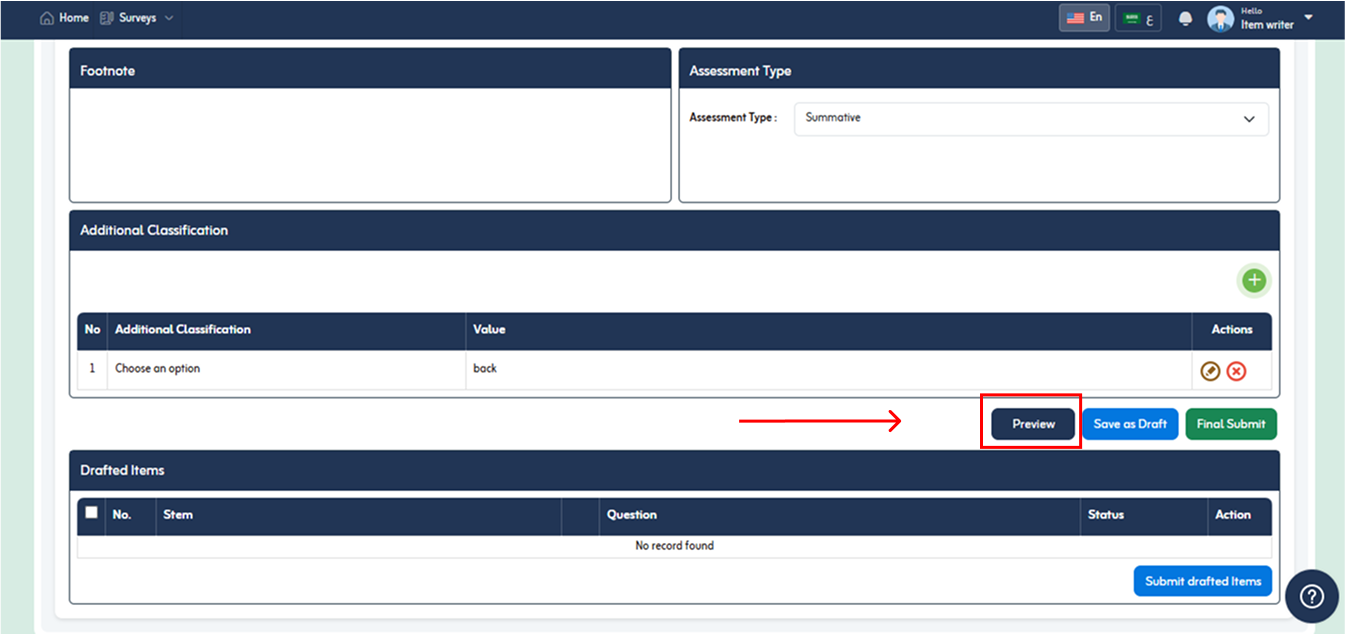
- Item Preview popup will appear.
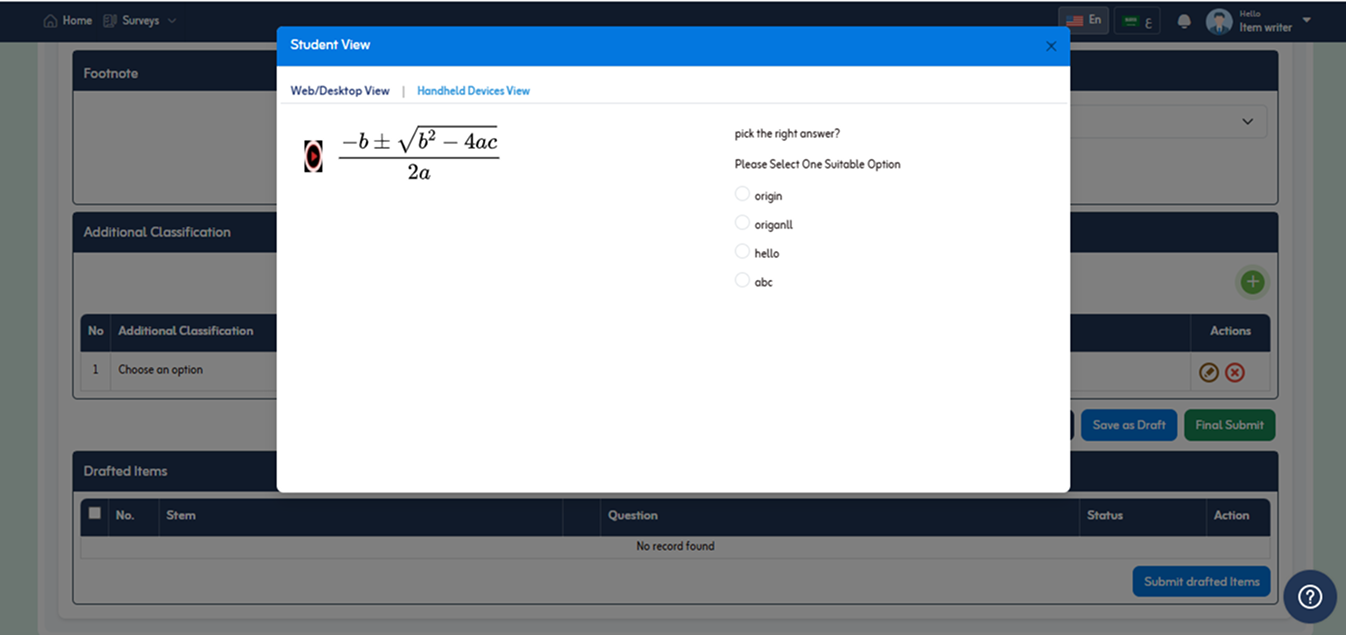
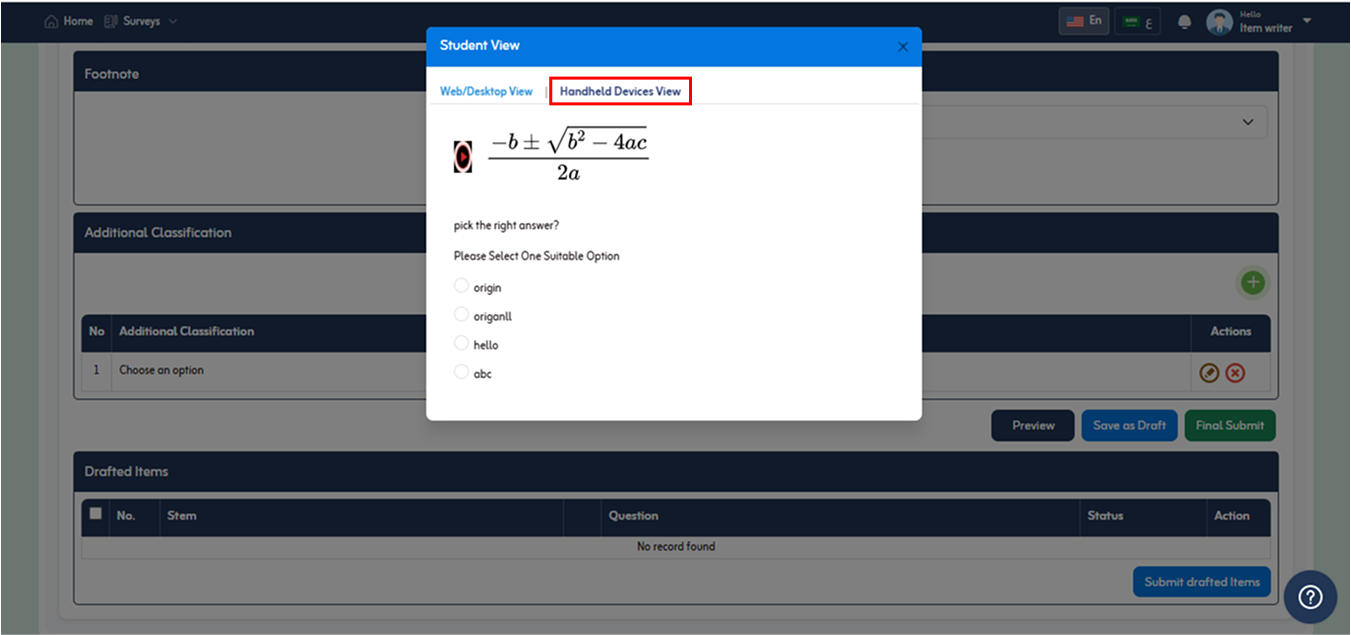
- By default Web/desktop view is selected. To view for handheld devices, click the handheld device view link. On clicking you are able to view item for handheld devices like mobile, tablets etc.
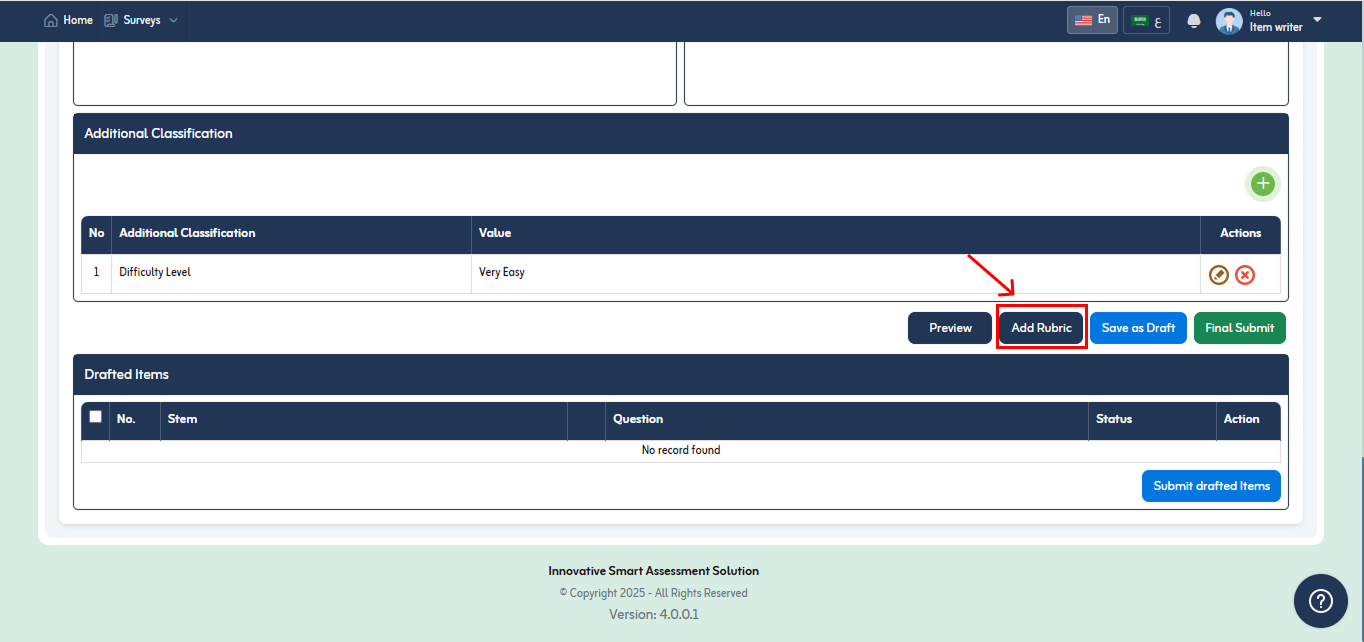
- Click “Add Rubric” button to add rubric for item. It is a set of criteria for grading an item while checking. You can add multiple evaluation criteria for an item.
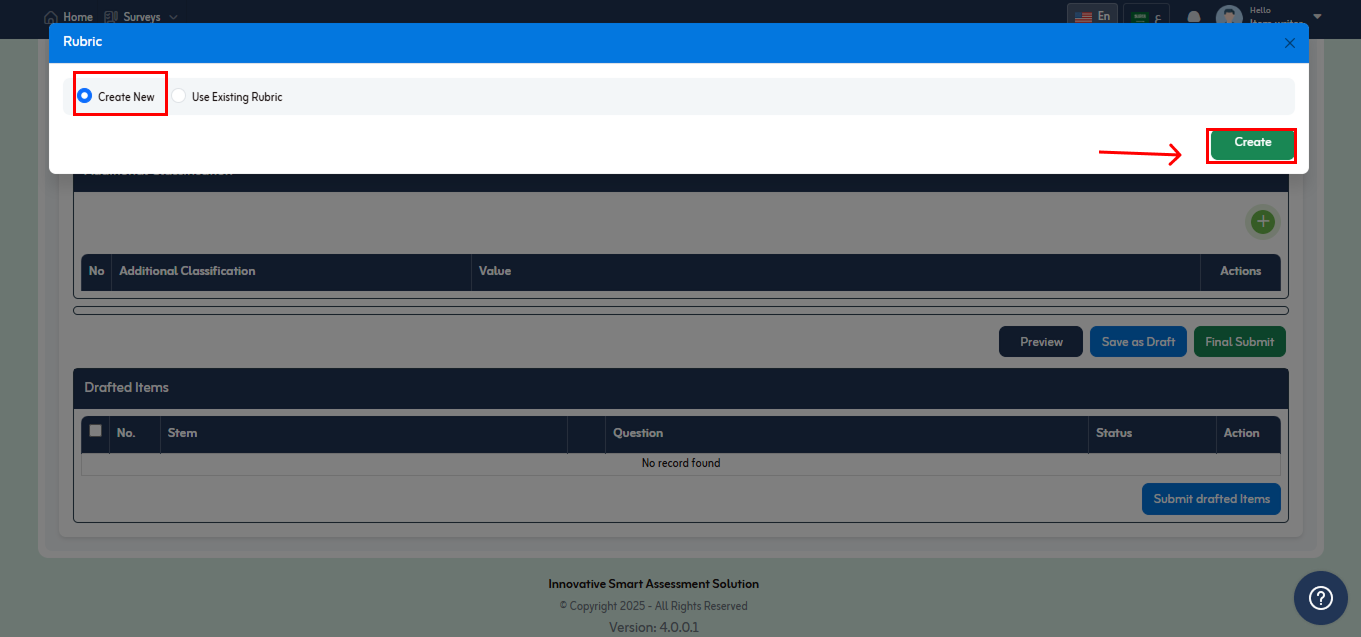
- Rubric section will appear as shown below.
- Click on “Add Evaluation Criteria” link above to set evaluating criteria of an item.
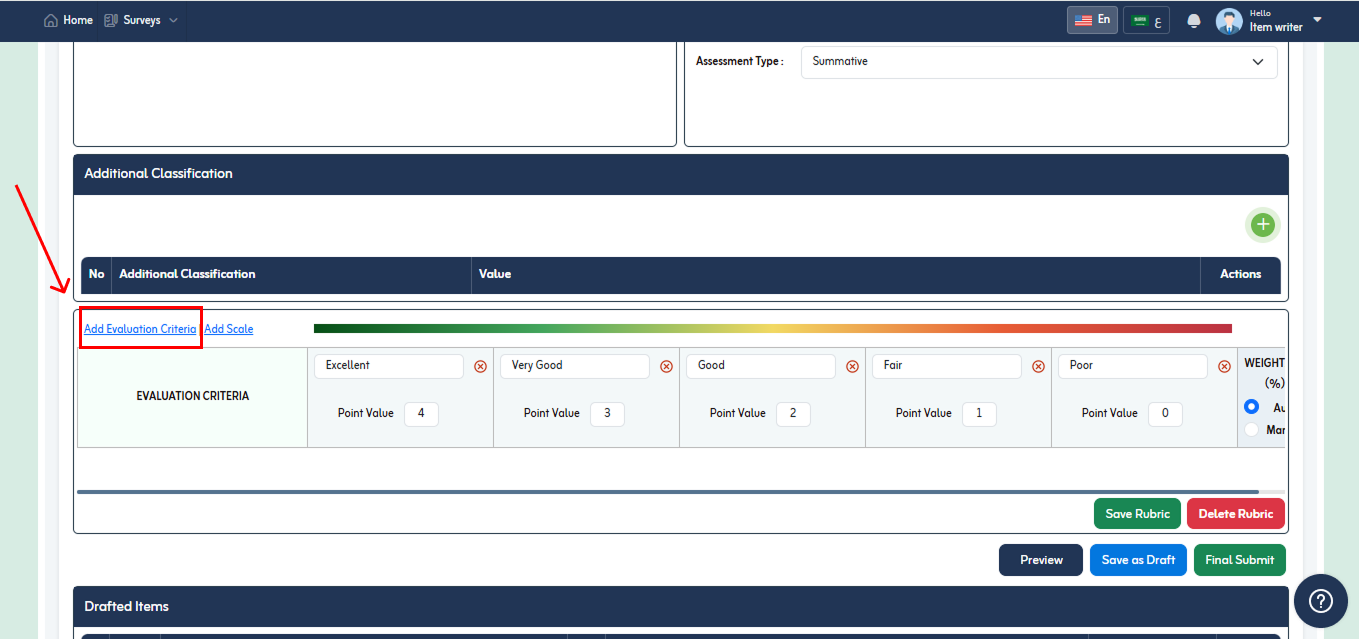
- An empty fields will appear as shown in below fig.
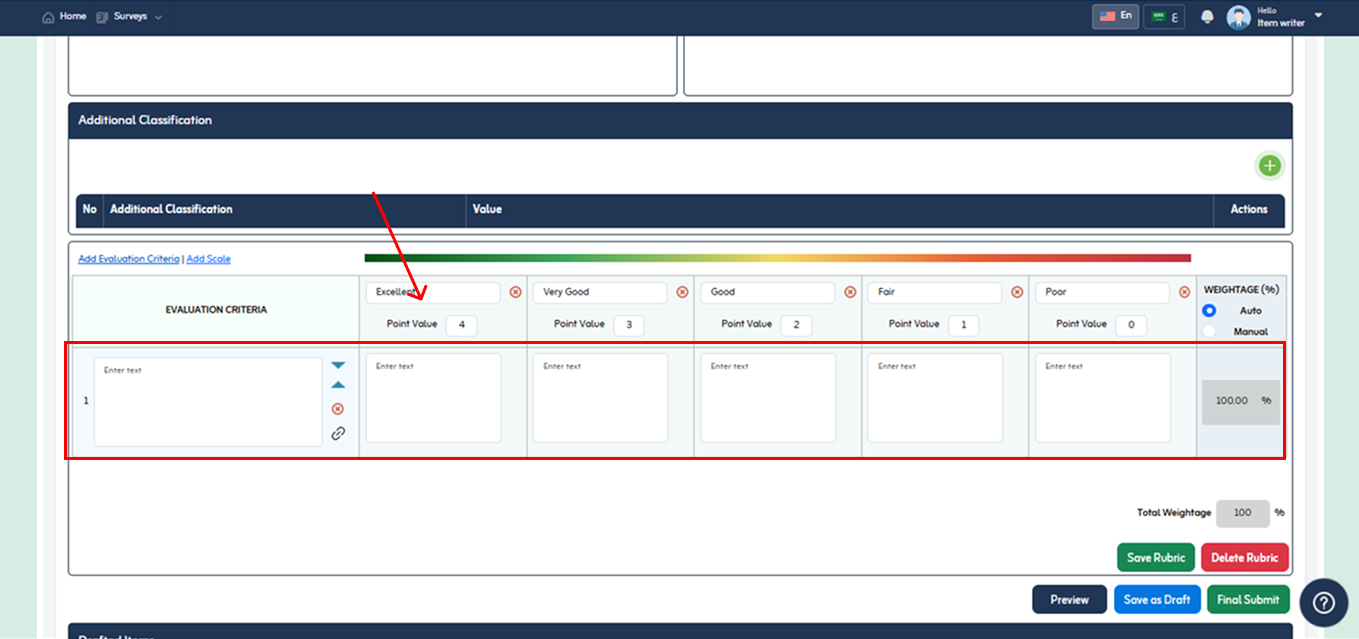
- Write the evaluation criteria for an item for evaluating this item.
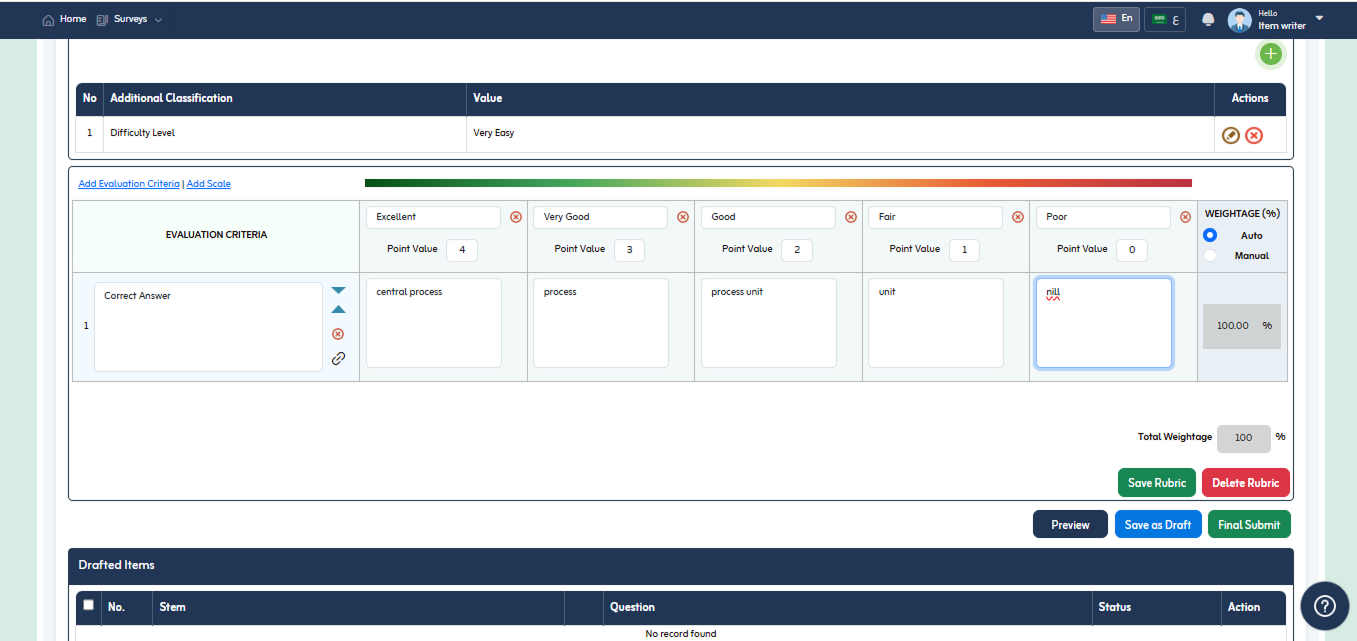
- Define Weightage of an item. By default it is “Auto” selected.
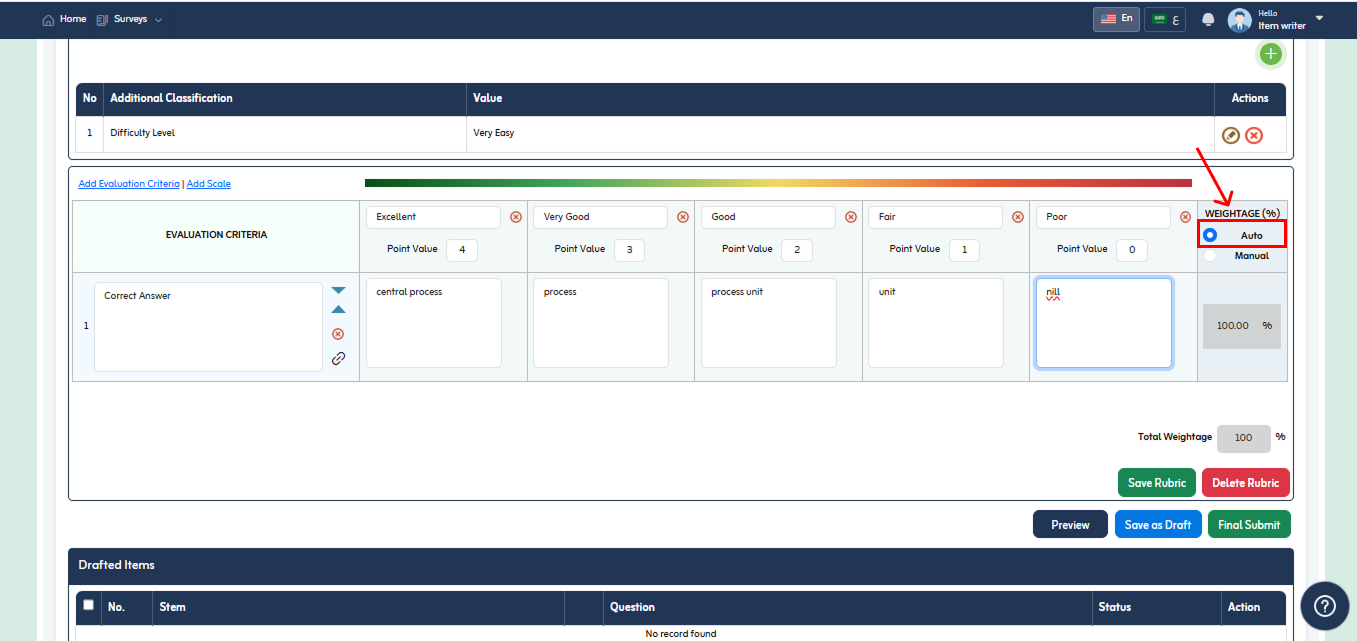
- Select Manual to define the weightage in percentage according to your wish if you add two evaluating shown in below fig.
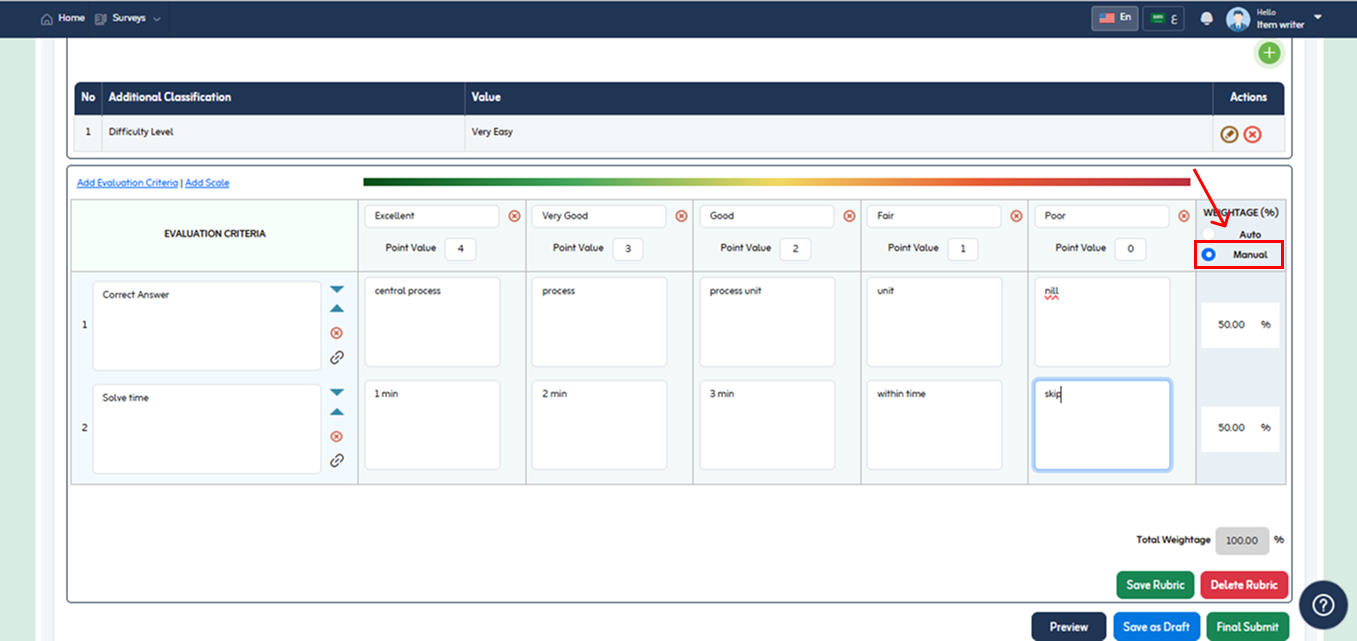
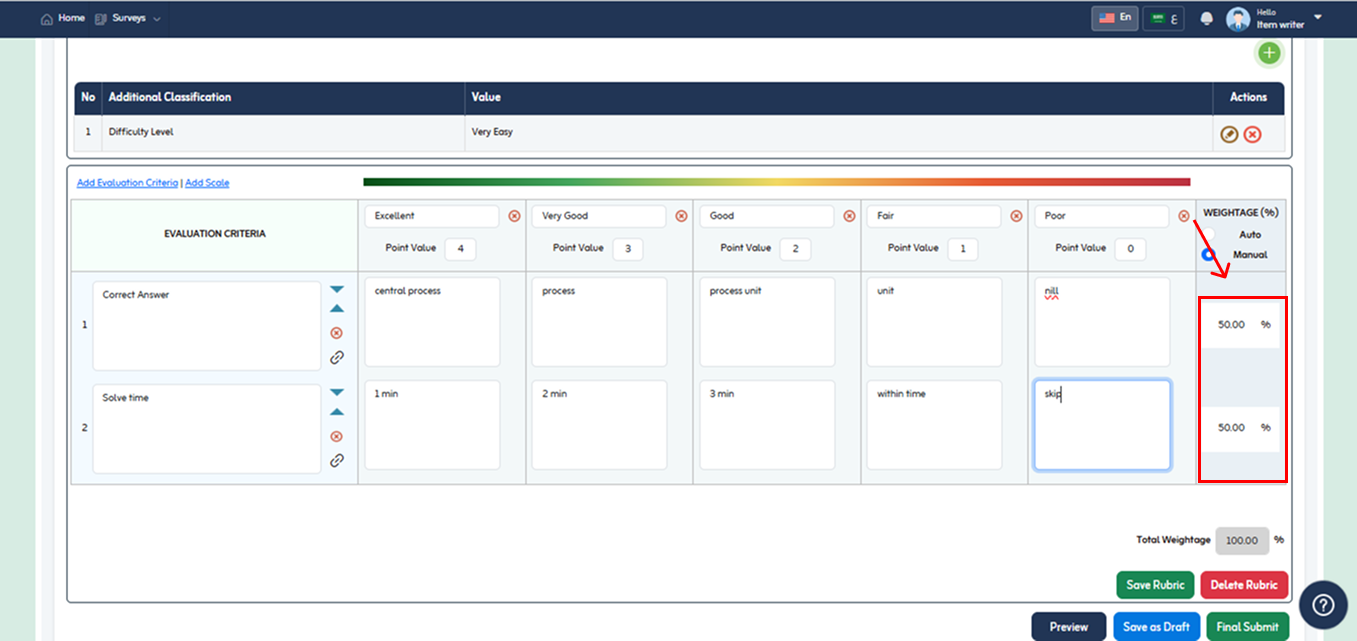
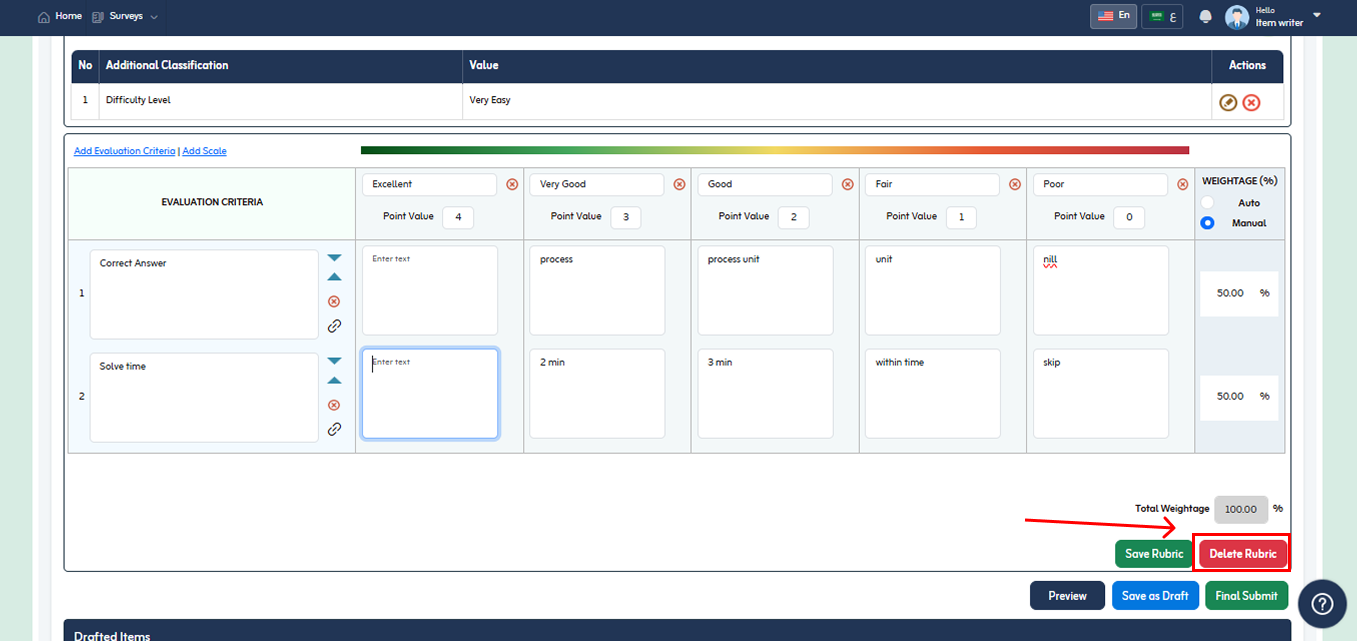
- You can distribute total weightage in between the evaluation criteria of your choice. E.g. 80 and 20 as shown in below fig.
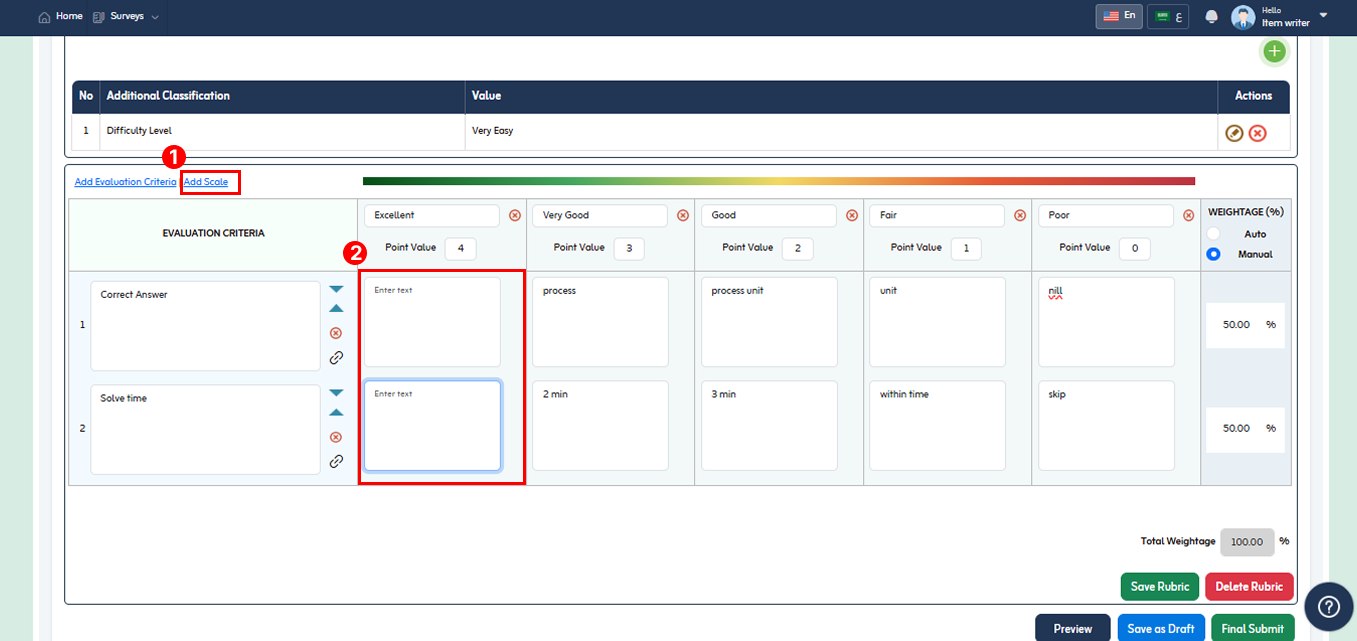
- To add more scale click “Add Scale” link. Below added scale will appear with empty text field as shown in below fig.
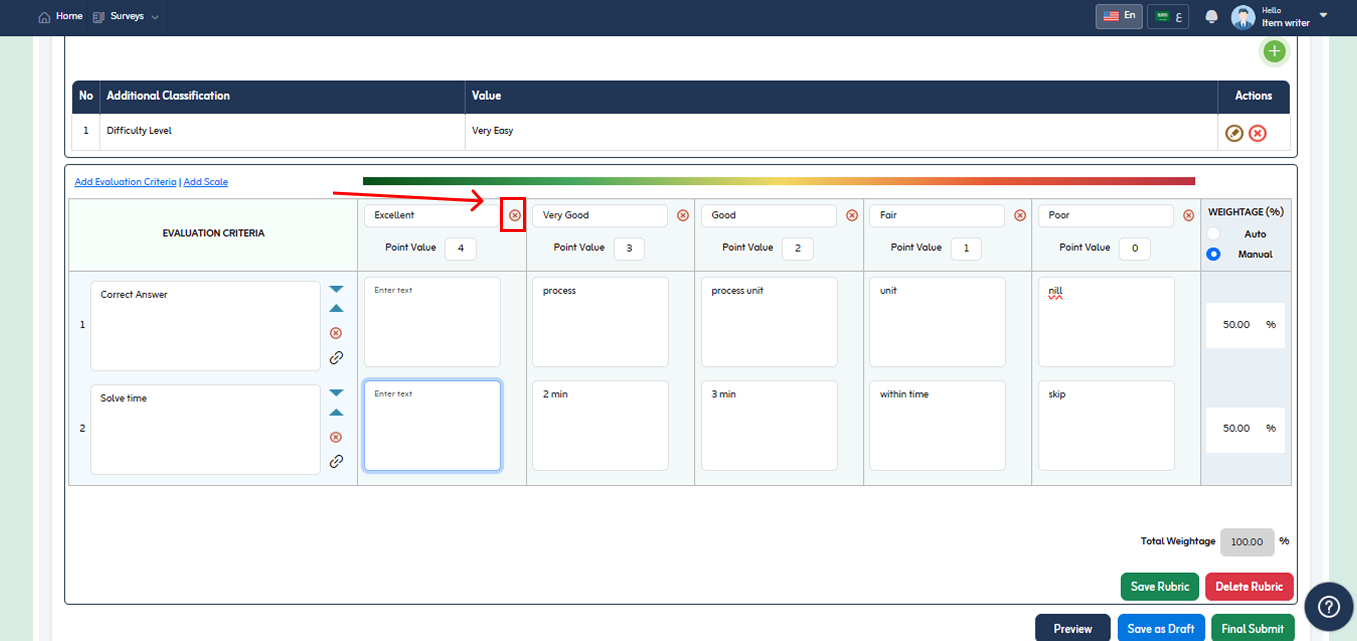
- To delete added scale click “x” icon.
- To delete added rubric, click “Delete Rubric” button present below.
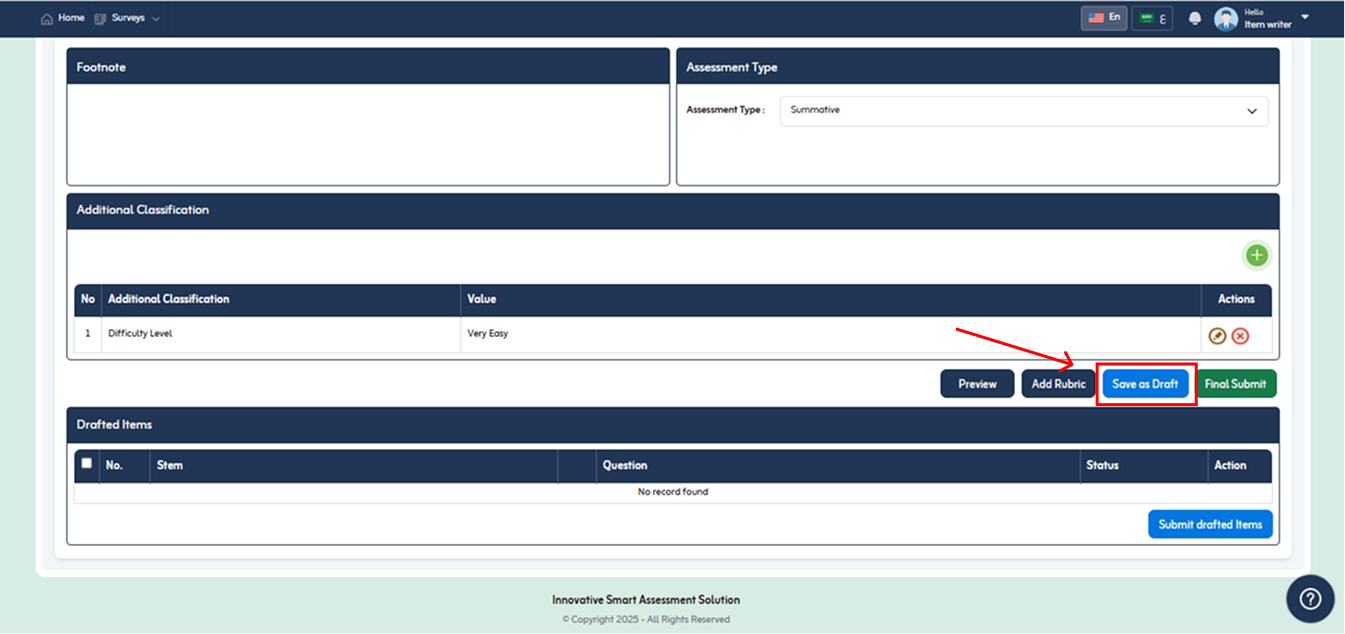
- To save item as drafted, click on “Save as Draft” button.
- Item save as drafted will be listed under Author Drafted items as shown below.
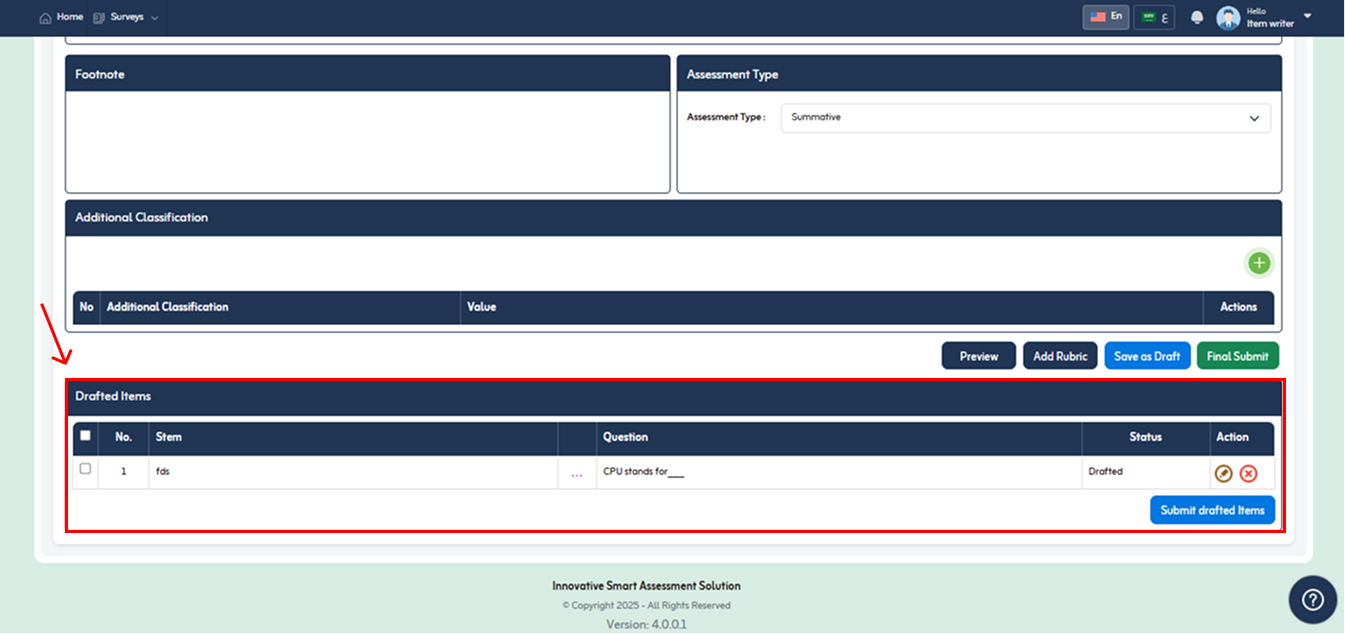
- You can edit item or delete drafted item. To edit click Edit
 icon.
icon. - To delete drafted item click
 icon
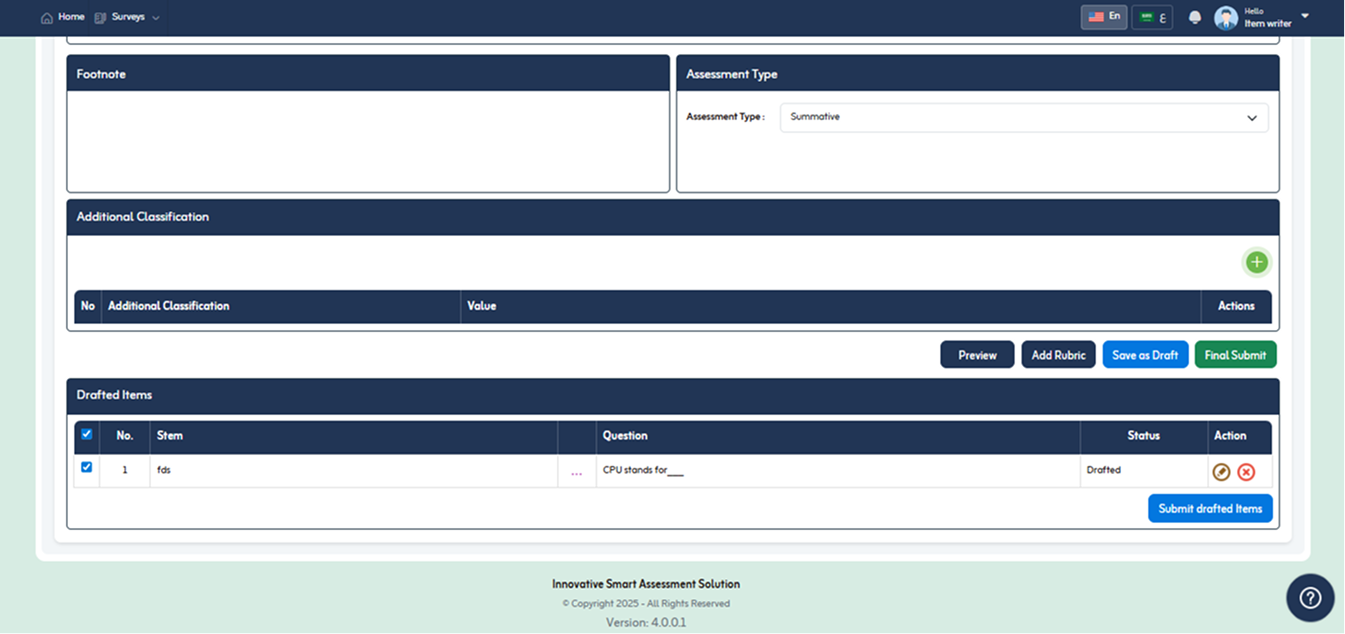
icon - To submit drafted item, check the box of desired drafted item and click on “Submit a Drafted Item” button.
- To submit created item, click “Final Submit” button.
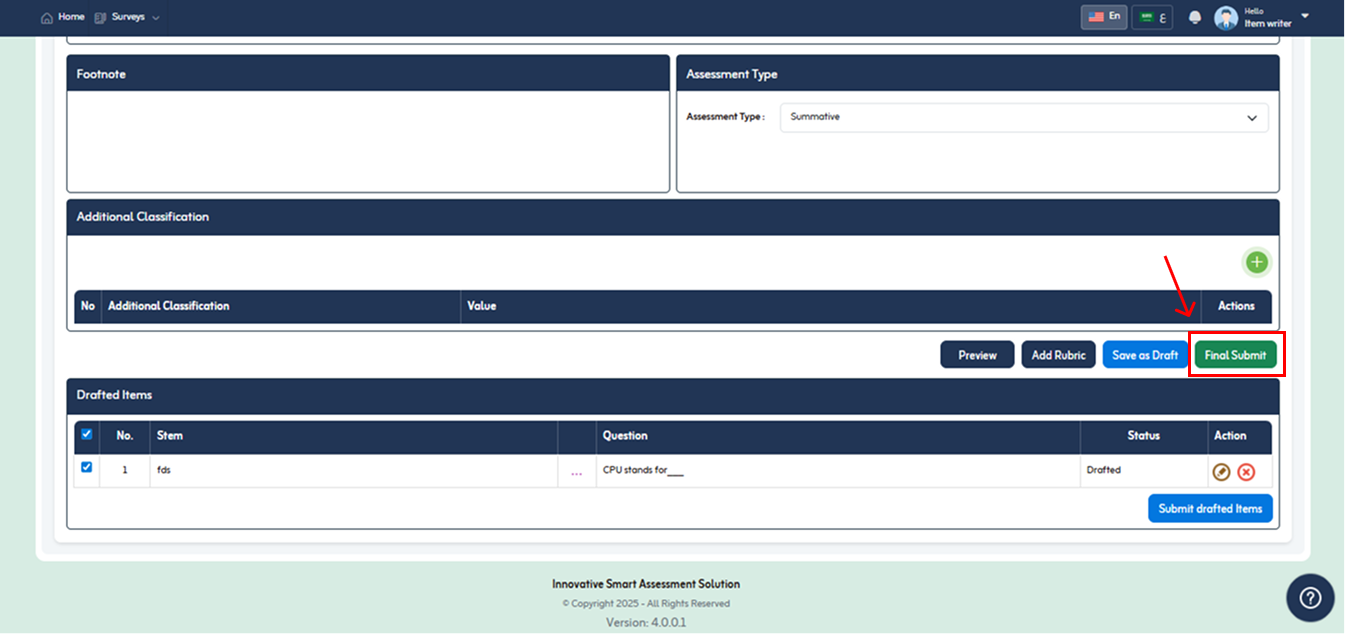
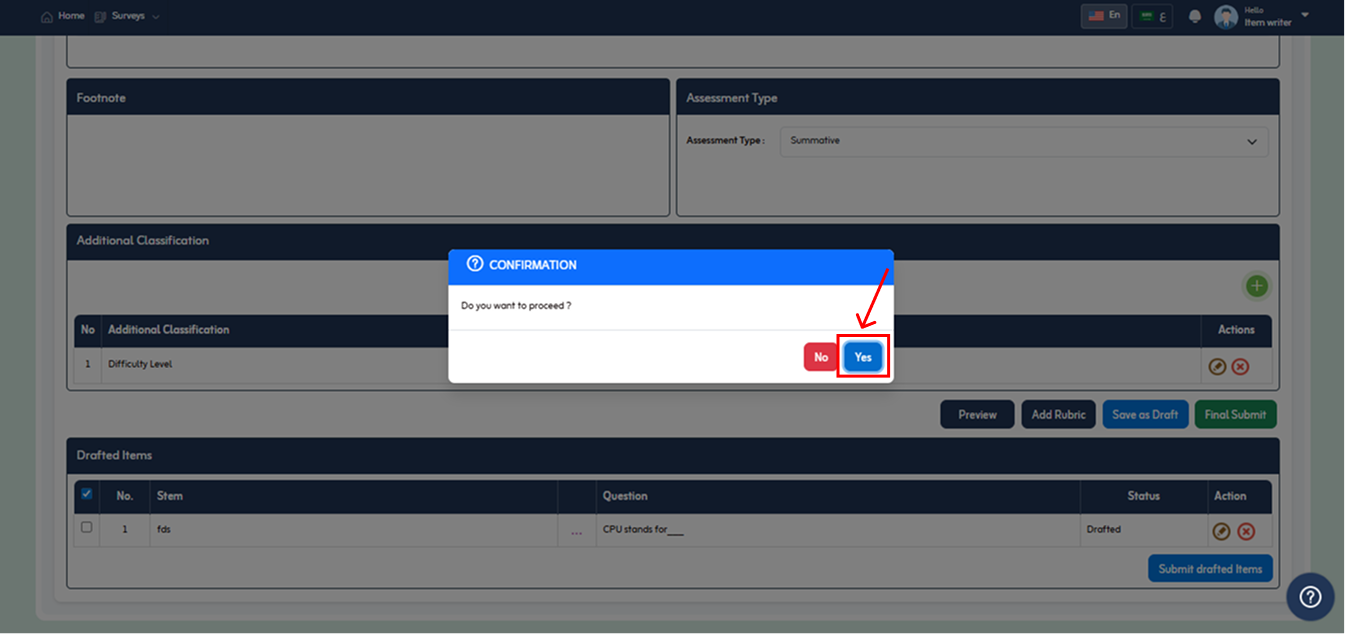
- Confirmation Message appear. Click “Yes” button to proceed.
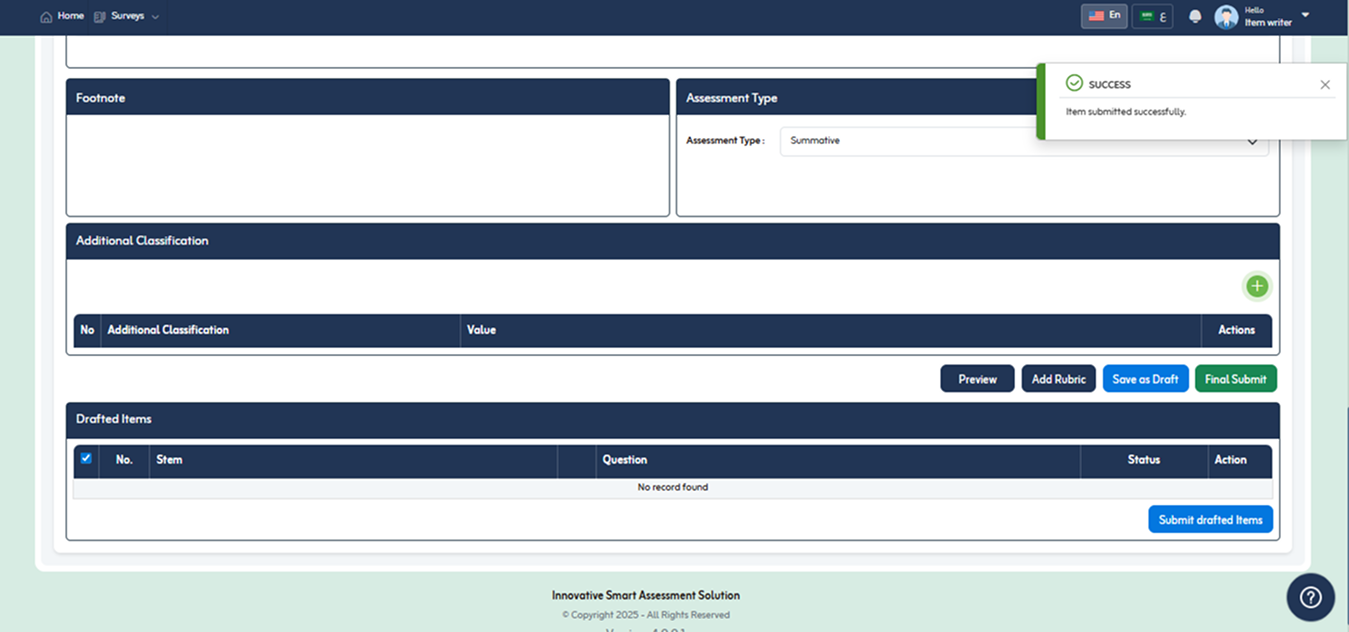
- On clicking yes, success message will appear. Click “Ok” button to close.
How can we help?
A premium WordPress theme with an integrated Knowledge Base,
providing 24/7 community-based support.


