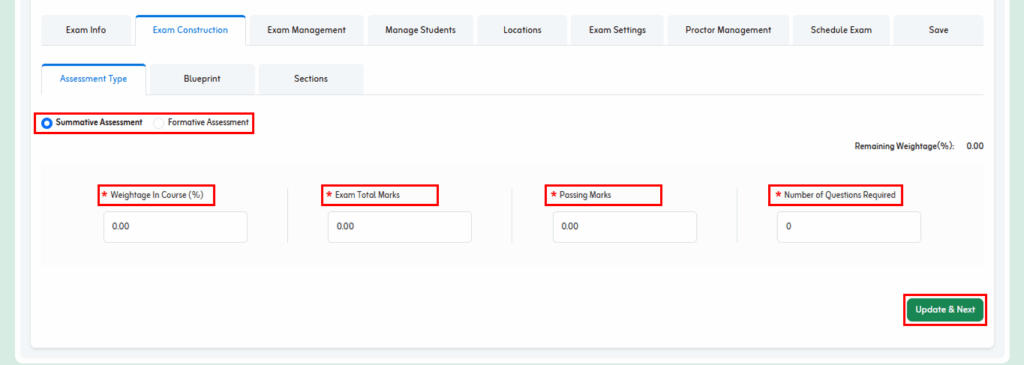
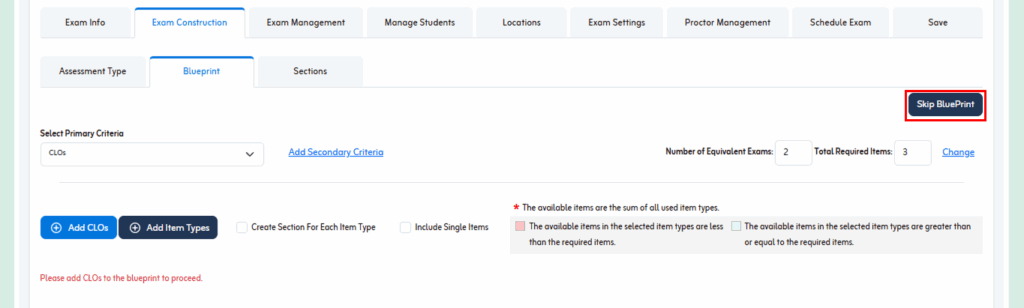
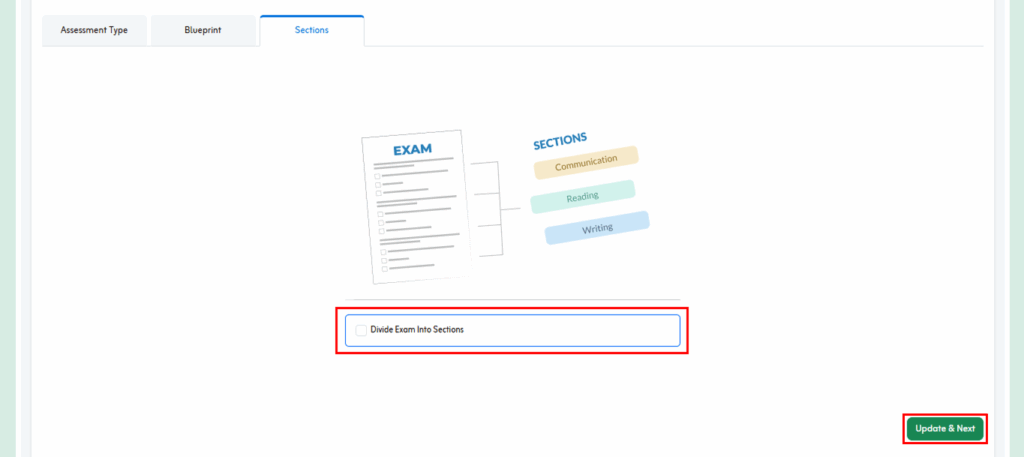
For now, we are skipping it and clicking “Update & Next.”
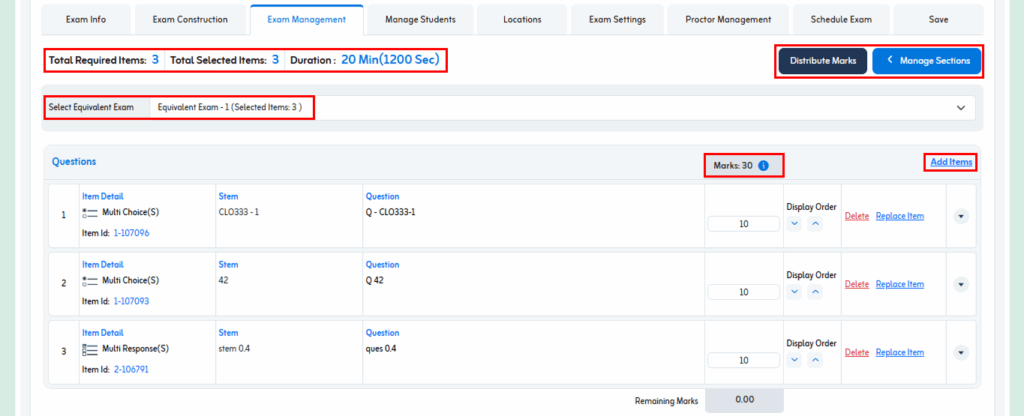
You are now on the ‘Exam Management’ screen.
Exam Management
Here you will see the “Total Required Items”, “Total Selected Items”, and “Duration”.
You selected the total number of items that you require previously, and added items as well.
The system automatically distributes marks equally across all items.
However, you may adjust the distribution as needed by selecting the “Divide Marks” option.
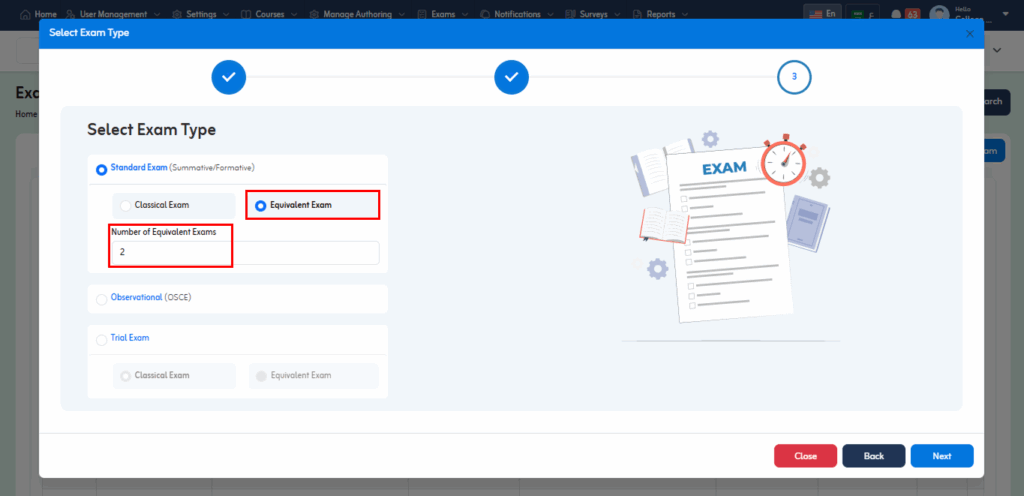
The “Select Equivalent Exam” shows you tabs of equivalent exams that you can select for an exam.
Default Sections illustrate the selected item type, its “Marks”, and “Display Order”, allowing you to distribute the marks as needed and decide the order in which you want the items to be displayed.
You can “Add Items”. To do this, first increase the number in “Total Required Items.” Once the required number of items is fulfilled, additional items cannot be added.
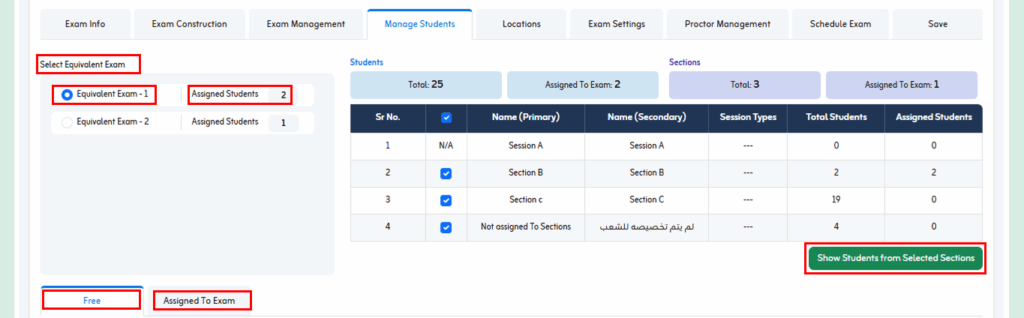
You are now on the ‘Manage Students’ screen.
Manage Students
Here you will see the “Equivalent Exams”. All equivalent exams that you created, and the “Assigned Students.”
Besides, you will see “Free”, and “Assigned to Exam”.
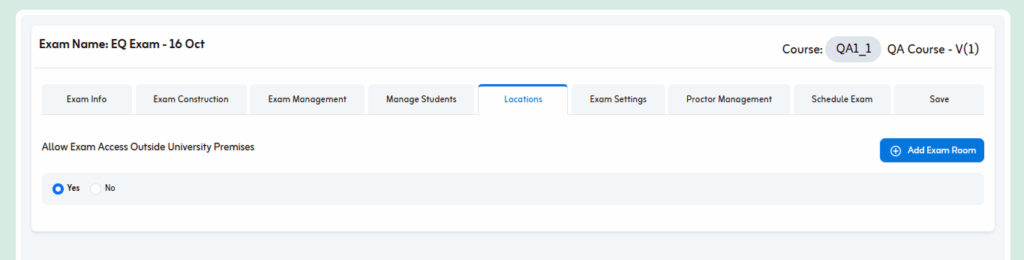
This will lead you to the ‘Locations’ phase.
Locations
If you want the exam access outside university premises, click “Yes.”
To restrict exam access within the university premises, select “No.” You will then need to assign rooms and define IPs to enforce location-based restrictions.
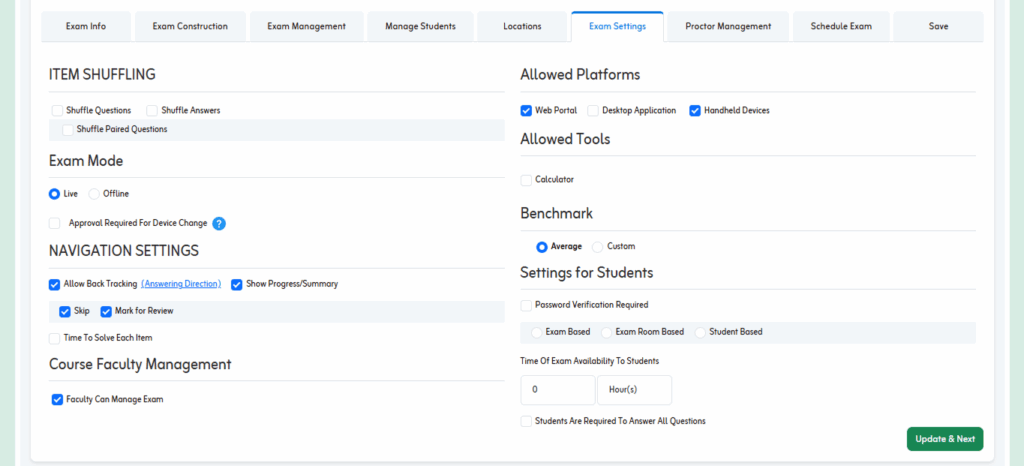
Here, you can check boxes to tailor the exam settings.
Each section can be enabled by selecting it or left unchecked if you don’t wish to use it.
Please refer to the ‘Exam Settings’ part of “Single Exam” section if you want detailed instructions.
After ‘Locations’, you will be on the ‘Exam Settings’ phase.
After “Exam Settings”, it’s now time for “Proctor Management”.
Proctor Management
From the options, “User identity and face images not required” or “User identity and face images required”, choose whether you want the identification and face images of the proctor or not.
If you check the box of “Use Proctoring Feature”, the options of “AI Proctoring”, “Human-Based Proctoring”, or “Both” will appear.
Please choose your preferred option to proceed.
Besides, you will see “Allow Students to Skip Face & ID Card Images” if you don’t want the face and ID card images of students while the exam is being conducted.
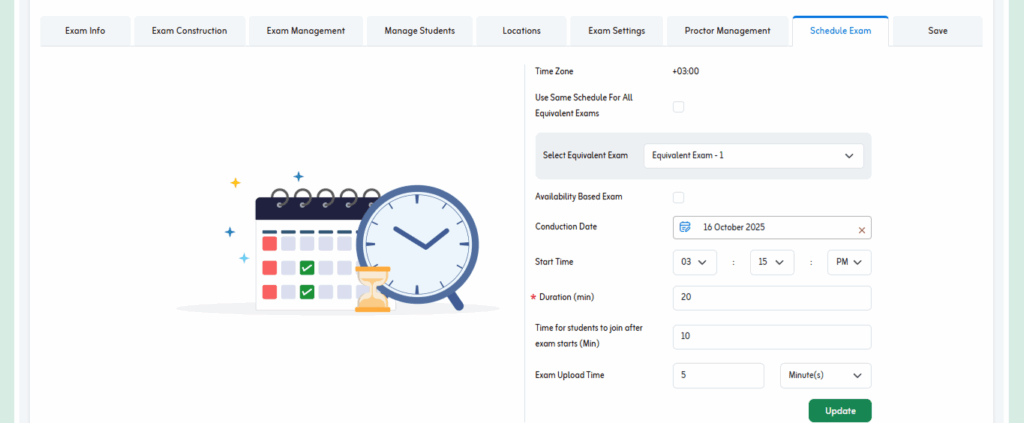
After “Proctor Management”, now comes scheduling the exam.
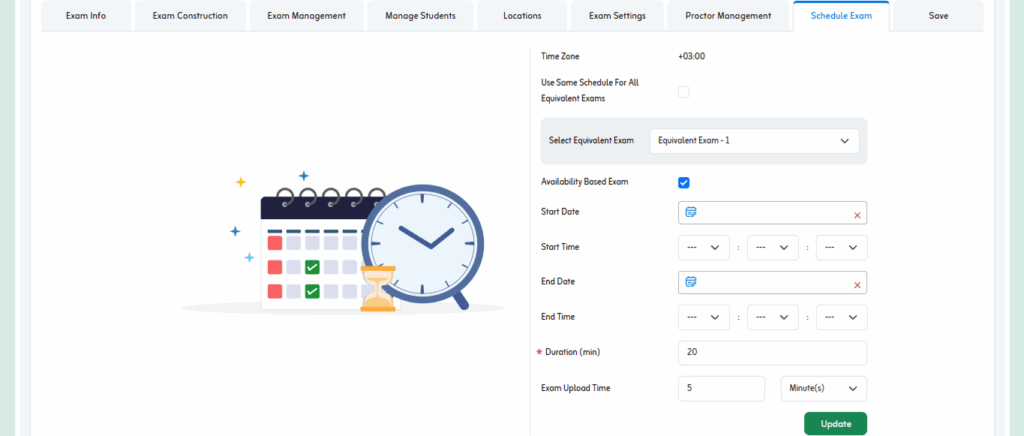
Schedule an Exam
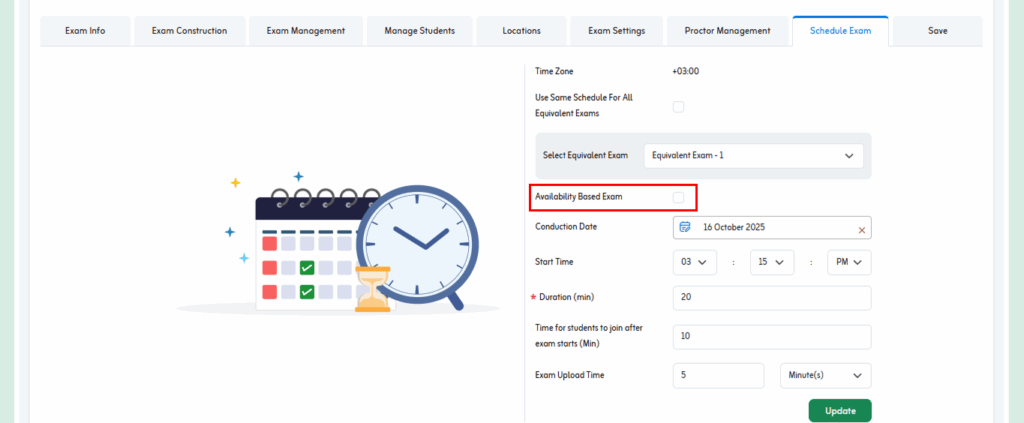
Here it includes “Time Zone”, “Availability Based Exam”, “Conduction Date”, “Start Time”, “Duration (min)”, “Time for students to join after exam starts (min)”, and “Exam Upload Time”.
If you want to schedule the exam based on the availability of students, you need to check the box for “Availability Based Exam.”
You need to specify the “Start Date”, “Start Time”, “End Date”, “End Time”, “Duration (min), and “Exam Upload Time”
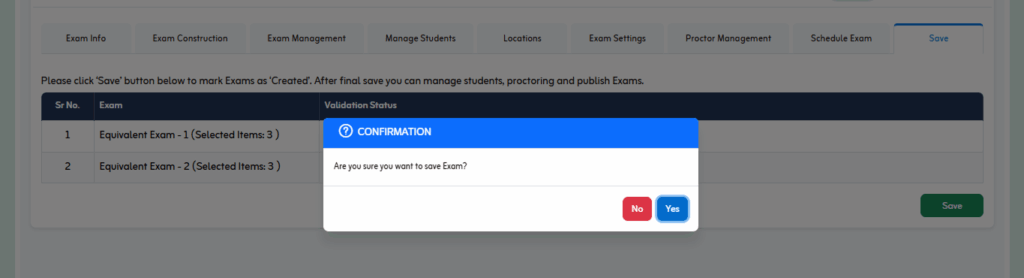
After scheduling the exam, it’s time to “Save” it. Saving the exam is the last phase of exam creation.
Save the Exam
Please click the “Save” button to finalize and save all exam details.
When you click on “Save”, a confirmation pop-up appears asking, “Are you sure you want to save the exam?”
By clicking “Yes”, a success message appears at the top right, indicating that the exam has been saved successfully.
You have now completed the process of creating an equivalent exam.
How can we help?
A premium WordPress theme with an integrated Knowledge Base,
providing 24/7 community-based support.